
Velero Setup Pre-requisites – Pushing Images to Private Registry
We will be using a TKGi cluster to setup Velero and to replicate a production environment, we will use the air-gapped (using images from private registry instead of pulling images directly from the internet) approach to install velero.
Hence, we assume a private registry (ex: Harbor) and docker client already exists in the environment and we will be pushing the images we download to this registry.
Push Images to Private Registry
Step 1 – Download Binaries to the linux jumphost
Use the link to download all the relevant binaries and plugins to be used for the velero installation into a directory on the jump host.

velero-linux-v1.12.1+vmware.1.gz – This is the Velero CLI plugin that will be used to install Velero. We will install this on the linux jump host. (Equivalent of kubectl if you need an analogy 🙂 Might not be a perfect analogy, but this was the closest I could think of)
velero-plugin-for-vsphere-v1.5.2_vmware.1.tar.gz – This is the volume backup plugin that we will be used to back up PVs in the cluster.
backup-driver-v1.5.2_vmware.1.tar.gz – As the name suggests, this is the backup driver that will be used by velero to interact with the kubernetes cluster to create a snapshot of the PV.
data-manager-for-plugin-v1.5.2_vmware.1.tar.gz – This is a component that is responsible for moving the volume snapshot data.
velero-v1.12.1+vmware.1.tar.gz – This is the velero package that will be installed on the TKGi cluster which will be responsible for backing up the cluster resources.
velero-plugin-for-aws-v1.8.1_vmware.1.tar.gz – Though this repository contains plugins to support running velero on AWS, we will be using this to run Velero on vSphere to make use of the object store plugin and the volume snapshotter plugin for creating snapshots and storing them into the MinIO buckets, which are S3-compatible.
Step 2 – Load the other binaries into the docker client
I have a docker client installed on my linux jump host and running “docker images” lists the images that I currently have.

Now we will use docker load to load all our binaries into this.
docker load -i velero-plugin-for-vsphere-v1.5.2_vmware.1.tar.gz
docker load -i backup-driver-v1.5.2_vmware.1.tar.gz
docker load -i data-manager-for-plugin-v1.5.2_vmware.1.tar.gz
docker load -i velero-v1.12.1+vmware.1.tar.gz
docker load -i velero-plugin-for-aws-v1.8.1_vmware.1.tar.gz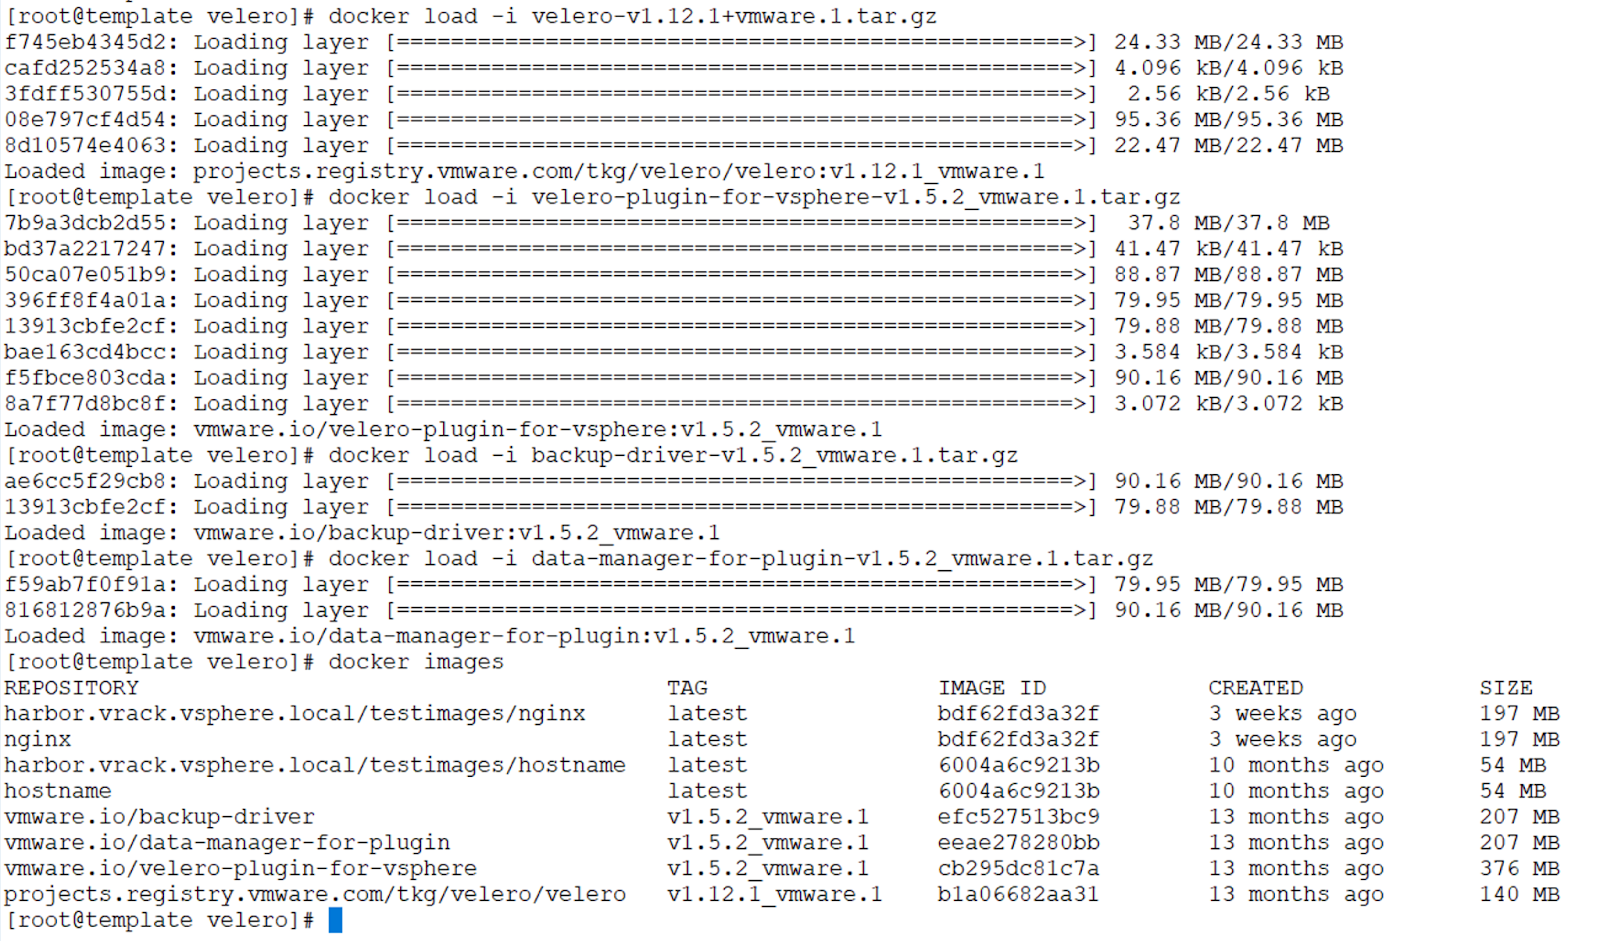

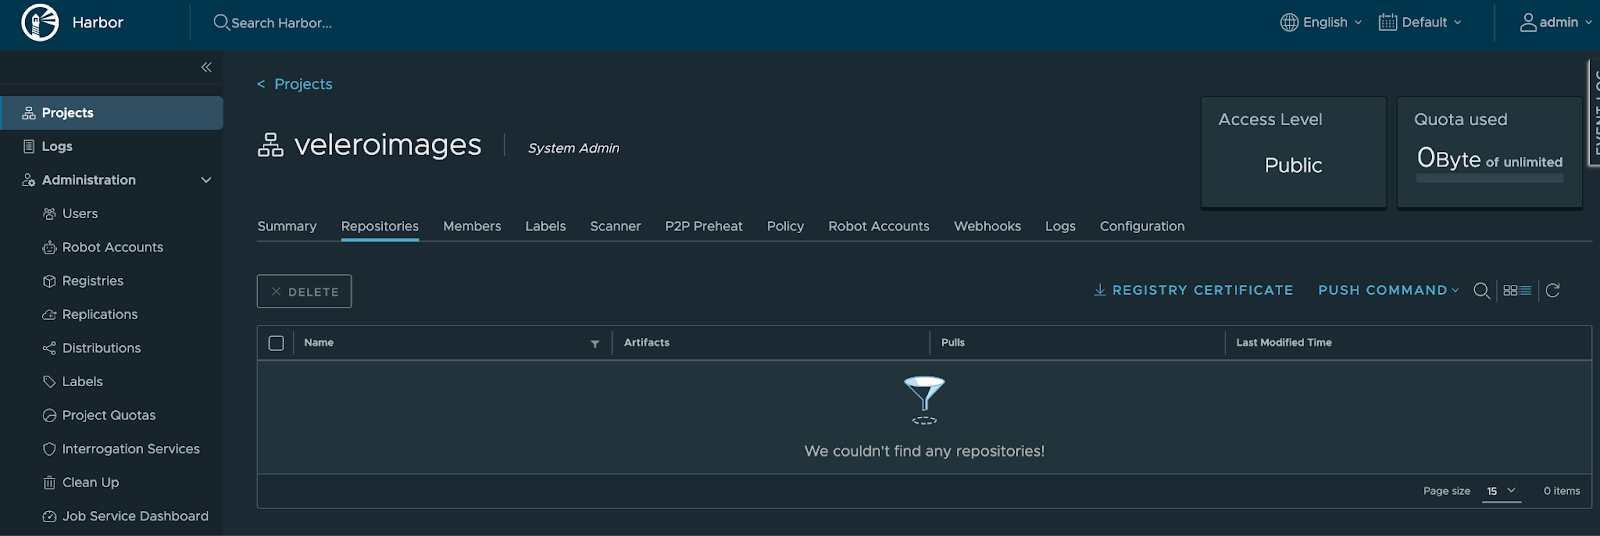
Step 3 – Copy images to the Private Harbor Registry
Create a project under the name “veleroimages” in the harbor repository that you intend to use.
You can now do a “docker tag” and “docker push” of the images that you just loaded.
docker tag vmware.io/backup-driver:v1.5.2_vmware.1 harbor.vrack.vsphere.local/veleroimages/backup-driver:v1.5.2

docker push harbor.vrack.vsphere.local/veleroimages/backup-driver:v1.5.2

docker tag vmware.io/data-manager-for-plugin:v1.5.2_vmware.1 harbor.vrack.vsphere.local/veleroimages/data-manager-for-plugin:v1.5.2

docker push harbor.vrack.vsphere.local/veleroimages/data-manager-for-plugin:v1.5.2

docker tag vmware.io/velero-plugin-for-vsphere:v1.5.2_vmware.1 harbor.vrack.vsphere.local/veleroimages/velero-plugin-for-vsphere:v1.5.2

docker push harbor.vrack.vsphere.local/veleroimages/data-manager-for-plugin:v1.5.2

docker tag projects.registry.vmware.com/tkg/velero/velero:v1.12.1_vmware.1 harbor.vrack.vsphere.local/veleroimages/velero:v1.12.1

docker push harbor.vrack.vsphere.local/veleroimages/velero:v1.12.1

docker tag vmware.io/velero-plugin-for-aws:v1.8.1_vmware.1 harbor.vrack.vsphere.local/veleroimages/velero-plugin-for-aws:v1.8.1

docker push harbor.vrack.vsphere.local/veleroimages/velero-plugin-for-aws:v1.8.1
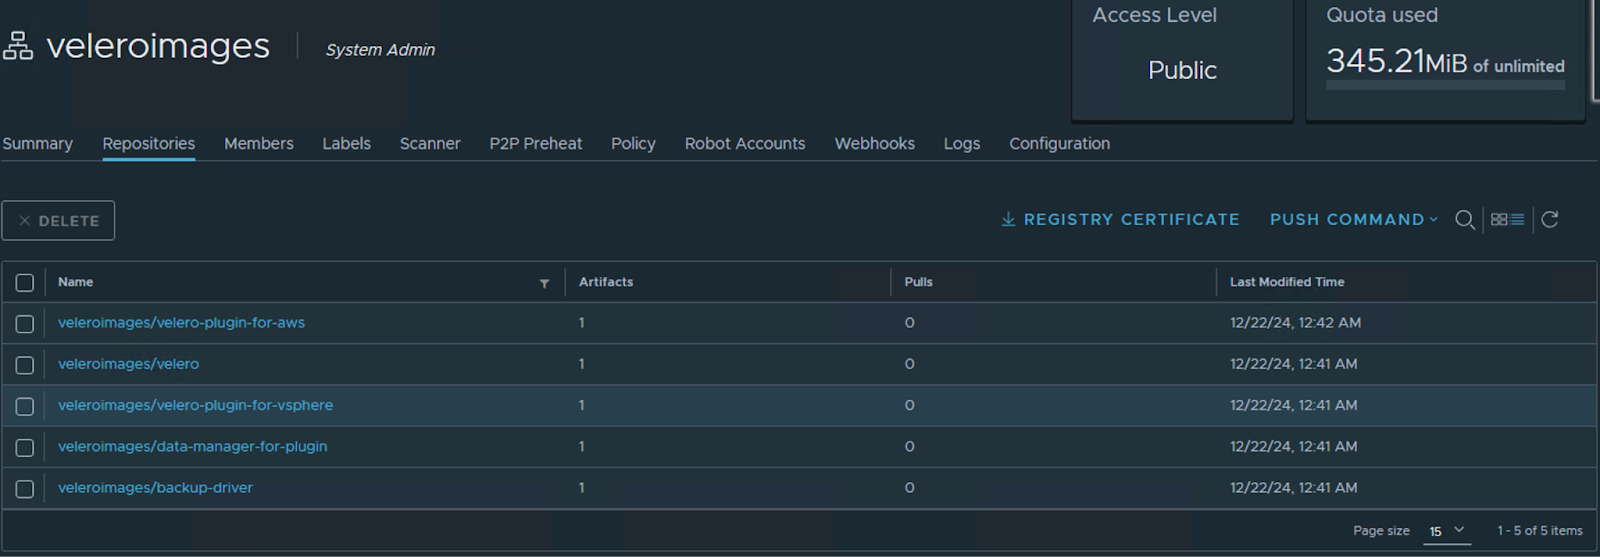
That’s it. The images are now in the private harbor repository that I have hosted in my infrastructure. We can now use these images to install Velero.
0 Comments