Supervisor Cloud Consumption Interface – vSphere 8.0U3
vCenter 8.0U3 was made generally available alongside VCF 5.2 on 25th June. While there are a lot of enhancements across the suite of products, I would like to describe about one such supervisor cluster related feature in this blog. Starting 8.0U3, what used to be known as vSphere with Tanzu, will now be termed as vSphere IaaS Control Plane.
You can find more about vCenter enhancements from the release notes. And specifically about vSphere IaaS control plane enhancements from What’s New. There are many features that have been introduced to address pending long-time issues such as using a private registry when installing a supervisor service. While there has been a lot of improvements, for the interest of this blog, we will look only into the installation procedure of the cloud consumption interface, which enables you to provision kubernetes workloads from vCenter UI.
Pre-requisites
CCI (Cloud Consumption Interface) has to be installed as a Supervisor Service, once workload management is enabled on vCenter 8.0U3. To enable workload management, you can follow my blog here (albeit older, the steps still majorly remain the same).
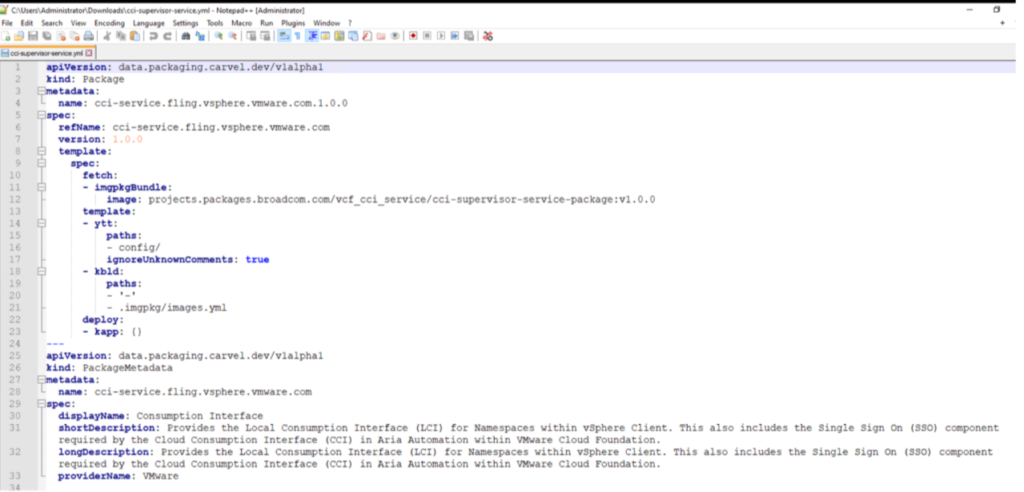
The supervisor service is available for download at: Consumption Interface v1.0.0

The downloaded yml file should look like the one below

Pre-installation Screenshots
Supervisor Status

Supervisor Services

Supervisor Namespaces

Namespaces View

Service Enablement Procedure
Once the yml file is downloaded, you can follow the below installation instructions to set up your CCI.
Step 1: Navigate to the supervisor services page and click on “Register a new service” which should take us to the service management page.

Step 2: Click on Add under the Add New Service tile.

Step 3: Upload the yml file in the Register Service window.


Step 4: Click on Finish.

This should have enabled the service on the Supervisor. We can now proceed to install it on the Supervisor cluster.


Service Installation Procedure
Step 1: Click on Actions on the Consumption Interface service tile and choose Manage Service which should allow you to install the downloaded version of the interface.

Step 2: Select the supervisor you want to install the service on, in case you are running multiple supervisor clusters.

Step 3: Review and Finish.

Step 4: You should see the following screen once completed.

Step 5: Navigate to the Supervisor services page to see the configuration messages.


Step 6: While the installation is about to complete, you should see a plugin installed pop-up like the one below.

Step 7: Once, the plugin is installed, you should see a configured message against the Consumption Interface service.

Validation
Once the service is installed you can navigate to “Administration → Solutions → Client Plugins” on the vCenter Interface to confirm the namespace UI plugin has been installed.

A successful installation should have created a service namespace “svc-cci-service-domain-xxx” which wouldn’t have existed prior to the installation.

Each of the namespace should now have an additional “Resources” tab in their UI 🙂

You can now consume the interface to create different workloads such as VM’s,TKC’s, Volumes etc.. I intend to cover this in the next blog. Until then, Happy Learning!

0 Comments