
Kubernetes – Setup your first cluster!
With the tech world shifting its focus towards app modernization (as they call it), cloud native platforms have become increasingly popular. One such platform has become my new found love, of course, after other few priorities! To those who haven’t heard of Kubernetes or K8s before, I am sure you will regret for having missed it off your radar for this long.
Image Courtesy: Wikipedia
So, here I am, to share with you how did I manage to setup my first K8s cluster on a typical under-provisioned lab resource. However, this installation procedure can be applied to any UAT/test setup. This obviously is not a production grade material. However, the cluster bootstrapping process that happens in the back end remains the same irrespective of the type of installation being done.
Pre-requisites
- Two running Linux VMs – This blog uses Xenial Ubuntu 16.04 release on Virtual machines that comprise the K8s cluster
- Minimum 2vCPUs for the installation to work
- Disable Swap partition on all VMs that are part of the cluster
- Network connectivity between the VMs
For other pre-requisites such as port requirements, refer to the official documentation here.
Nodes
I am going to use two VMs within the same subnet to bring up my cluster. First off, I will disable swap on these machines.
Disabling Swap
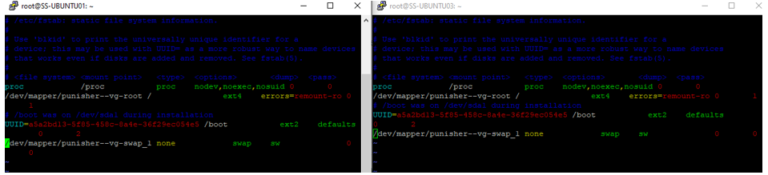
To disable swap, hash out the fstab entry. This is done to make this persistent across reboots.
Post disabling swap, when i run “free -g” the value should be 0.

Now that we have met the minimal requirements to build up a cluster, let us jump right into it!
Installing Container Runtime
Kubernetes needs a container runtime that it can rely on. There are options like:
- Containerd
- CRI-O
- Docker
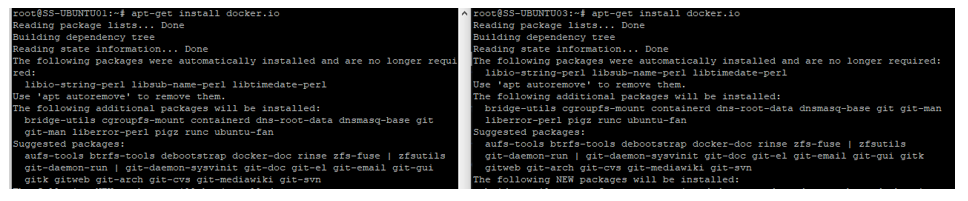
And docker being the most popular of all, I have decided to use it for this lab. Provided the machines have internet access, installing docker is just a command away. Else, the packages can be downloaded via a proxy and local repository. That accounts for another blog. Hence, presuming internet connectivity isn’t a blocker, this is how the installation should look like when the following command is executed.
apt-get install docker.io
Once the installation is complete, you can verify it by running the “docker -v” command to check the installed version.

Installing Kube Components
Kube components include:
- Kubectl
- Kubelet
- Kubeadm
Kubeadm is the utility responsible for bootstrapping your K8s cluster. Kubectl is the utility used to communicate to the API server. Kubelet is an agent service that runs on all the nodes and takes care of initializing a pod among many other jobs that it is responsible of. This can be installed with the following command, documentation which can be found here:
sudo apt-get update && sudo apt-get install -y apt-transport-https curl
curl -s https://packages.cloud.google.com/apt/doc/apt-key.gpg | sudo apt-key add -
cat <<EOF | sudo tee /etc/apt/sources.list.d/kubernetes.list
deb https://apt.kubernetes.io/ kubernetes-xenial main
EOF
sudo apt-get update
sudo apt-get install -y kubelet kubeadm kubectl
sudo apt-mark hold kubelet kubeadm kubectl
Once this is done, you can verify the installation by checking the kubectl version installed.

We are now ready to build the cluster!
Initializing the cluster
Once the kube components are installed, the cluster can be initialized with few additional flags appended to the kubeadm command.
- Specifying a control plane end point – Optional Flag – This is used for highly available deployments of k8s cluster. Ex: an etcd cluster behind a load balancer. Since this is a UAT grade deployment, I have set up only a single instance of all the control plane components.
- Pod Network CIDR – Mandatory Flag – This is used to specify the subnet that has to be used for deploying the Pods. This calls for deploying a Container Network Interface (CNI). There are many supported CNIs that can be used and for this lab we will use calico.
- Container runtime to be used – Optional Flag
- API server address – Optional Flag- in case k8s needs to be deployed with IPV6
So I ran this command here with the mandatory flag only on the node that I intend to make as master node.
kubeadm init –pod-network-cidr=10.10.10.0/24
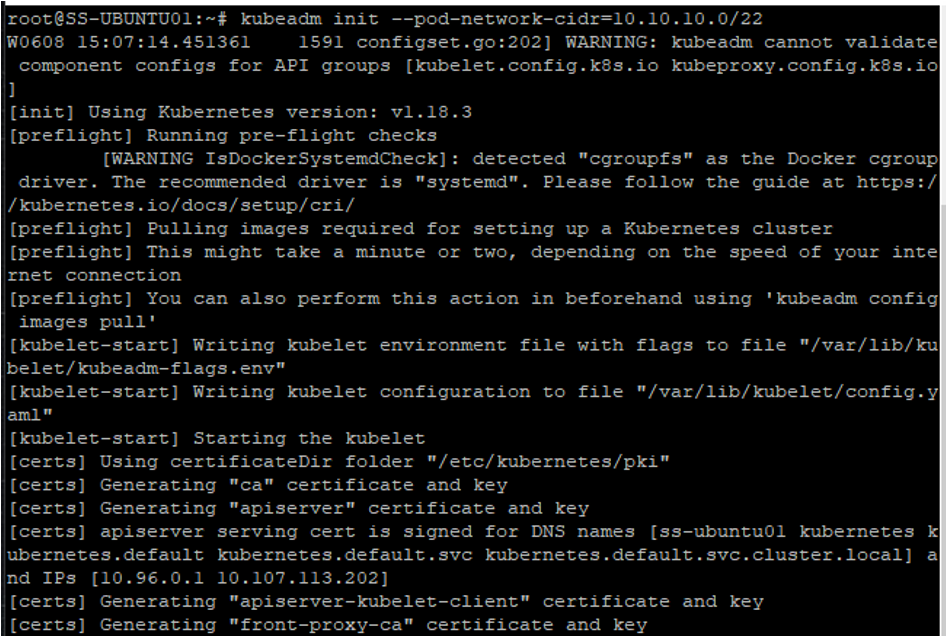
Upon successful completion, you should a message similar to the one below.
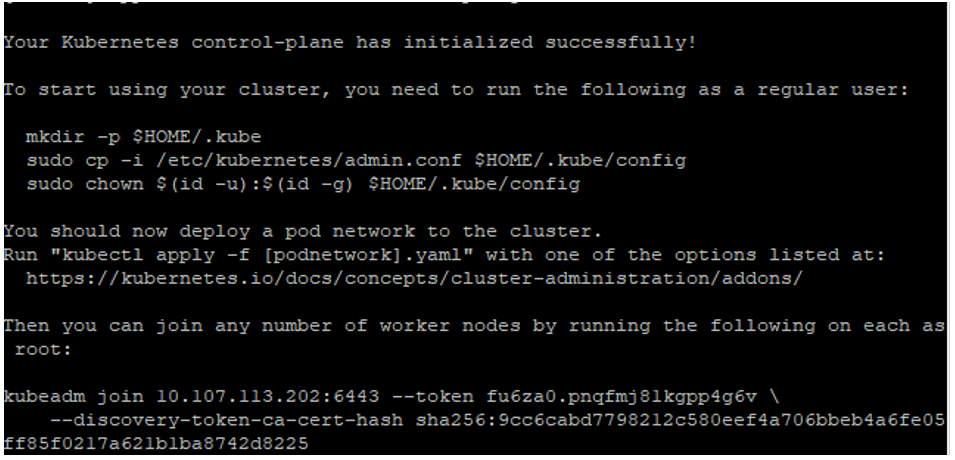
As you can see from the above screenshot, there are additional commands that one must run to enable, kubectl work for non-root users as well, by creating a kubeconfig file under the home directory.

Now that the cluster is initialized, we still have one more step before we dive deep in to the exciting waters of cloud native ocean!
Installing the network plugin
To leverage the internet access that I have, i run the command pointing to the YAML file from the URL. You can download the yaml and copy it to the machine and run the same command with the local file name.
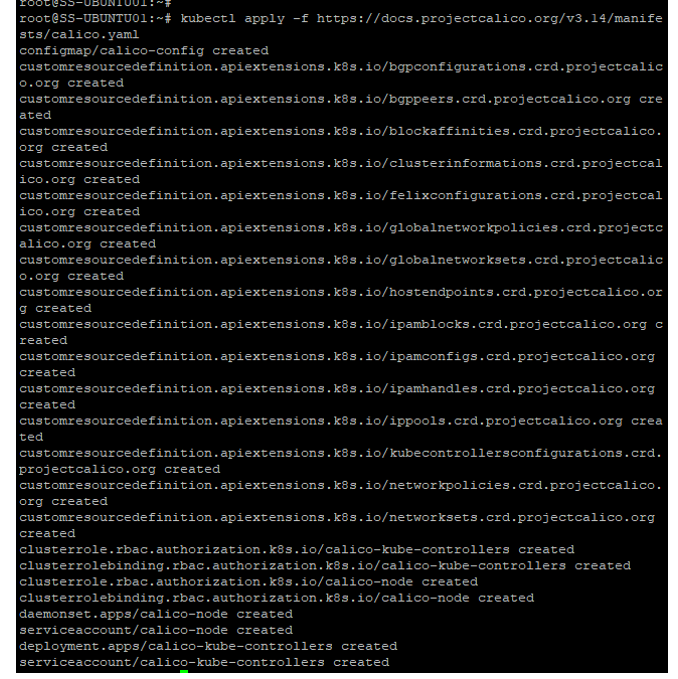
kubectl apply -f https://docs.projectcalico.org/v3.14/manifests/calico.yaml
The CIDR mentioned in the yaml for running the pods will now be replaced with the one specified as a flag during the kubeadm init command and you should see a message of related resources getting configured.
Andddd we are done! Oh wait.. Almost 🙂
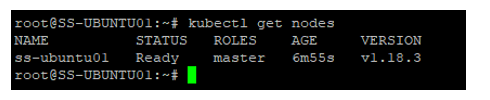
The cluster has only one node now, which obviously is the master node, which you can confirm by running “kubectl get nodes“
To add more nodes the cluster, you will have to run “kubeadm join” command from the nodes you intend to add, there by justifying the installation of this kube component on all other nodes. Of course, this involves adding some additional parameters as well.
- Bootstrap token generated by kubeadm on the master
- CA cert hash of the master node
If you did not copy the command, during the initialization phase, you can retrieve it using “kubeadm token list” if you are adding the node within 24 hours, as the expiry of the token is set to a day. If not, you can run “kubeadm token create” on the master node to generate a new one and use it. To know how to retrieve the hash value, refer to the documentation.

Upon successful completion, you should see your node added to the cluster. Tadaa!

More about Kubernetes in the upcoming blogs! If you have reached till here, I really appreciate your patience for putting up with my style of writing! Happy learning with the pods and containers!
Stay safe, stay indoors!
Good going…. Awesome writing… Hoping to see from you…. Good Luck
Thanks buddy!