
Deploy your first K8s app!
All good things take time they say. I have come to realise this is kind of true. Been a while since I wrote.. You see where I am getting at? Never mind.. Let me jump right into it.
If you have been following me, you would have noticed me talking about setting up a K8s cluster from scratch here and more about private registries here. This blog would be a follow up to that series of related cloud native topics.
In this article, I am gonna show you how to deploy a “nginx” pod and expose it via a service. At this point, if you don’t understand what a pod or a service is, I would recommend reading the kubernetes documentation here. PS: Talking about all the kubernetes constructs would in itself require a series of blogs 🙂
So, assuming you understand what constitutes a deployment, here’s the deployment file that I have used to create the required resources to get a static page running, which you will witness at the end of this blog.
apiVersion: v1
kind: Namespace
metadata:
 name: k8s-blog
---
apiVersion: apps/v1
kind: Deployment
metadata:
  name: nginx-deployment
  namespace: k8s-blog
  labels:
   app: nginx
spec:
 replicas: 1
 selector:
  matchLabels:
   app: nginx
 template:
  metadata:
   labels:
    app: nginx
  spec:
   containers:
   - name: nginx
     image: nginx
---
apiVersion: v1
kind: Service
metadata:
  name: nginx-service
  namespace: k8s-blog
spec:
  type: NodePort
  selector:
    app: nginx
  ports:
    - port: 80
      targetPort: 80
      nodePort: 30007
---
I wasn’t really aware until a few months into learning K8s that, you can create multiple constructs using a single YAML file. Yes, I was that dumb. I thought each object was self-righteous enough to demand its own YAML file you know.. 😀 Nonetheless, l am now gonna walk you through the YAML file and the objects that I have created with it.
Namespace
This would be the primary construct/object within K8s that you would be introduced to if you have just started learning. A namespace is merely a cluster wide segregation that you can use to deploy various objects in. Simplest analogy would be to let various teams use various namespaces. HR can deploy/view resources in the HR namespace, finance in finance namespace and so on.. This is what I have done with the code below, creating a namespace called “k8s-blog” to deploy all objects that i would demonstrate today..
apiVersion: v1
kind: Namespace
metadata:
 name: k8s-blog
Deployment
A deployment usually consists of a pod. A pod is the smallest construct/object within a K8s cluster. If we are to draw an analogy with the Virtualization world, then a pod in K8s would be a Virtual Machine equivalent. This has nothing to do with how a VM works, because a Pod doesn’t work the same way. Like I said, that’s just an analogy and nothing more.
apiVersion: apps/v1
kind: Deployment
metadata:
  name: nginx-deployment
  namespace: k8s-blog
  labels:
   app: nginx
spec:
 replicas: 1
 selector:
  matchLabels:
   app: nginx
 template:
  metadata:
   labels:
    app: nginx
  spec:
   containers:
   - name: nginx
     image: nginx
In an attempt to keep this article short – I have created a deployment named “nginx-deployment” in the “k8s-blog” namespace, using an image named “nginx” (with no tag – NOT A BEST PRACTICE) and added a label “app=nginx” based on which the deployment ensures there’s always one running pod, since the number of replicas is set to one. If something is to happen to the pod, the replica set/deployment would ensure the pod gets recreated in no time. Cool right..
Service
The final piece of the puzzle.. A service.. This kubernetes object exposes what’s running on your pod to where you want it exposed. This can be done in various ways based on the service type you choose. The different types of Services would be: NodePort, Loadbalancer and ClusterIP. I have used type NodePort here. This basically means, I can access the site by hitting the IP/DNS of any of the physical nodes within the cluster. Again, NOT A BEST PRACTICE in a production environment. Due to the limitations in my lab environment, I have used NodePort and exposed the nginx service (running on the pod with port 80)using port 30007 on the physical node hosting it with the code below.
apiVersion: v1
kind: Service
metadata:
  name: nginx-service
  namespace: k8s-blog
spec:
  type: NodePort
  selector:
    app: nginx
  ports:
    - port: 80
      targetPort: 80
      nodePort: 30007
“Selector” is the key that decides which pods needs to be exposed. In this case, it finds pods with a label “app=nginx” on them and exposes them using port 30007.
Execution
Alright, now that we have the yaml file, all we have to do is execute the below command to get things up and running.
kubectl apply -f <filename>.yamlDoing this would result in:

Now that our pod is running, let us identify which node it is running on, for us to be able to connect and verify if the application is working fine and we do so by executing the following command:
kubectl get pods -n k8s-blog -o widewhich should give us this

So, accessing my 4th node (or for that matter, any node) with port 30007 should give me my static web page.
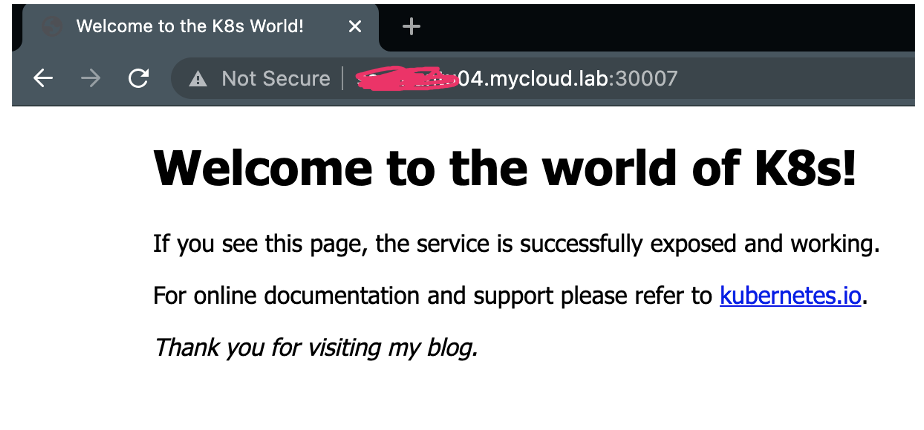
Looks neat right.. No big trick. You can modify the index.html within the nginx pod to say whatever you would want to 🙂
I know this isn’t rocket science, but I hope to help someone who’s still a beginner like me when it comes to K8s. Do let me know what you think by leaving a comment. Until I write again, happy learning. Oh, and as usual, stay safe/indoors!