
Enable Workload Management – vSphere with Tanzu
Tanzu has become the buzz word off-late. While VMware offers a variety of Tanzu services, this blog would concentrate on enabling vSphere with Tanzu or TKGs as they call it. Starting vSphere 7, your hypervisor’s (ESXi Servers) are capable of acting in similar capacity to a worker node of a kubernetes cluster, by using the spherelet service running on the kernel. However, older versions of TKG supports deployment with vSphere 6.7 as well.
If you would like to compare and contrast different versions TKG offerings, please refer to Cormac Hogan’s wonderful explanation here.
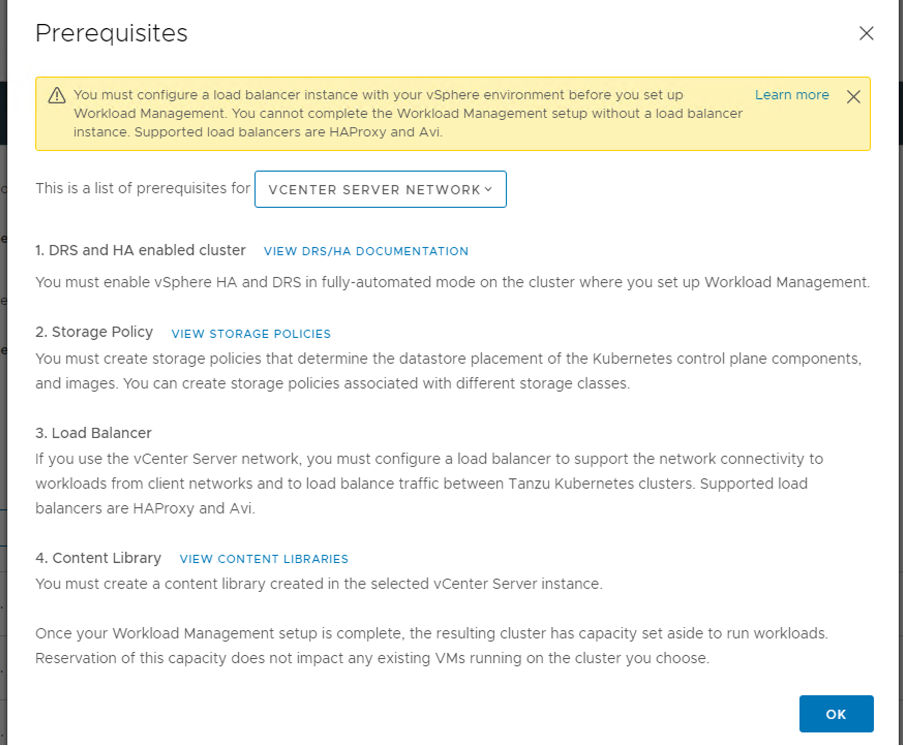
To begin with enabling workload management, there are few other pre-requisites apart from the obvious licensing check and these would differ based what network provider you choose.
Pre-requisites:
NSX-T
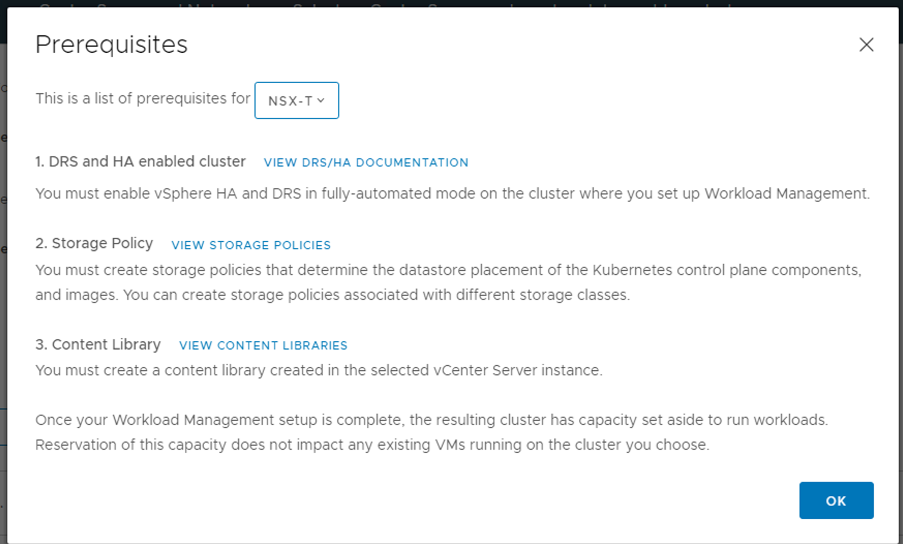
vSphere Distributed Switch
Assumptions:
NSX for Datacenter is already deployed and is your preferred choice of NCP for enabling vSphere with Tanzu.
Content Library and Storage Policy to be used as part of the configuration are already created. If you haven’t done this yet, please create your content library and storage policy before you read further as this is a hard requirement.
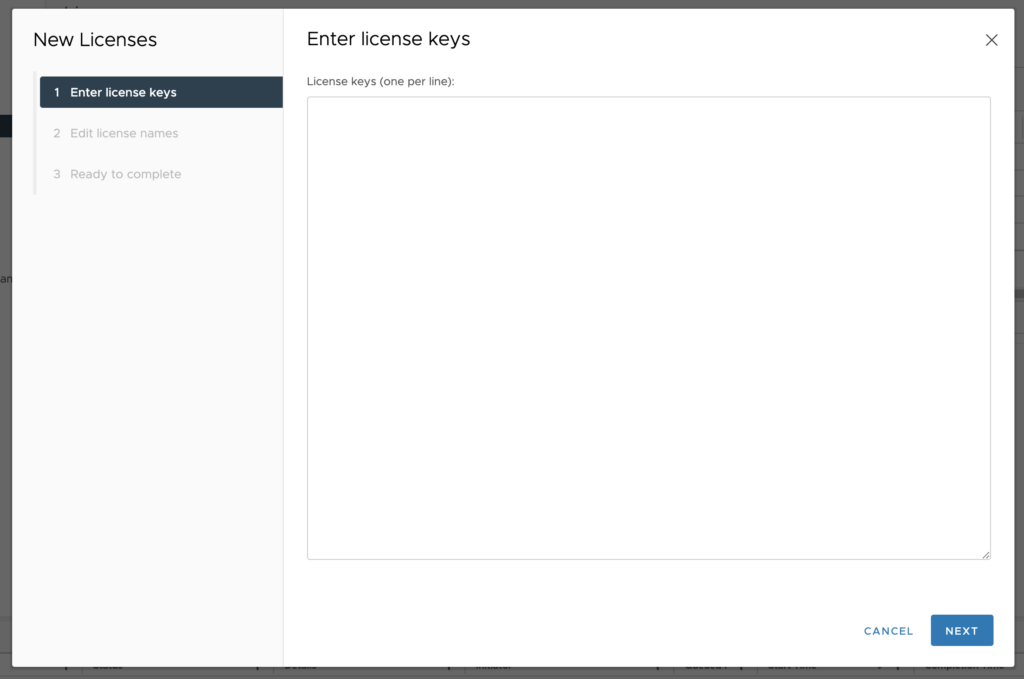
Step 1: Apply License
a. Login in to the vCenter server as admin user
b. Menu – Administration – Licensing – Licenses – Add
c. Enter your license key along with a meaningful name and finish
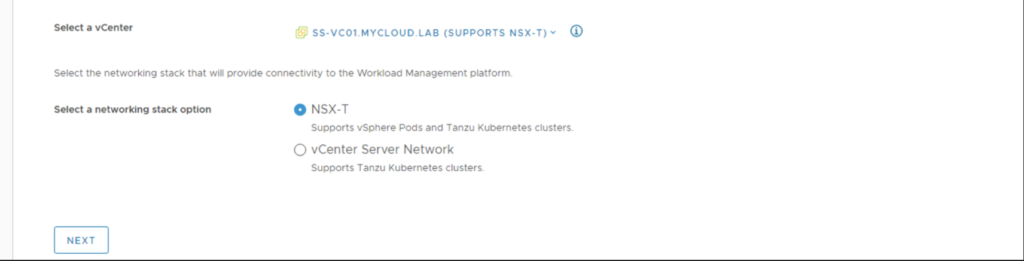
Step 2: Launch Workload Management Configuration Wizard
a. Menu – Workload Management – Get Started
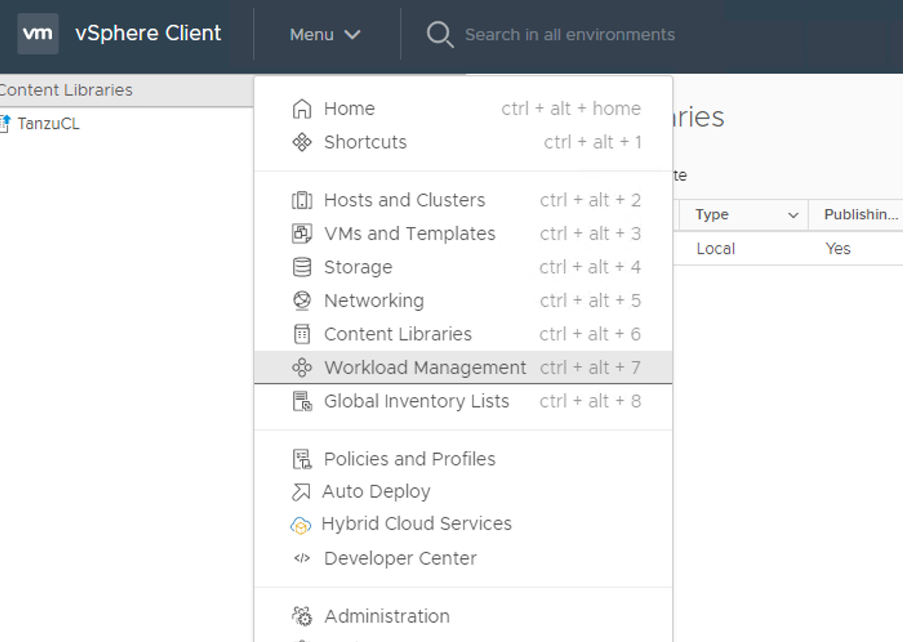
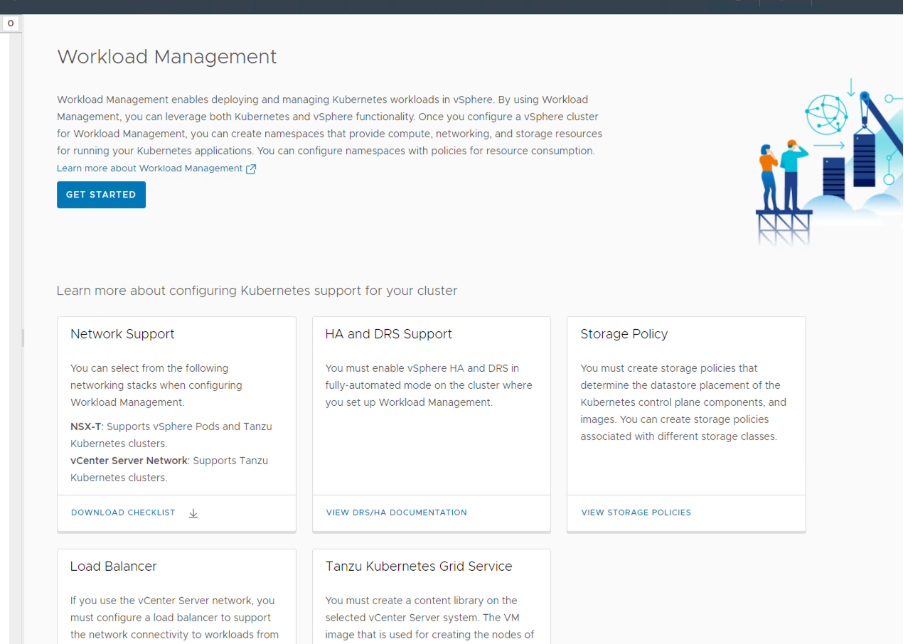
b. Choose vCenter server and NSX-T as the network provider
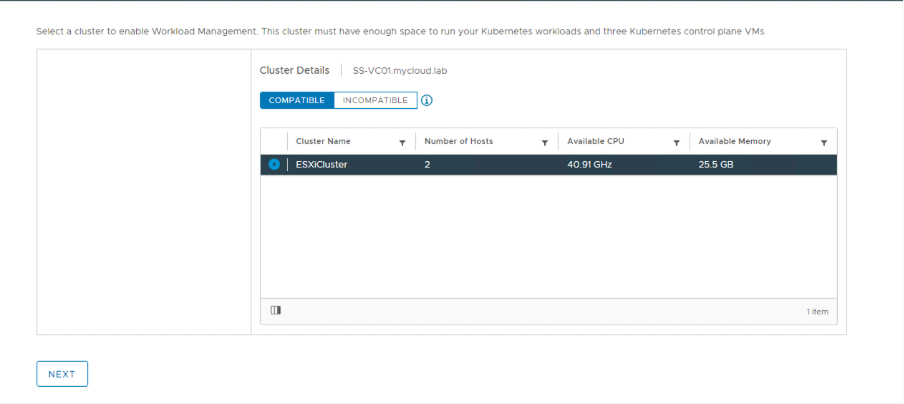
Step 3: Choose Cluster
Select the cluster where you would like to enable vSphere with Tanzu from the list of compatible clusters shown.
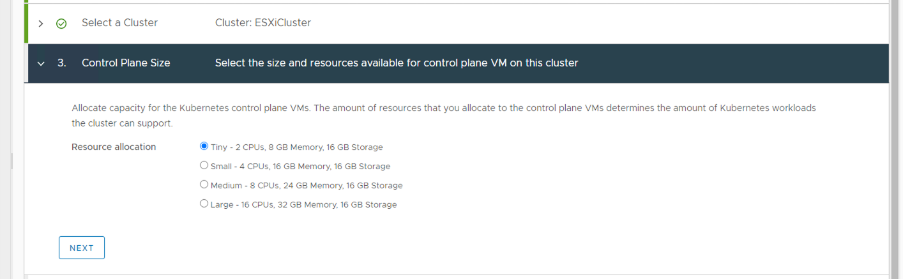
Step 4: Select Control Plane Components Size
Select the desirable config for your supervisor cluster. Supervisor cluster is responsible for hosting the Kube API server and adding the ESXi hosts as worker nodes to the Kube cluster via the spherelet service. This gets deployed as VMs on the ESXi host.
You can read more about upstream Kubernetes clusters and how to setup one here.
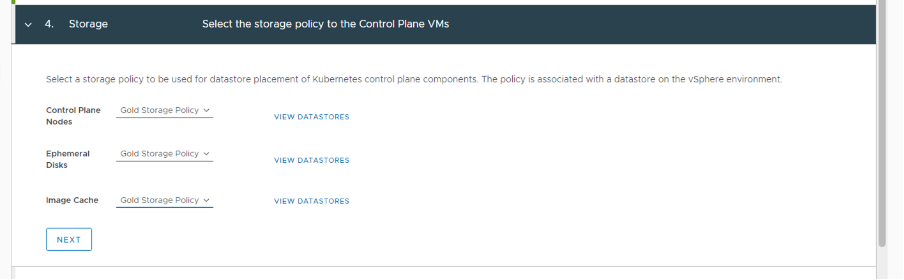
Step 5: Storage
Select relevant storage policies for each functionality. I have used the same storage policy for all of it. You can dedicate a separate datastore for workload management and configure a storage policy to be used here.
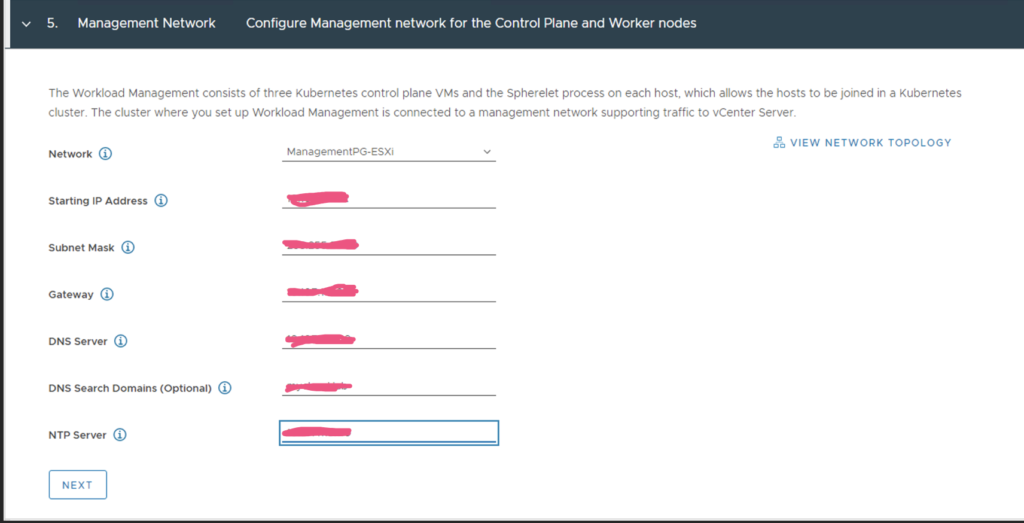
Step 6: Management Network
Specify the network to be used by the supervisor cluster VMs for communication within the cluster (preferably on the same network as your vCenter management to avoid F/W hassles)
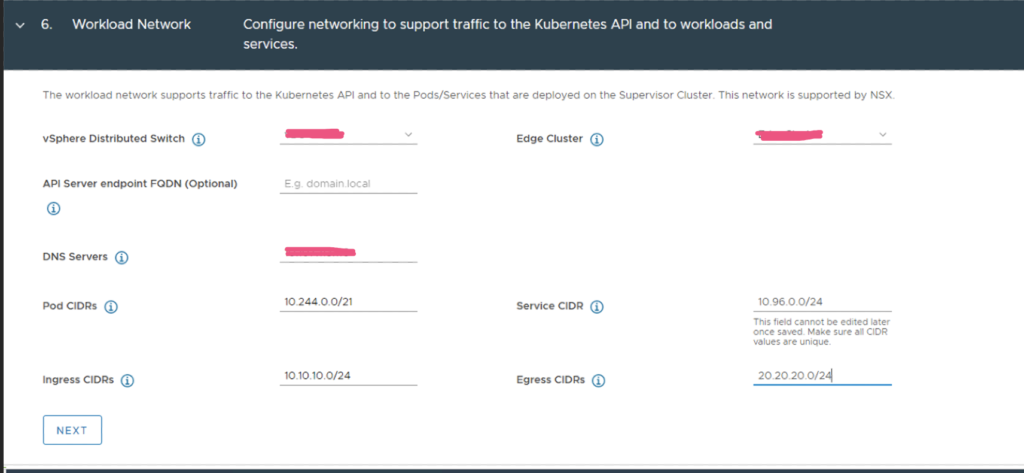
Step 7: Workload Network
This is where we will be specifying 4 different subnets to be used by the Kubernetes estate.
a. POD CIDR – to be assigned to the kubernetes pods that will be running on the cluster
b. SERVICE CIDR – to be assigned to the kubernetes services that will expose the pods
c. INGRESS CIDR – any load balanced communication will be via the Ingress IP that will be assigned to the service (eg. Kube API control plane on 6443 will have an IP assigned from the Ingress CIDR, while the endpoints will be the supervisor cluster VMs that has IPs from the POD CIDR)
d. EGRESS CIDR – any external communication from the pods will be via the Egress CIDR
So, though it isn’t mandatory to edit the POD and SERVICE CIDRs (and leave it to the defaults), it is always a good practice to have a subnet allocated.
And at no point, should these CIDR’s overlap with each other and with those IPs that Antrea CNI will use on the TKC’s. Please note that this requirement of 4 subnets is applicable only to NSX-T backed TKGs deployments. With vDS, there’s no scope for Ingress/Egress and Service CIDRs, whose purpose would be achieved by introducing HA proxy.
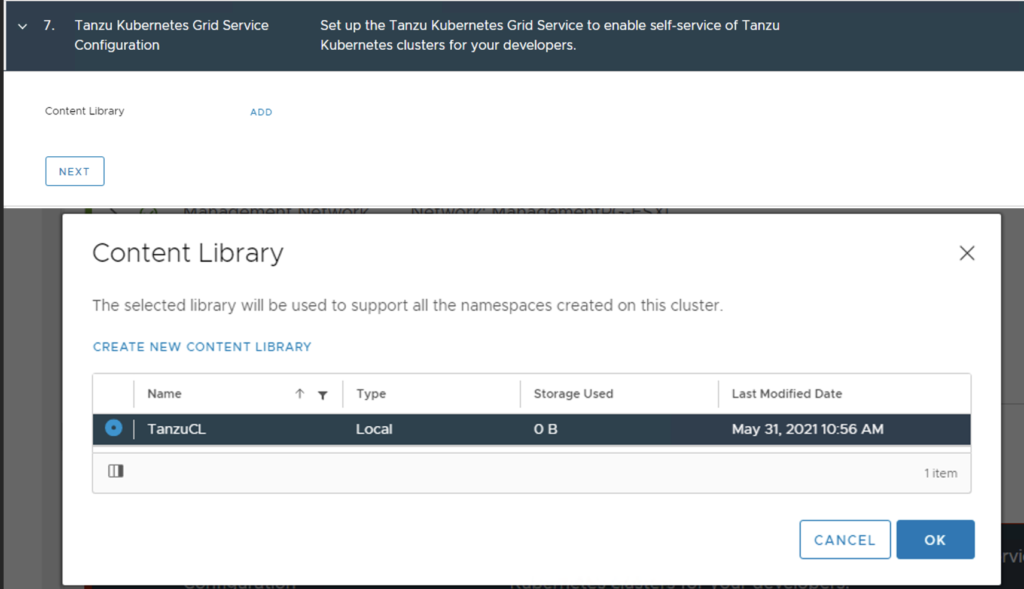
Step 8: Choose Content Library
This is required to download TKGs configuration files and run Tanzu Kubernetes Clusters aka Guest clusters on top of vSphere with Tanzu.
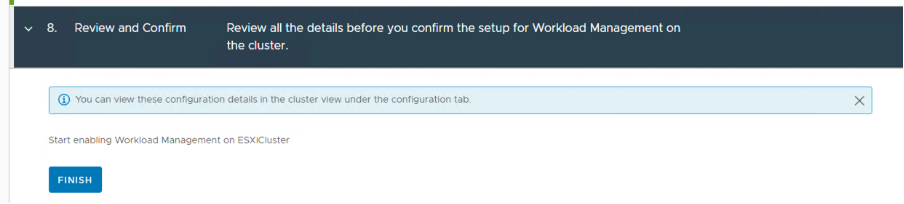
Step 9: Review and Confirm
Well, go for it!
Step 10: Monitor WCP logs
As soon as you hit finish, you should see the deployment progress on the UI. However, the process is more transparent and easy to follow at this path on the vCenter Server Appliance: /var/log/vmware/wcp/wcpsvc.log
Upon successful completion, you should see a screen like this with an IP from your ingress IP range assigned to the “Control Plane Node IP Address” column.
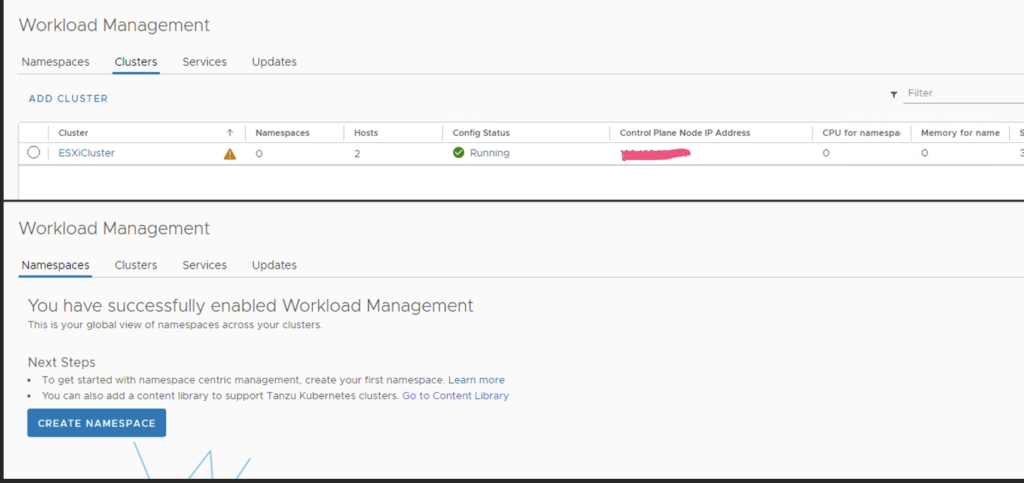
Once you have configured workload management, you can start consuming the services by creating namespaces and by assigning relevant permissions and policies to the namespace. More about it to follow!
PS: Deployment Experience
Honestly, at this point, though it sounds as simple as this, I had to spend a whole weekend to get things moving as I did not have an understanding of what was happening with the deployment. Once you get to read about the concepts and architecture of the components that form vSphere with Tanzu, it would make things much more easier.
I also had a lot of difficulties in setting up my NSX-T infrastructure. Without the help of my colleague Sam Edric, I wouldn’t have been able to write this one! So, I guess, I owe him now 🙂
Nevertheless, the learning was fun and to my surprise troubleshooting with the wcpsvc.log was so fascinating 🙂 Looking forward to doing more of this!
I am sure this is not the first blog about enabling workload management and that I am too late to the party, but I guess it feels good when you share something, you have done. Doesn’t it?
So, the point is, I am happy to have a TANZU/KUBERNETES conversation anytime of the day/month/year 🙂
Also, don’t forget to let me know how your deployment experience is/was!
Hi,
Have doc implementation of VMware Tanz with kubernete.
Are you looking for further documentation or pointing out that this has been already documented?