
TAS/ALB Installation Series – Part 2
In my earlier post, I covered the OVA deployment procedure of Opsman and AVI controller. In this article, the focus would be to setup the controller and configure the cloud endpoint to be used for the deployment.
Initial Configuration
I have created a DNS entry for my controller’s IP address. Hence accessing it via the URL here. You can choose to login with your IP as well.
Note: Give your controller VM a while before you access the URL. If you access it as soon as you see the VM’s IP address, the web page might throw some weird error messages.
The landing page of the URL will be the page that instructs you to set the admin password.
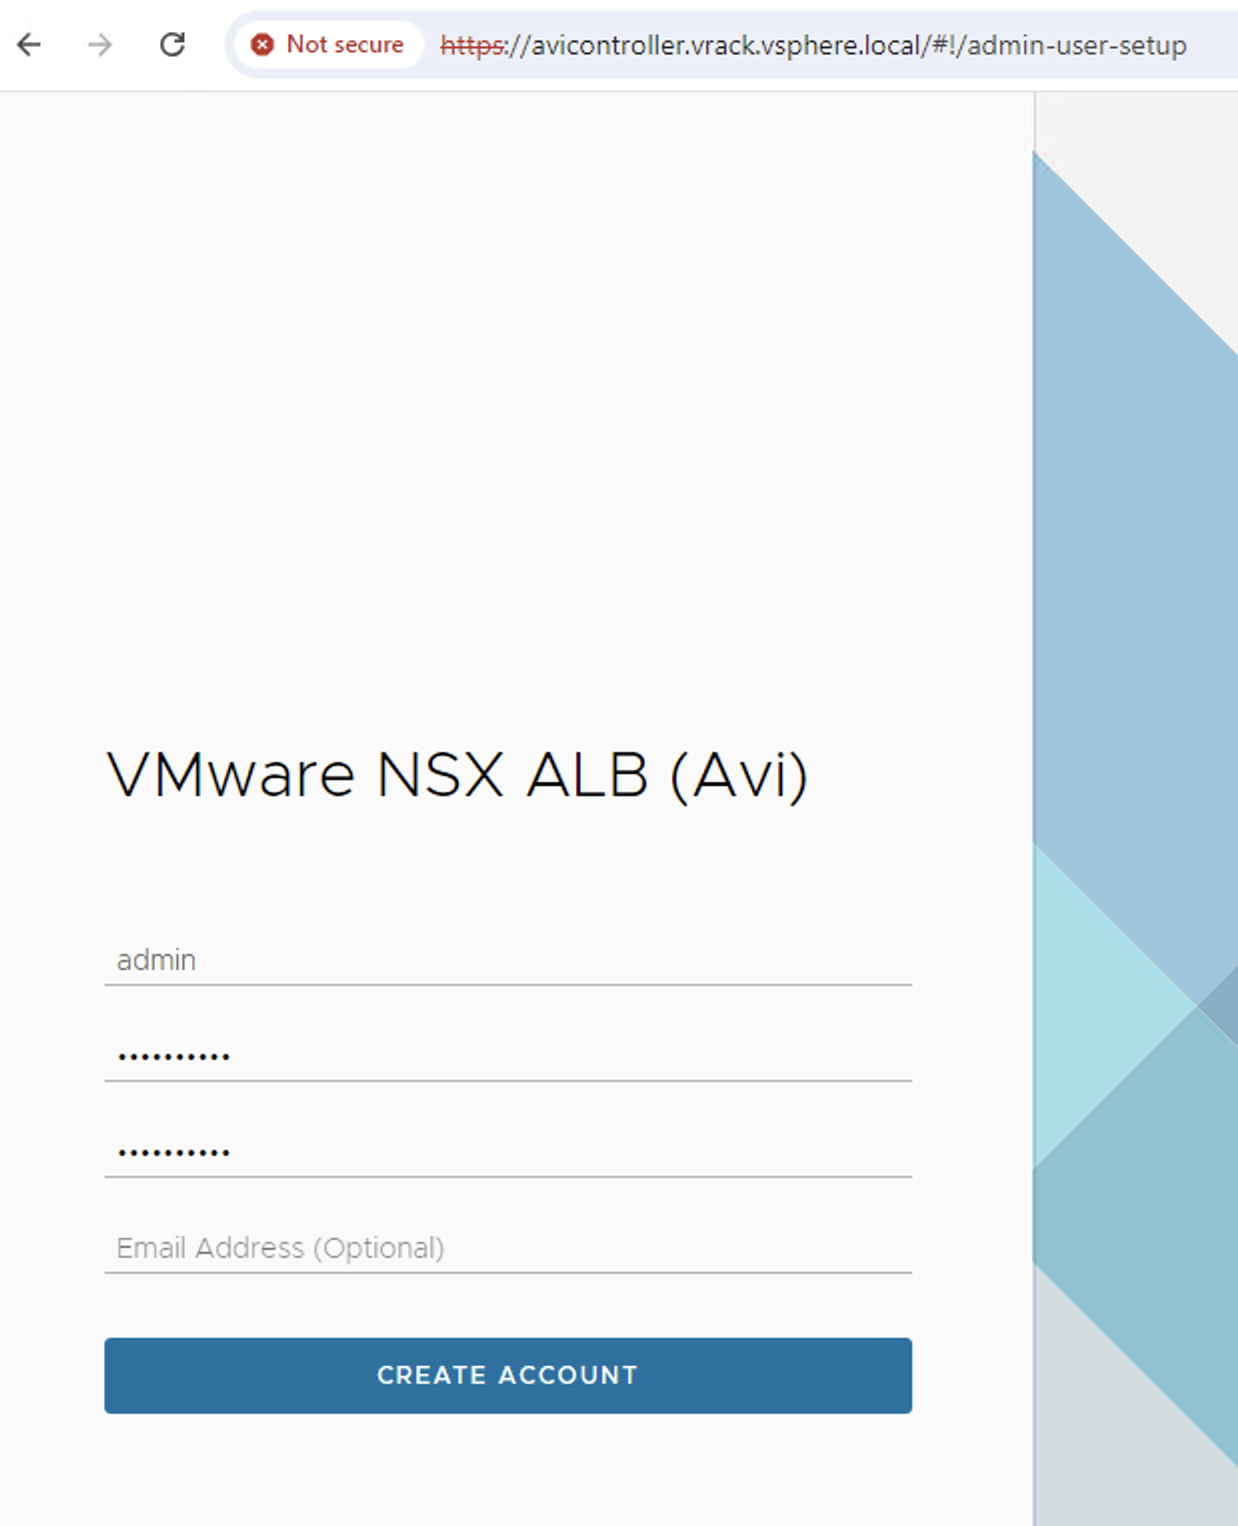
Once you create the account, you can then proceed to setup the controller.
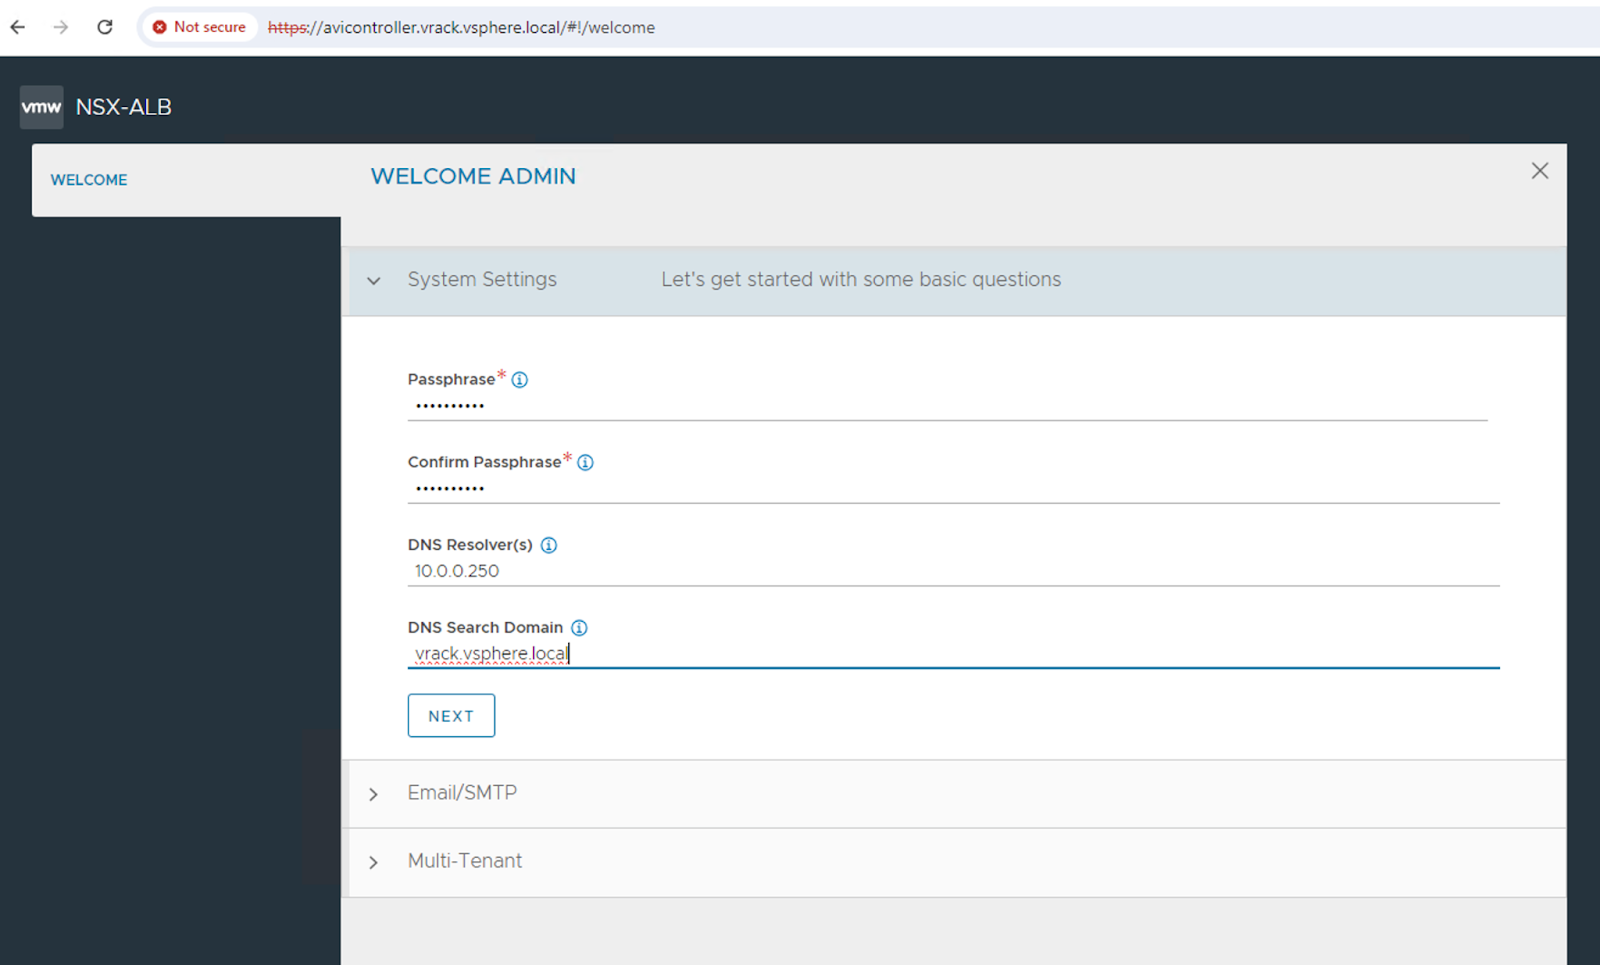
Clicking on Save should take you to the following screen
Now, we need to setup the cloud (endpoint) before we can use the virtual services and other AVI LB offerings. But before we can do that, there are a few pre-requisites that we need to complete.
Cloud Setup Pre-requisites
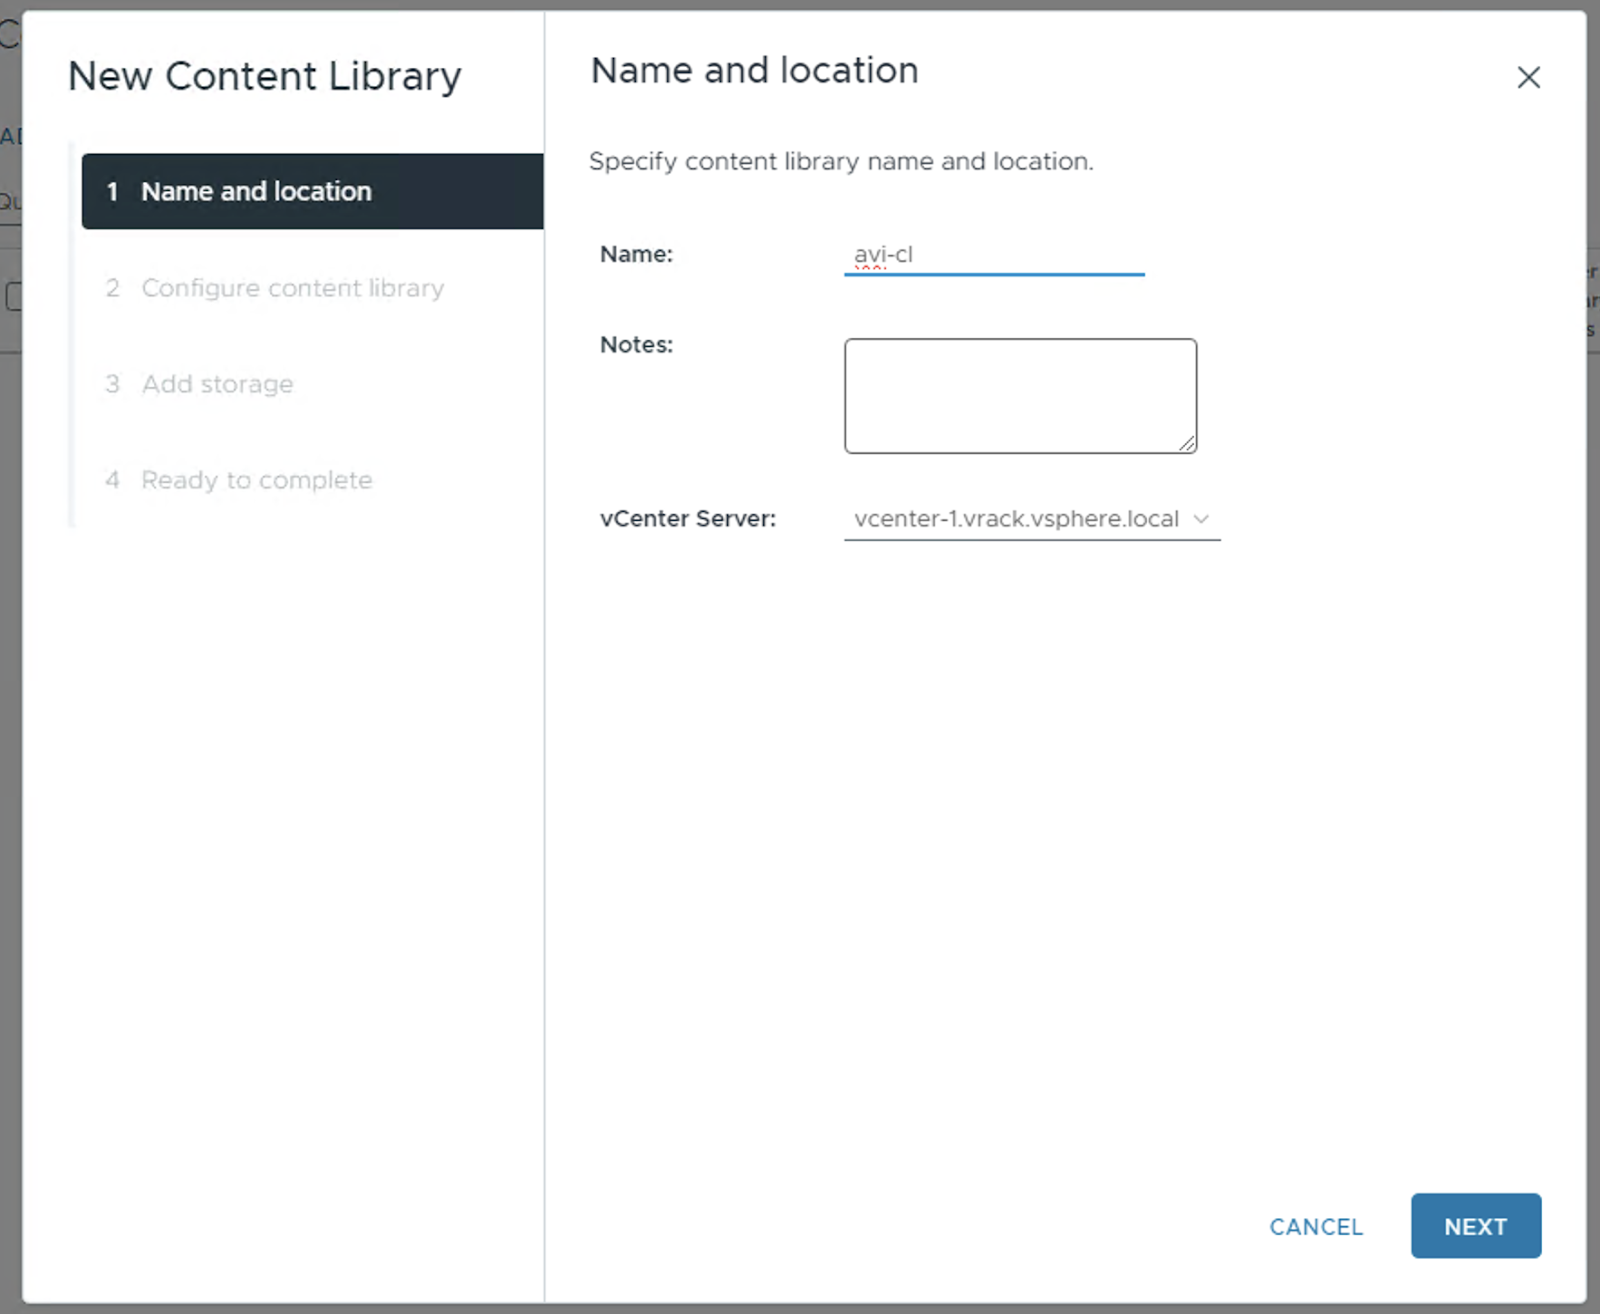
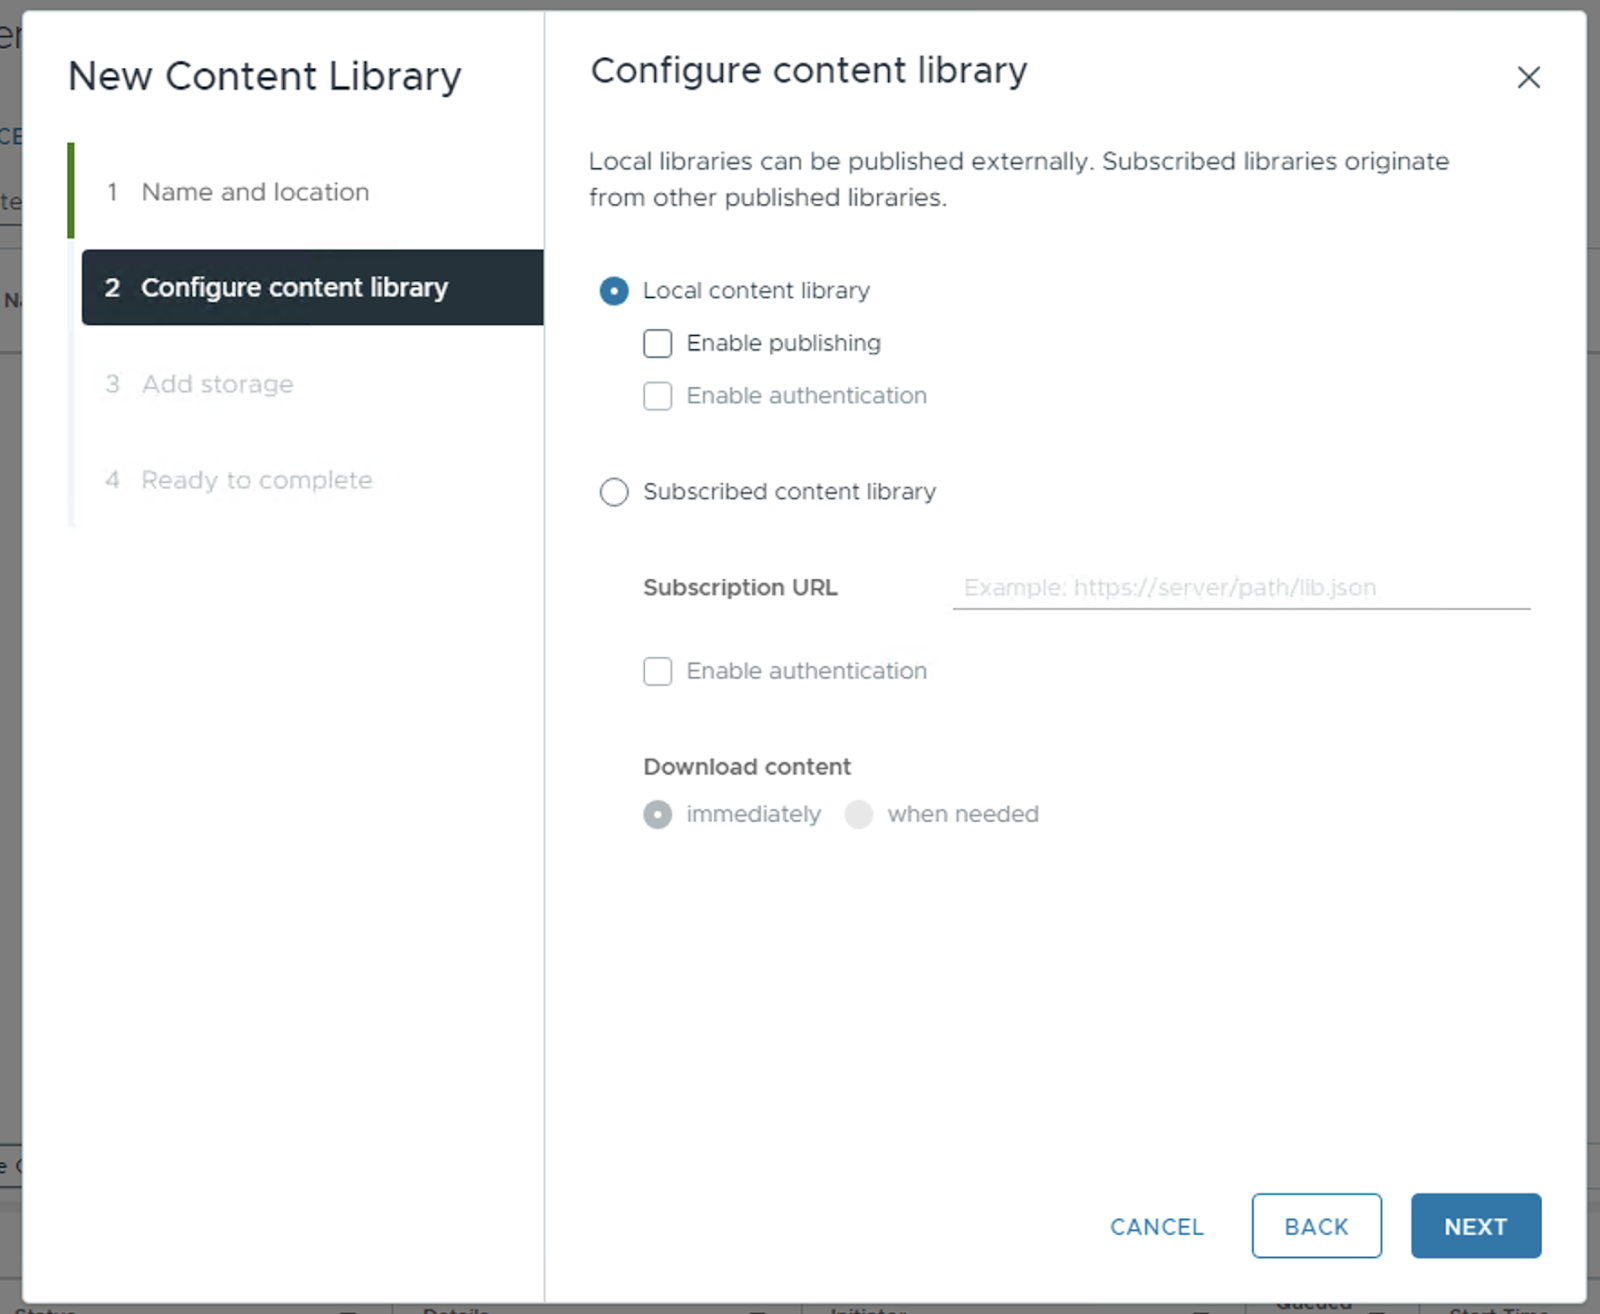
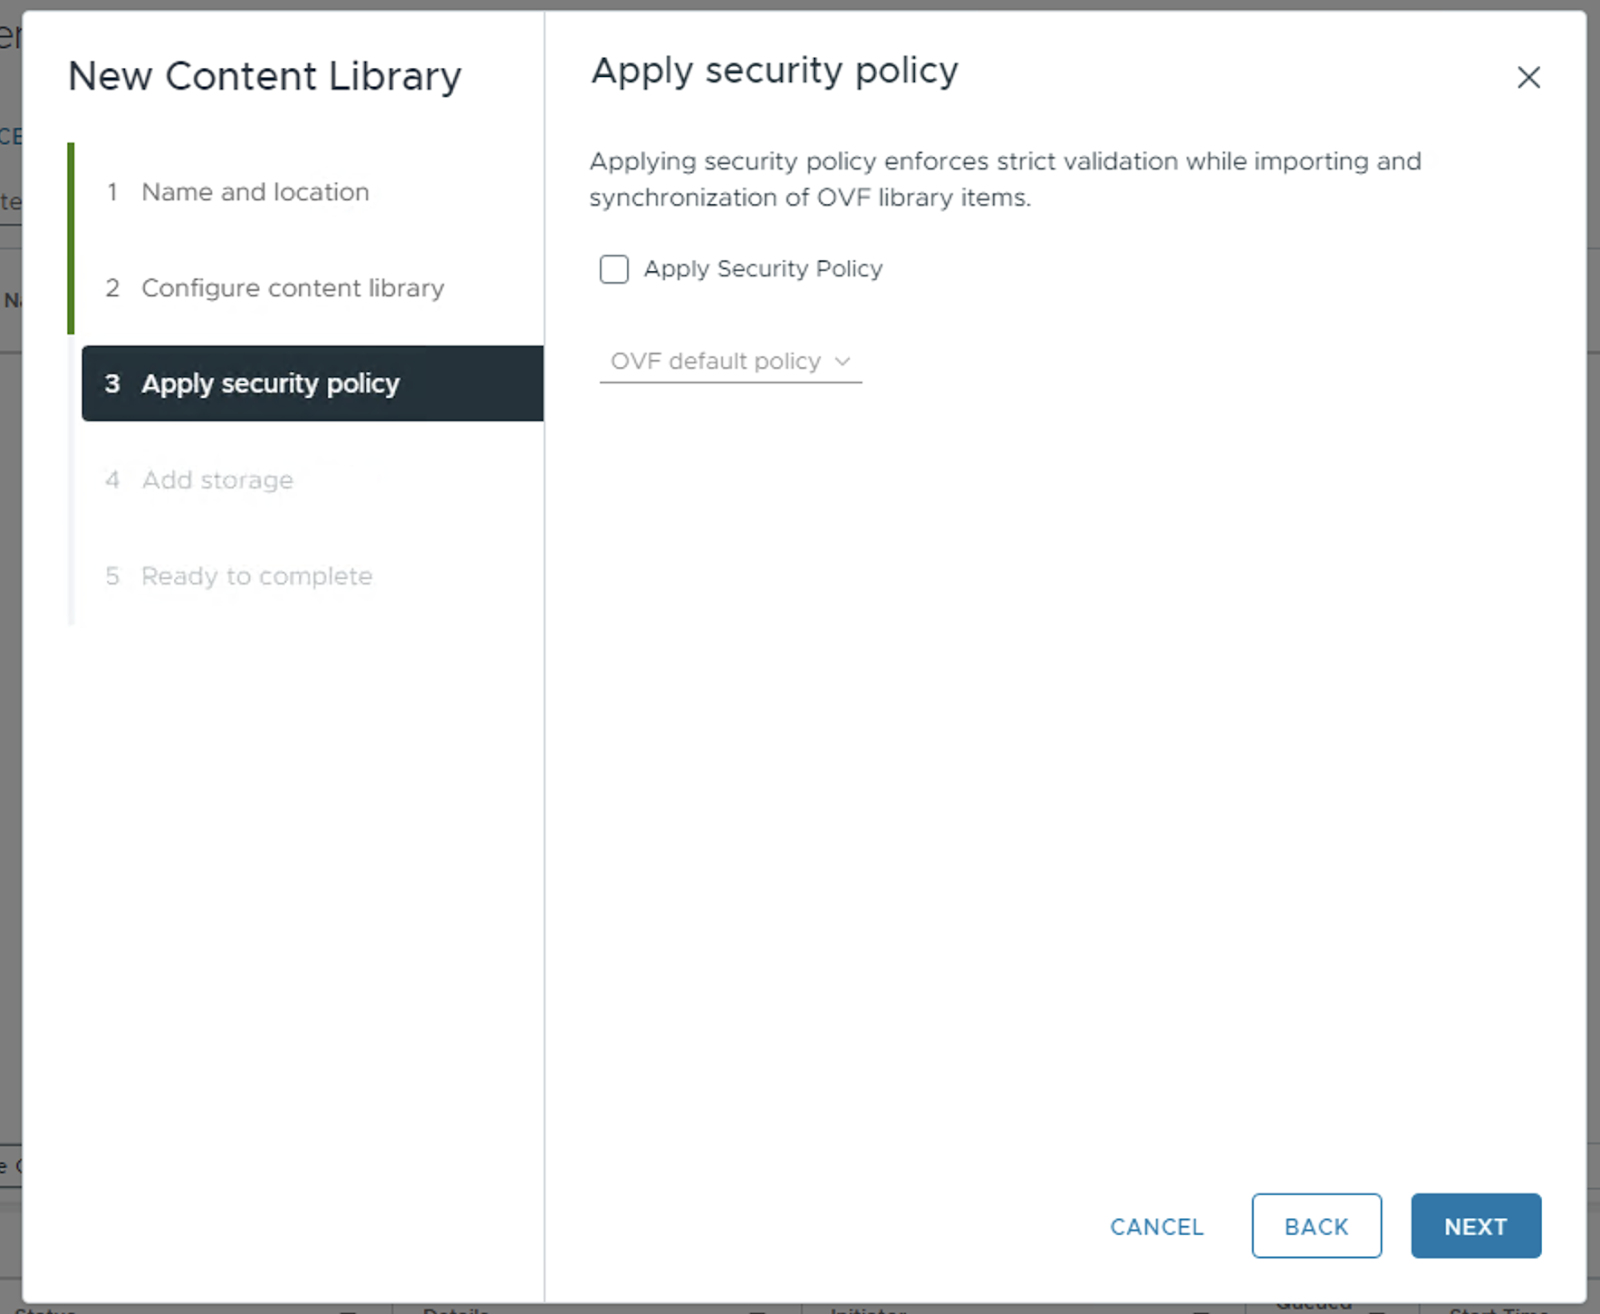
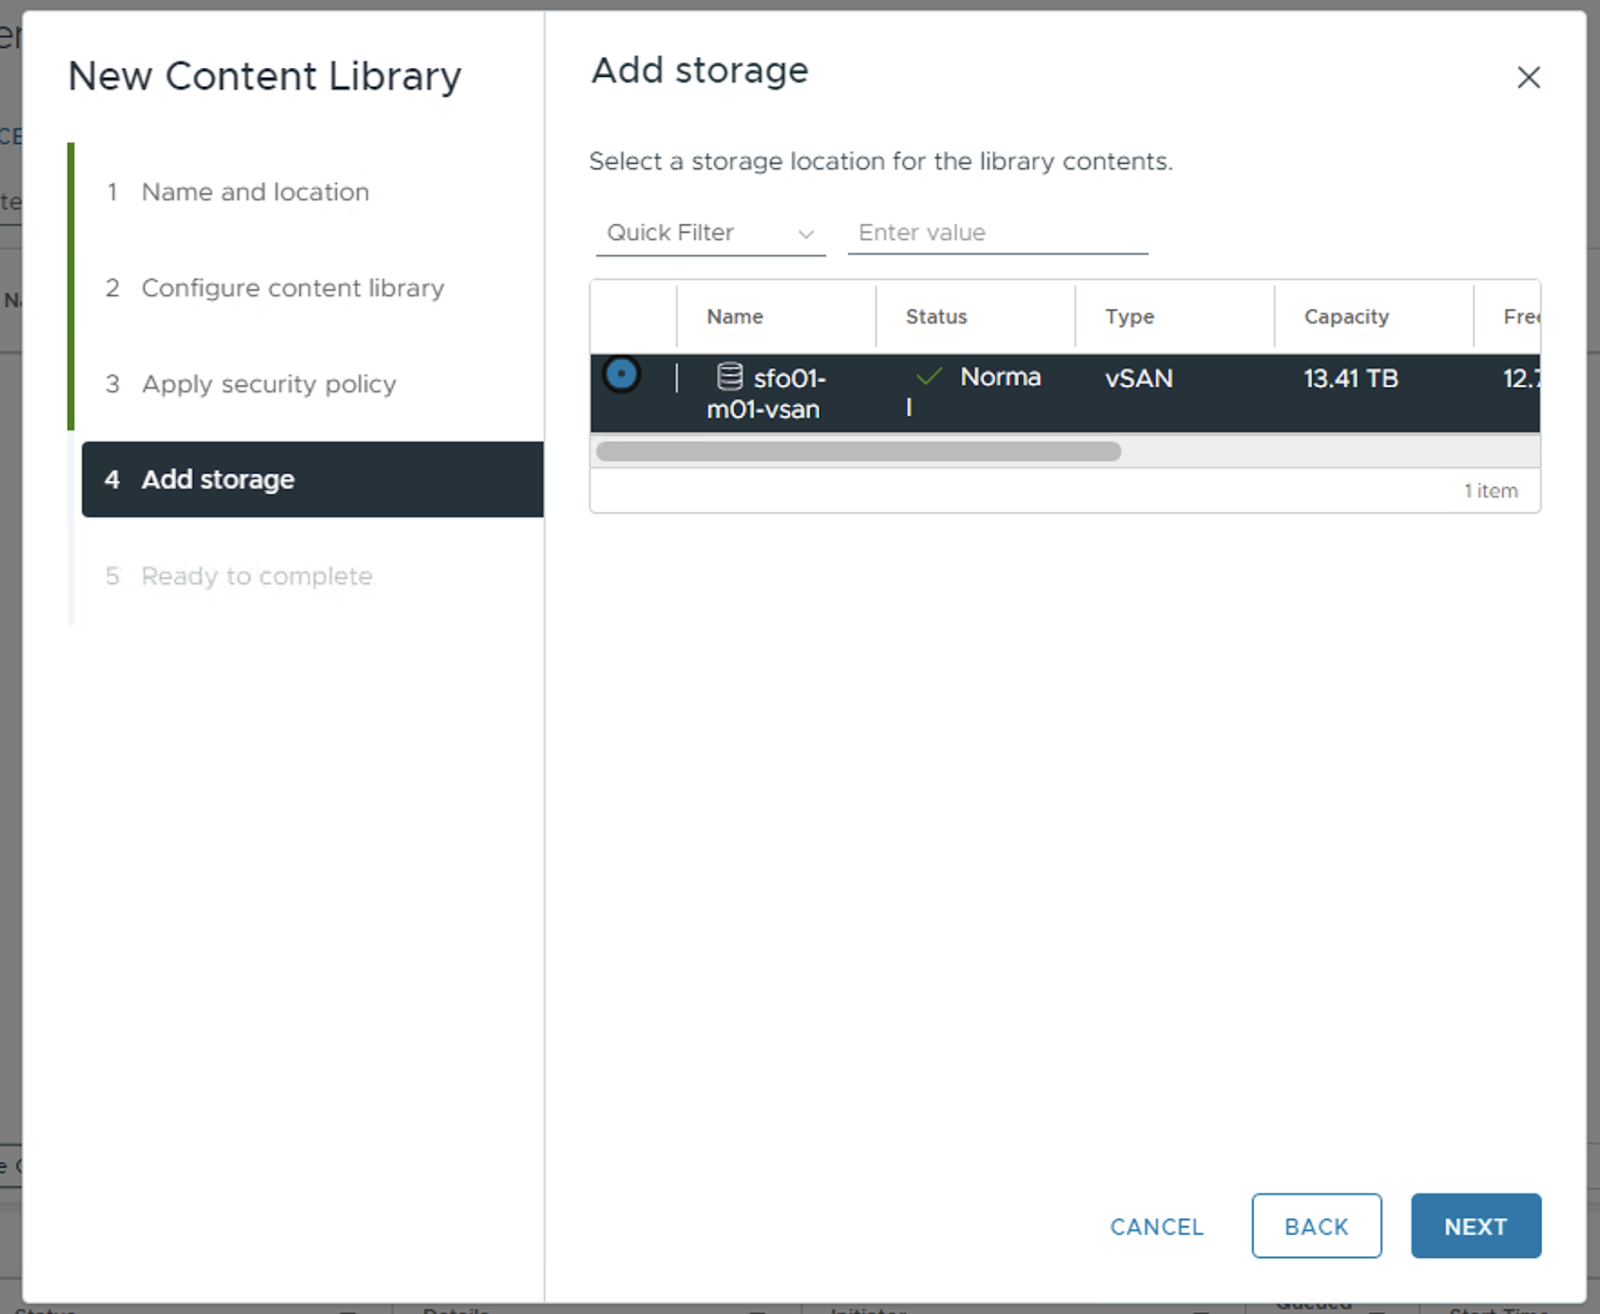
Content Library Creation
A content library is used by the controller to store the OVA from which the AVI SE’s will be deployed. We will proceed to create that now.

Network Pre-requisite
I will be using overlay segments for both AVI Management and SE traffic. Both of these segments are connected to the same T1 in my case. You can choose to deploy the Management network in a separate T1. For a matter of fact, that is the recommended approach.


Other Pre-requisites
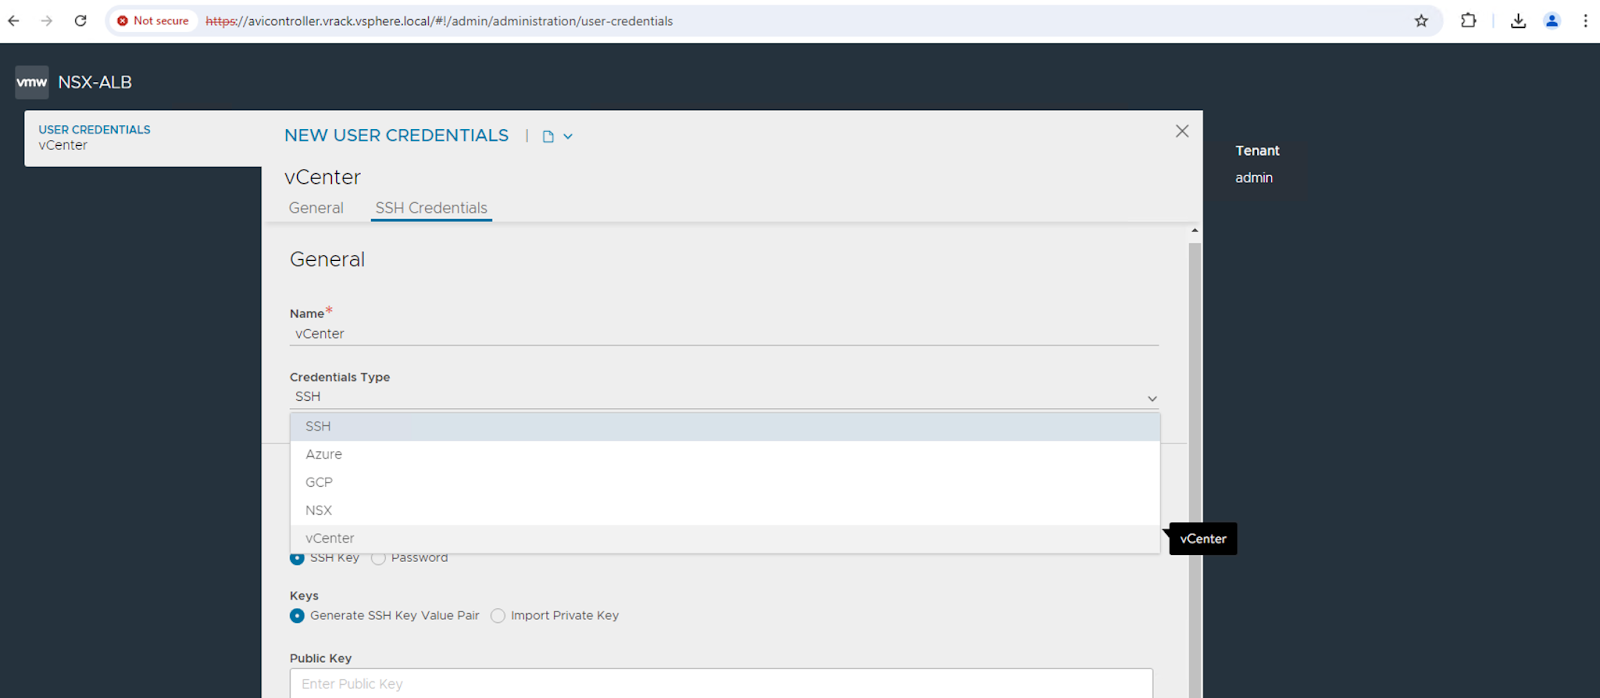
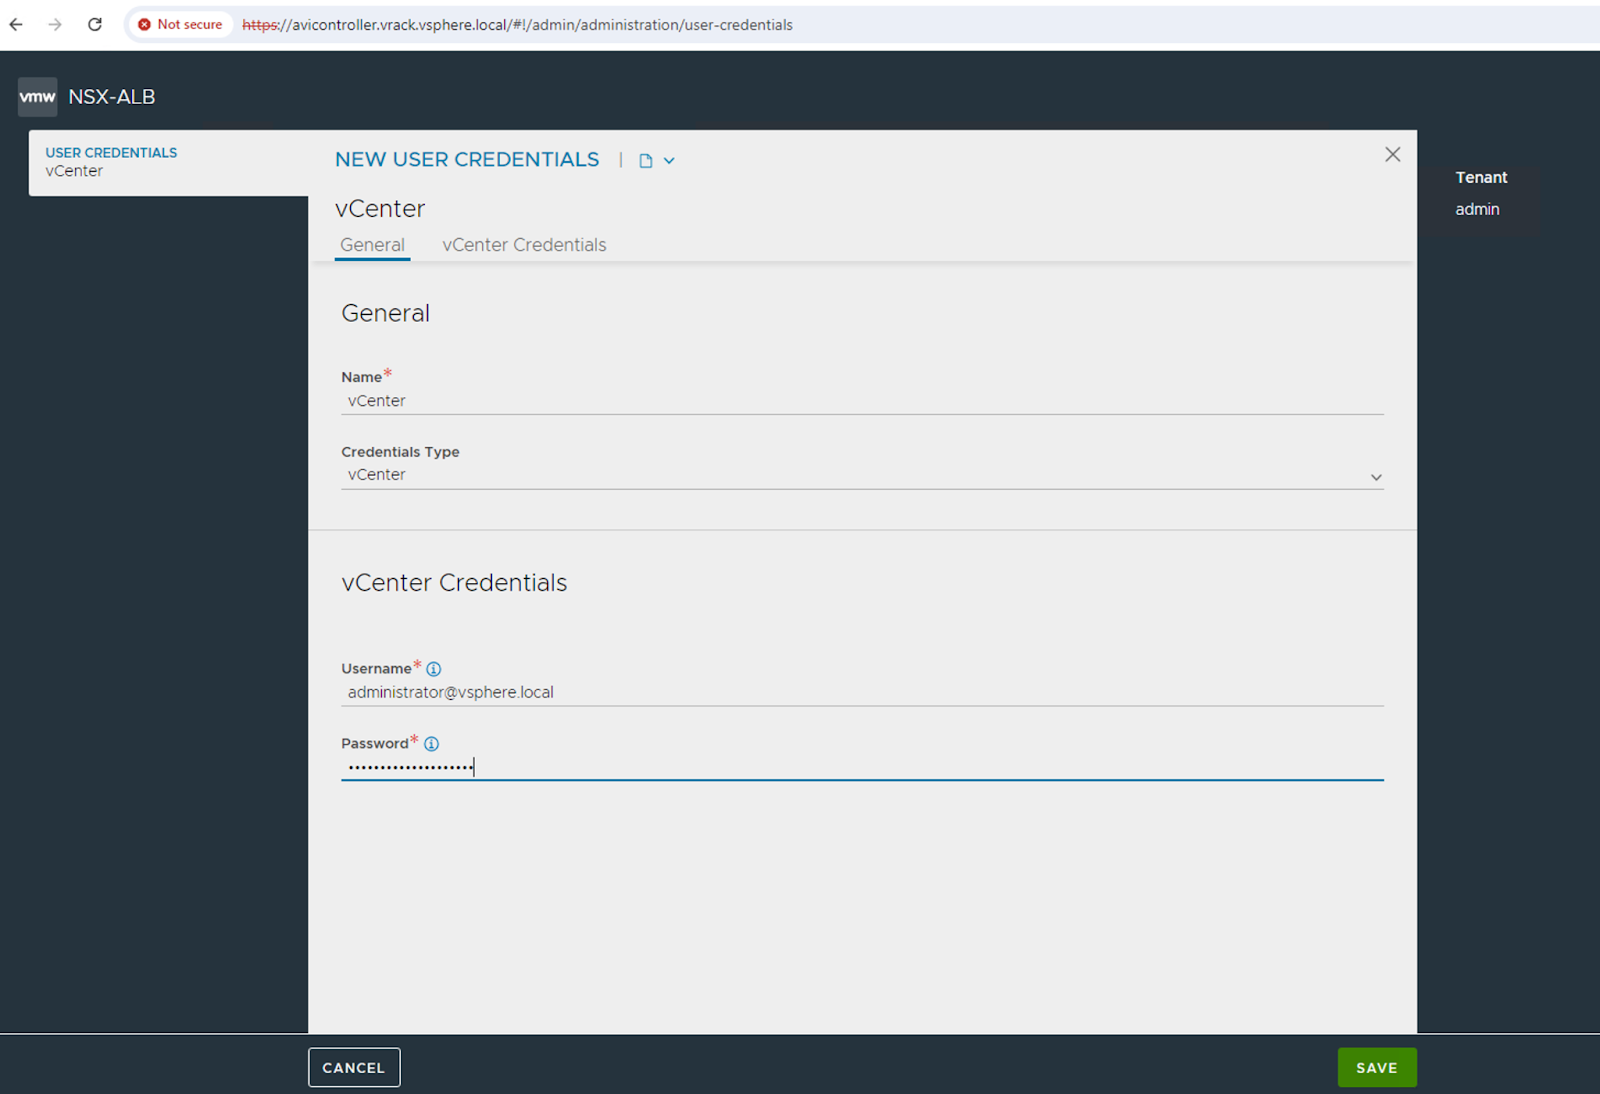
Before configuring the cloud, we need to create a few credentials which will be later used during the setup.
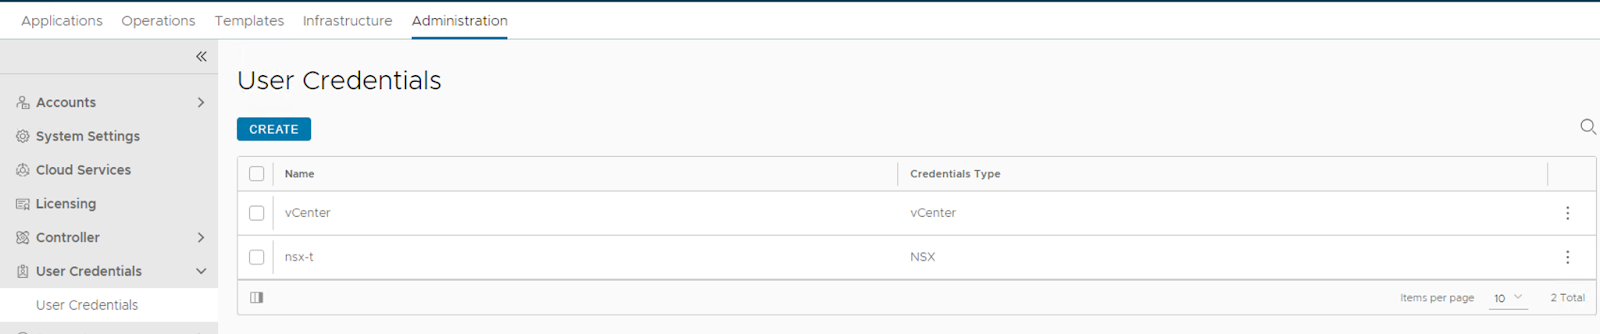
Navigate to “Administration – User Credentials – Create”
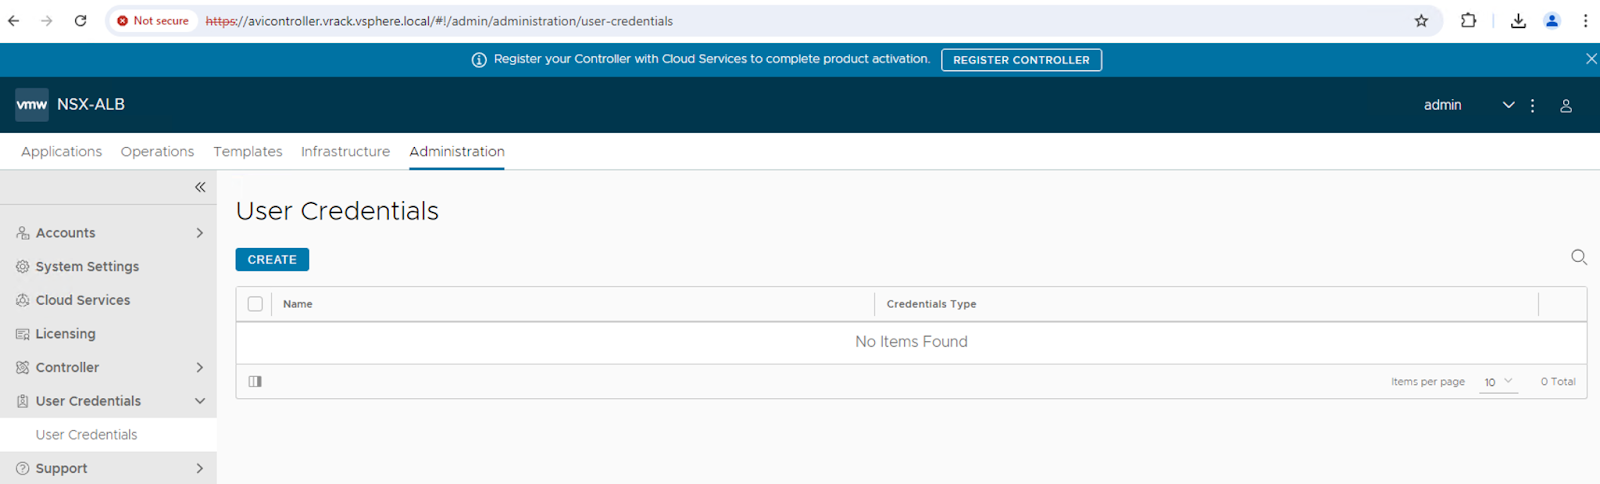
We will be creating NSX and vCenter credentials. From the drop down, choose vCenter first and then follow the same procedure to create NSX credentials as well.

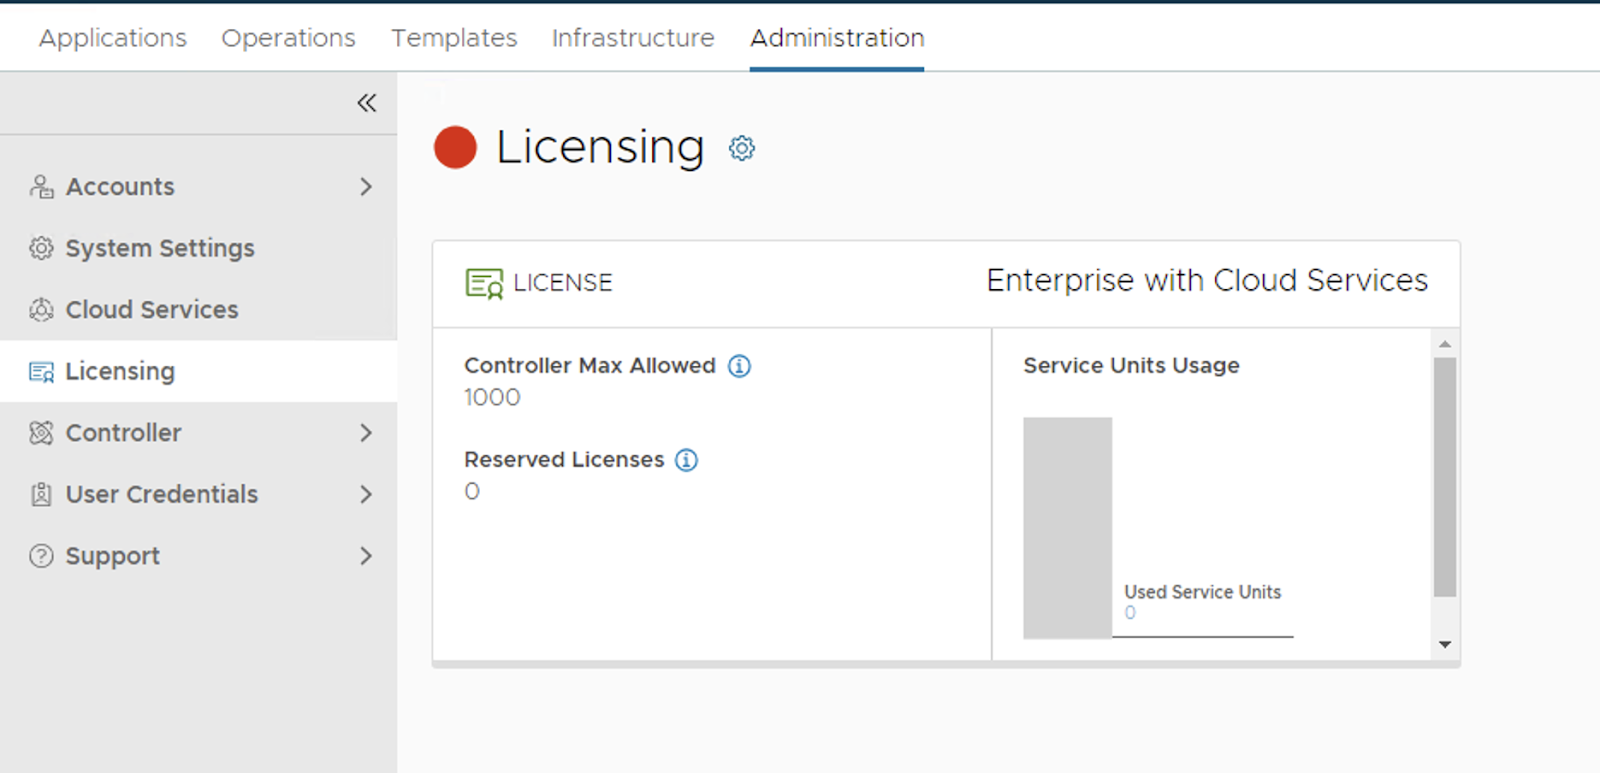
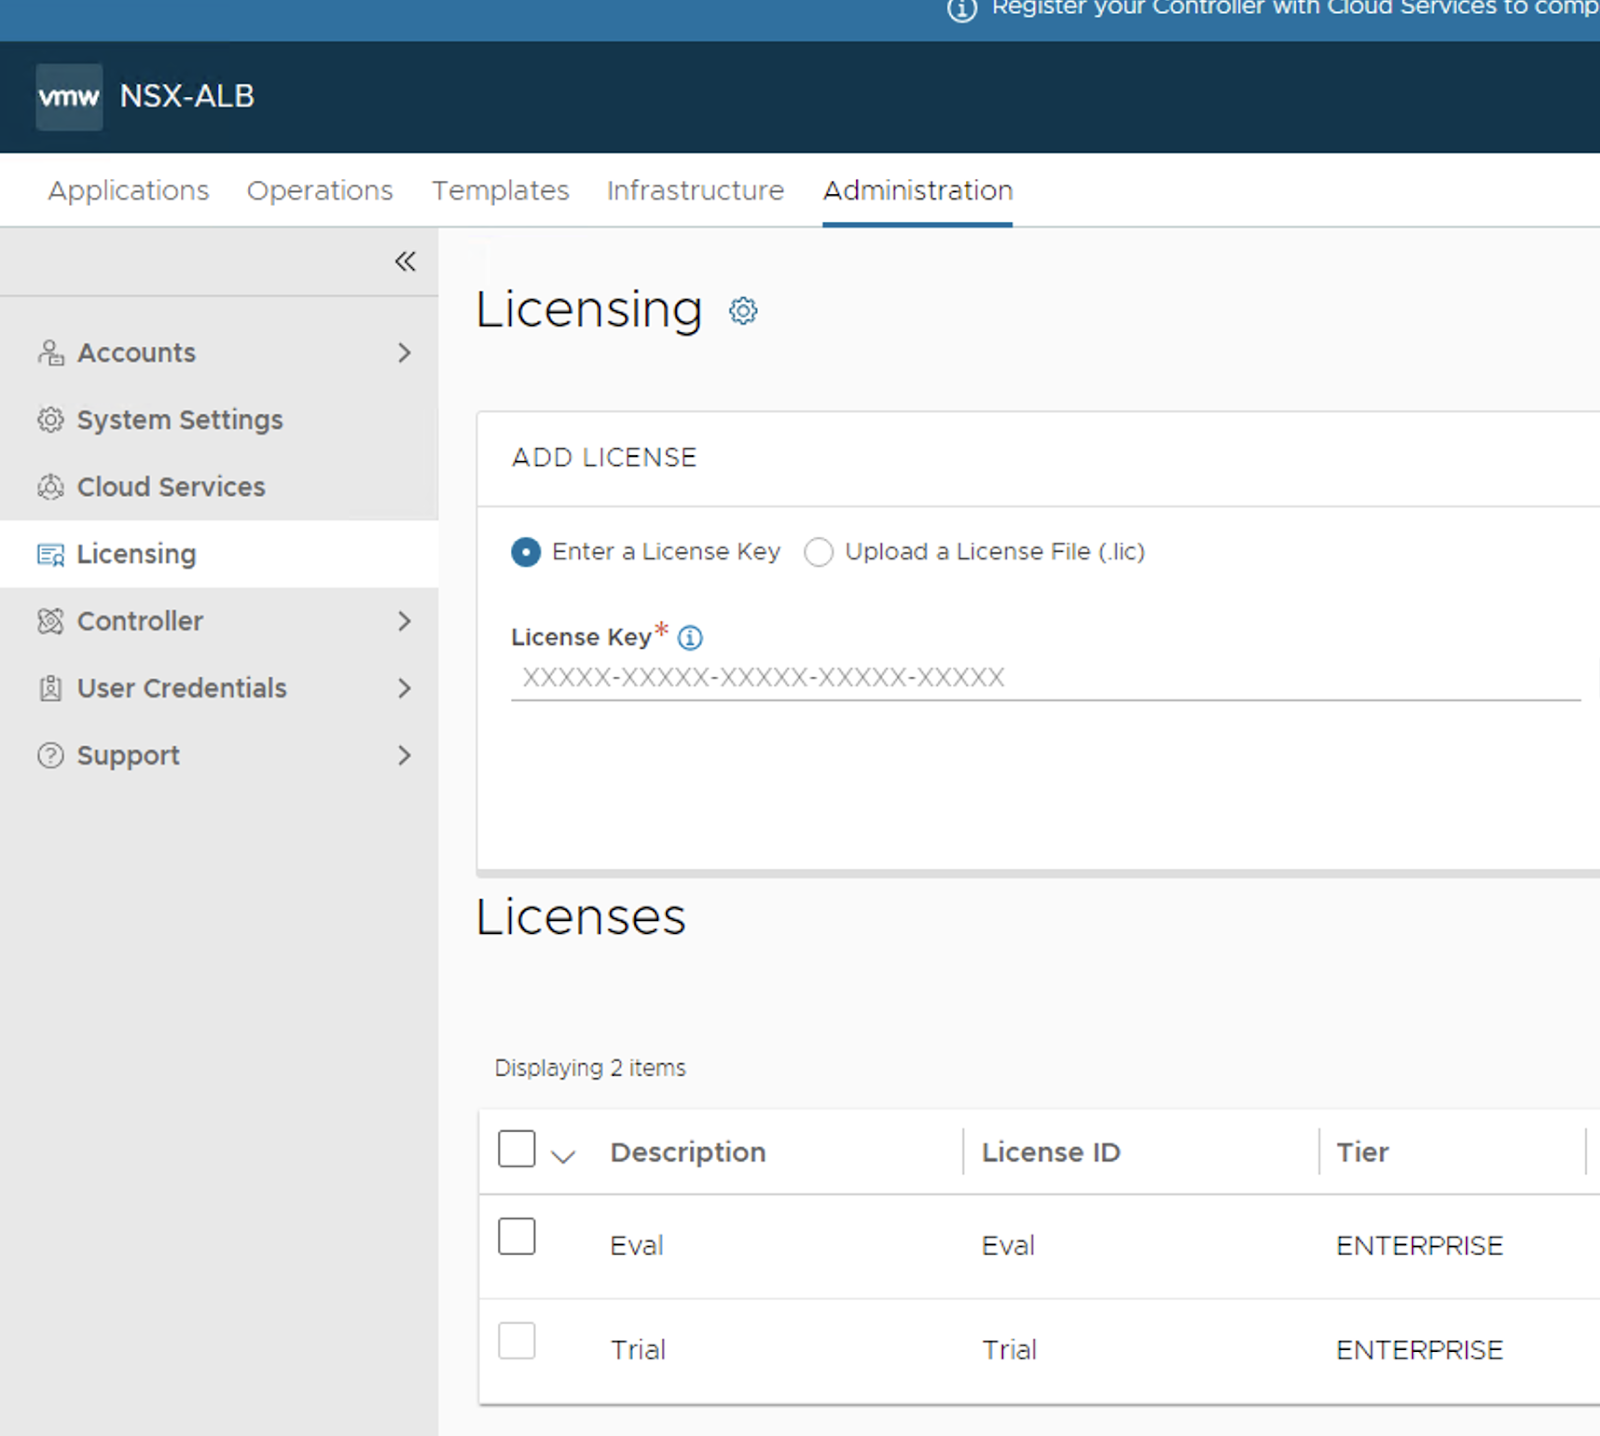
We will now proceed to the licensing setup. You get a default Eval licenses that you can use (22 Service Core License). Navigate to “Administration – Licensing”.
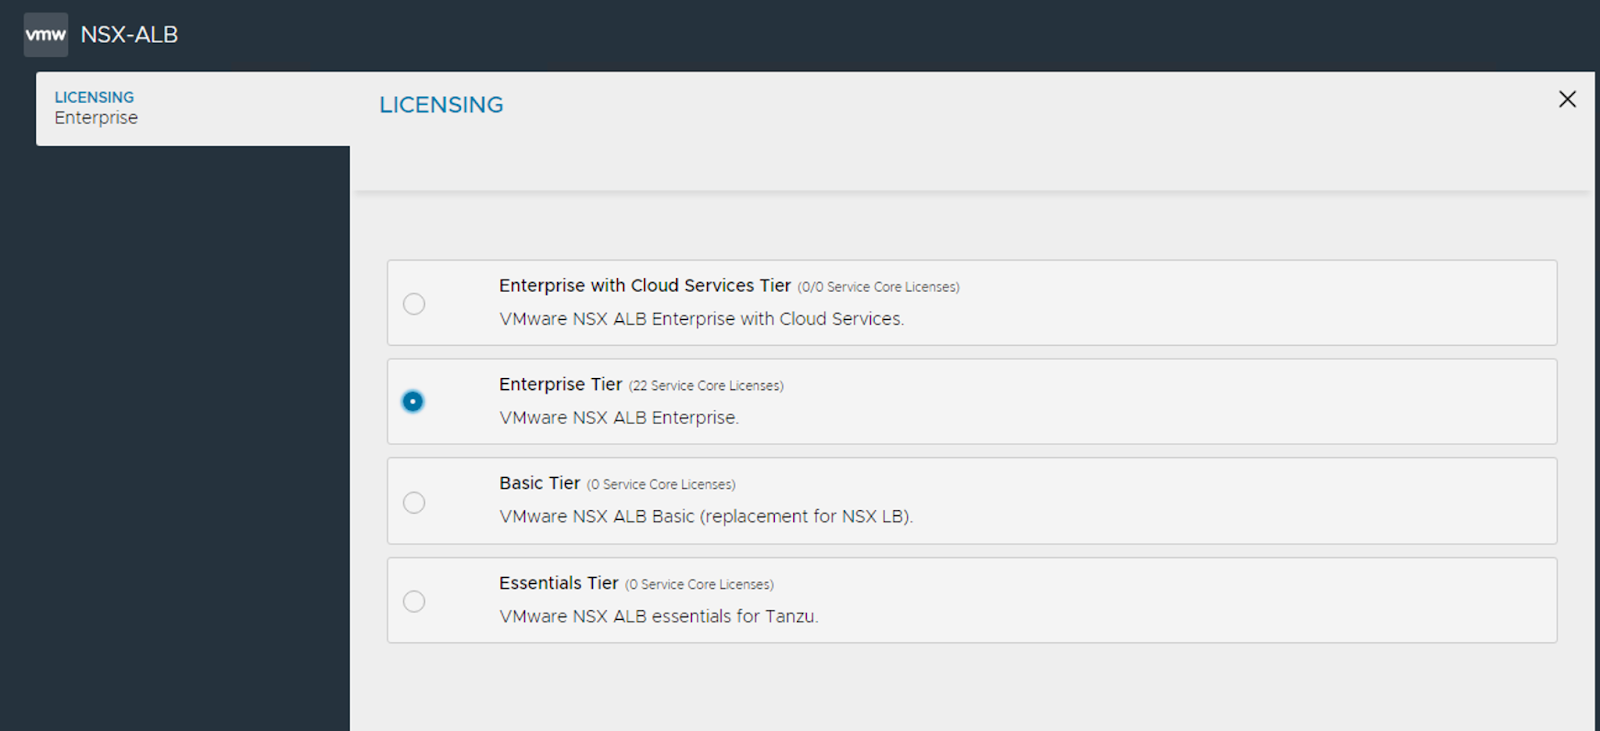
Click on the cog wheel next to Licensing, which will take you to the following screen.
Follow the prompts and your licensing page should like the one below.
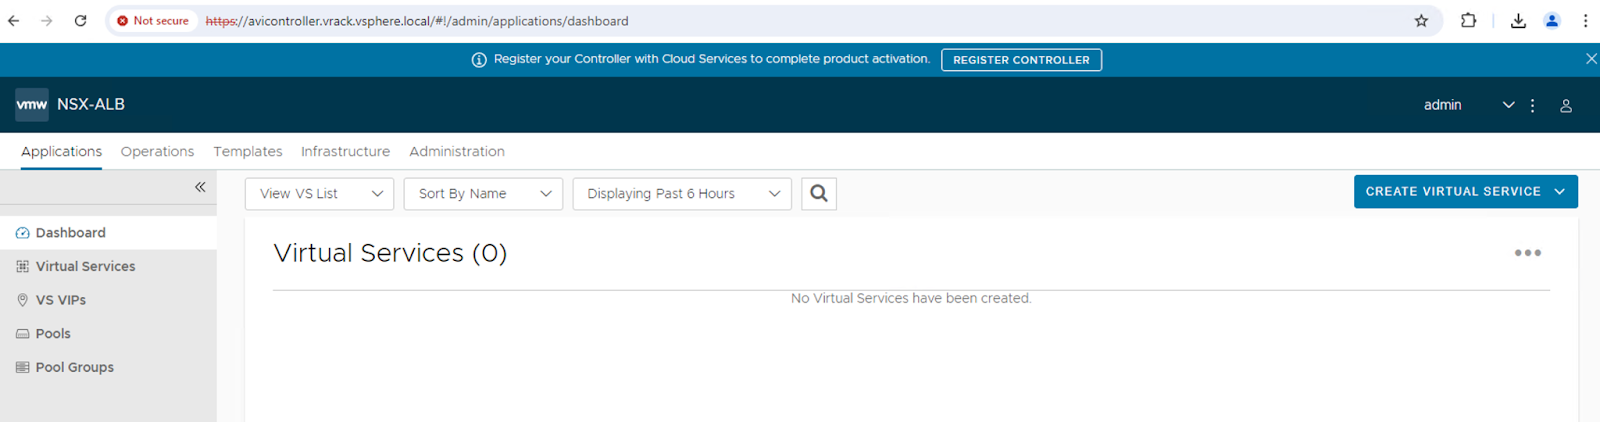
Cloud Setup
We will now proceed to setup our NSX Cloud now. By default, you should already have a No Orchestrator cloud configured. Navigate to “Infrastructure – Clouds – Create”.

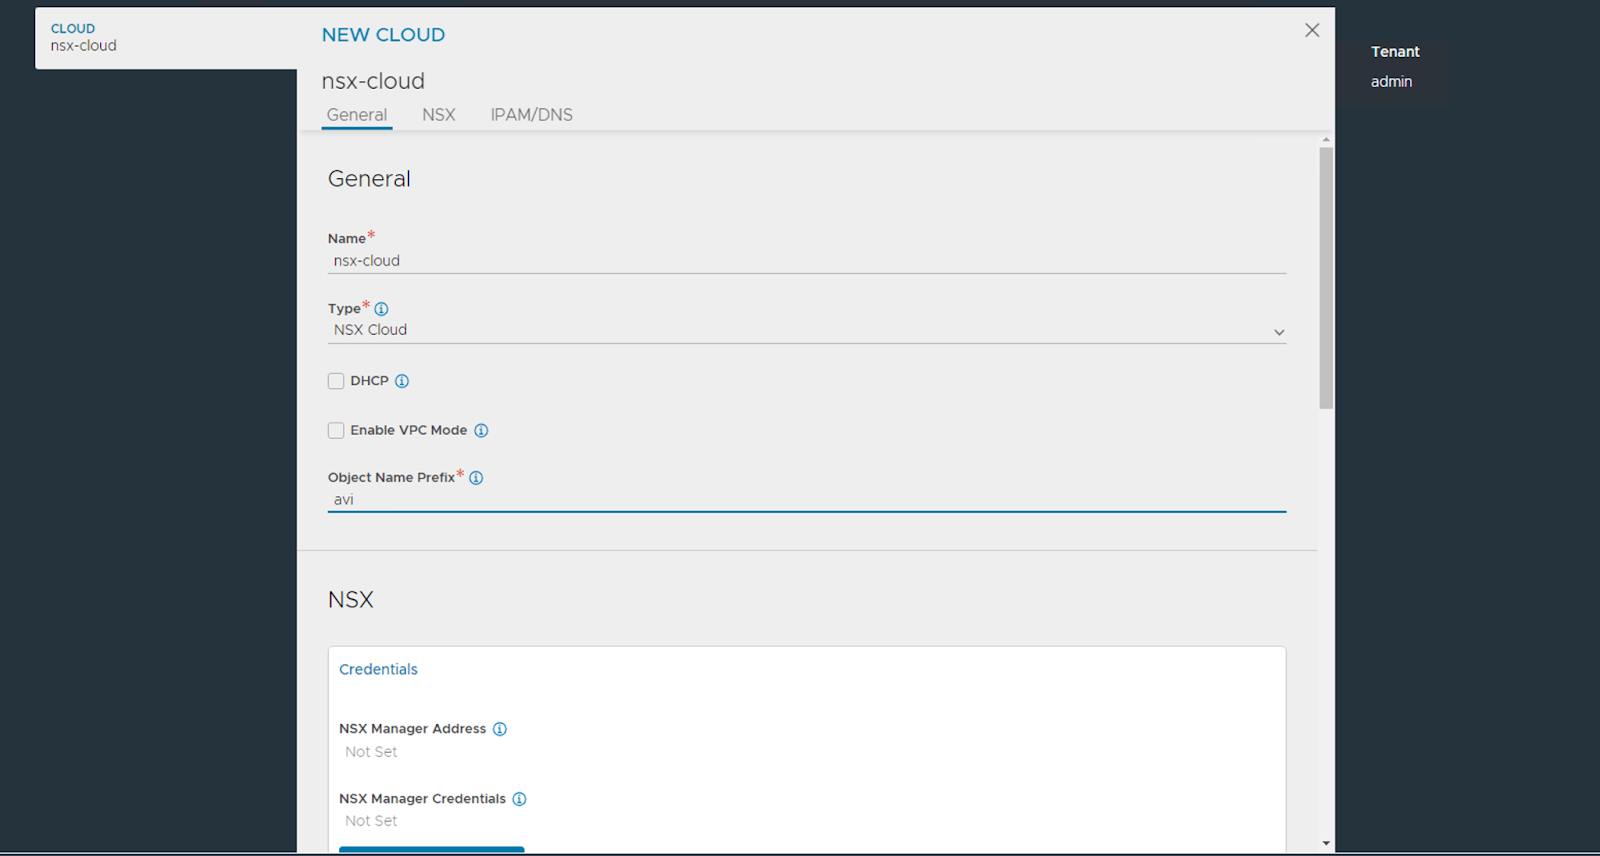
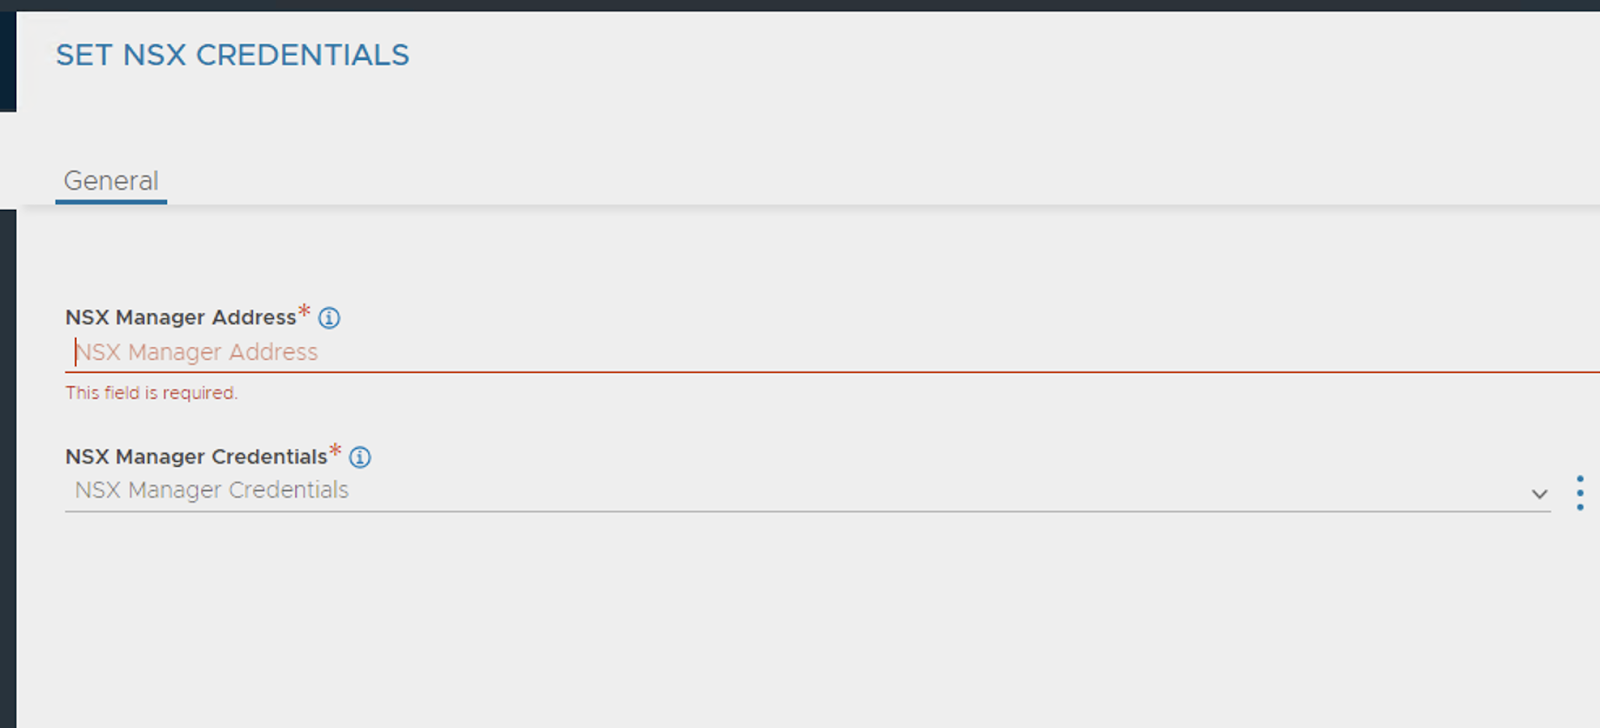
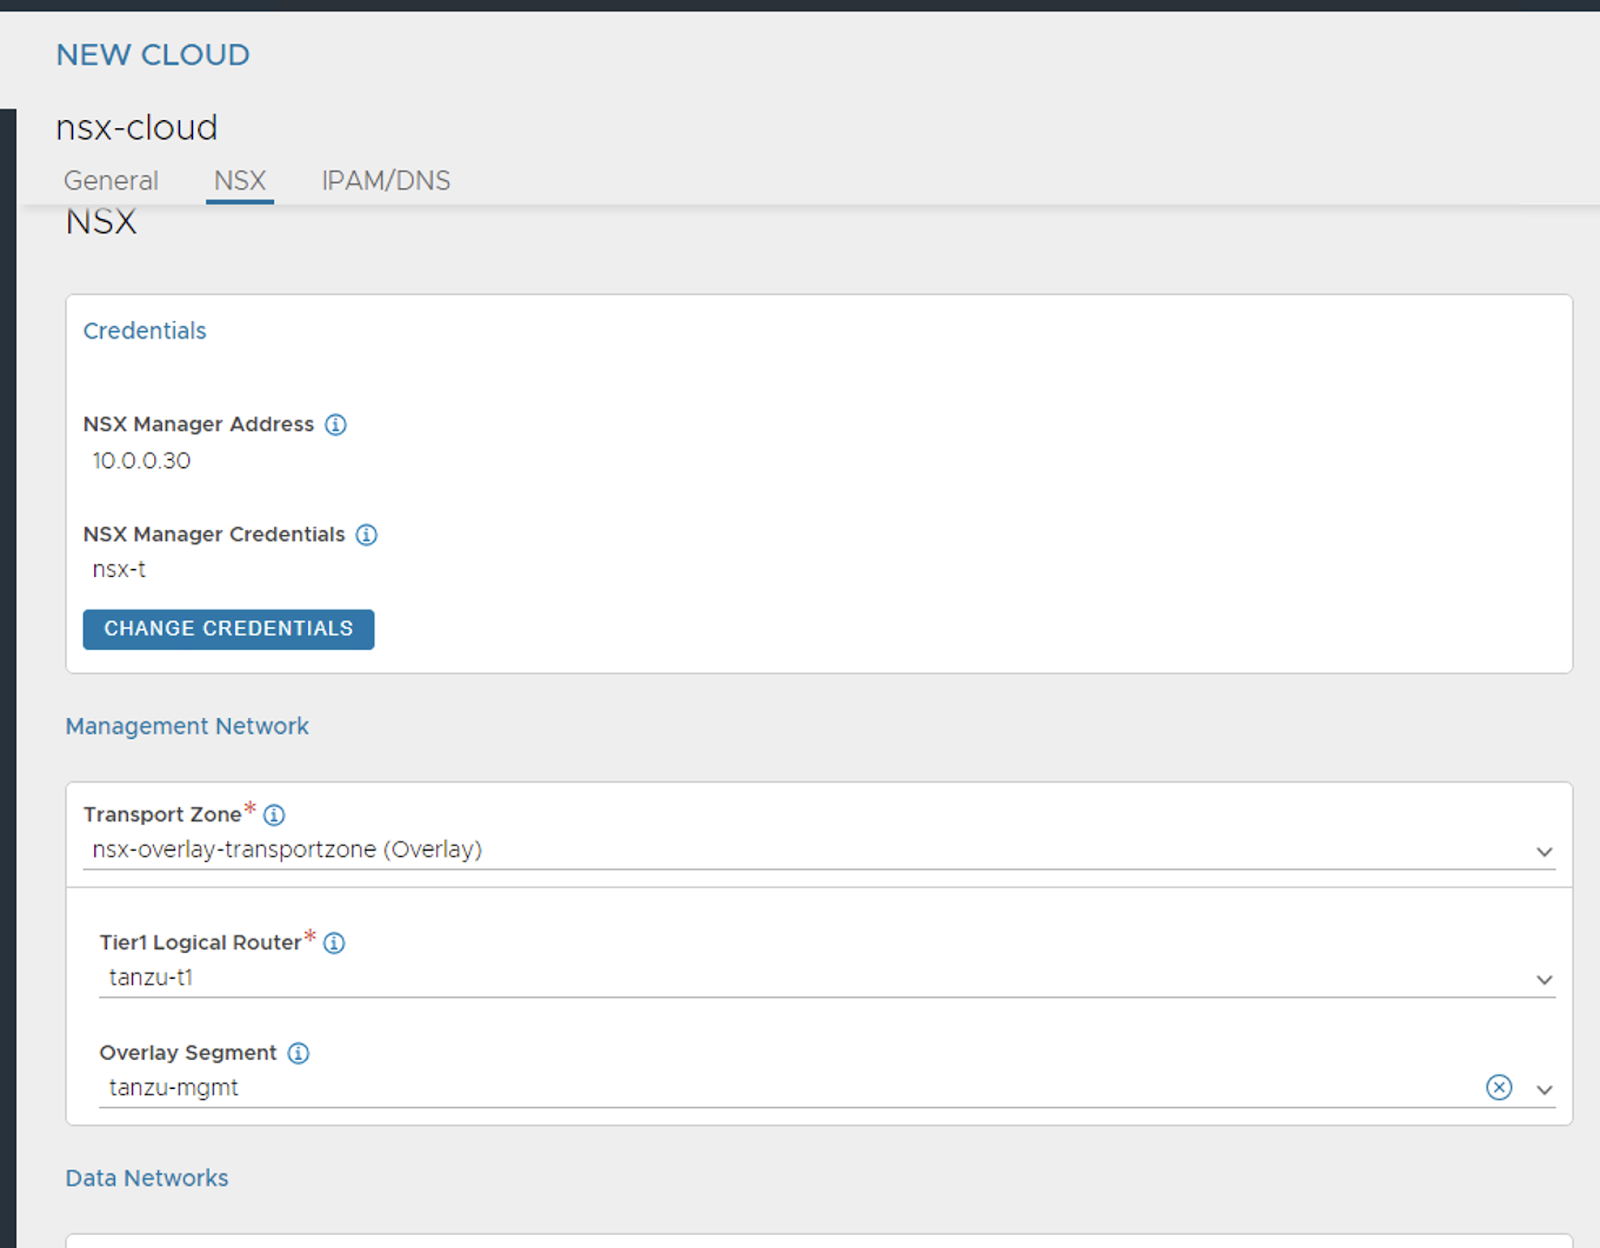
Choose the NSX credentials you created previously while setting up NSX by clicking on “Change Credentials”.

At this point, your NSX-T constructs should auto-populate in the dropdown.
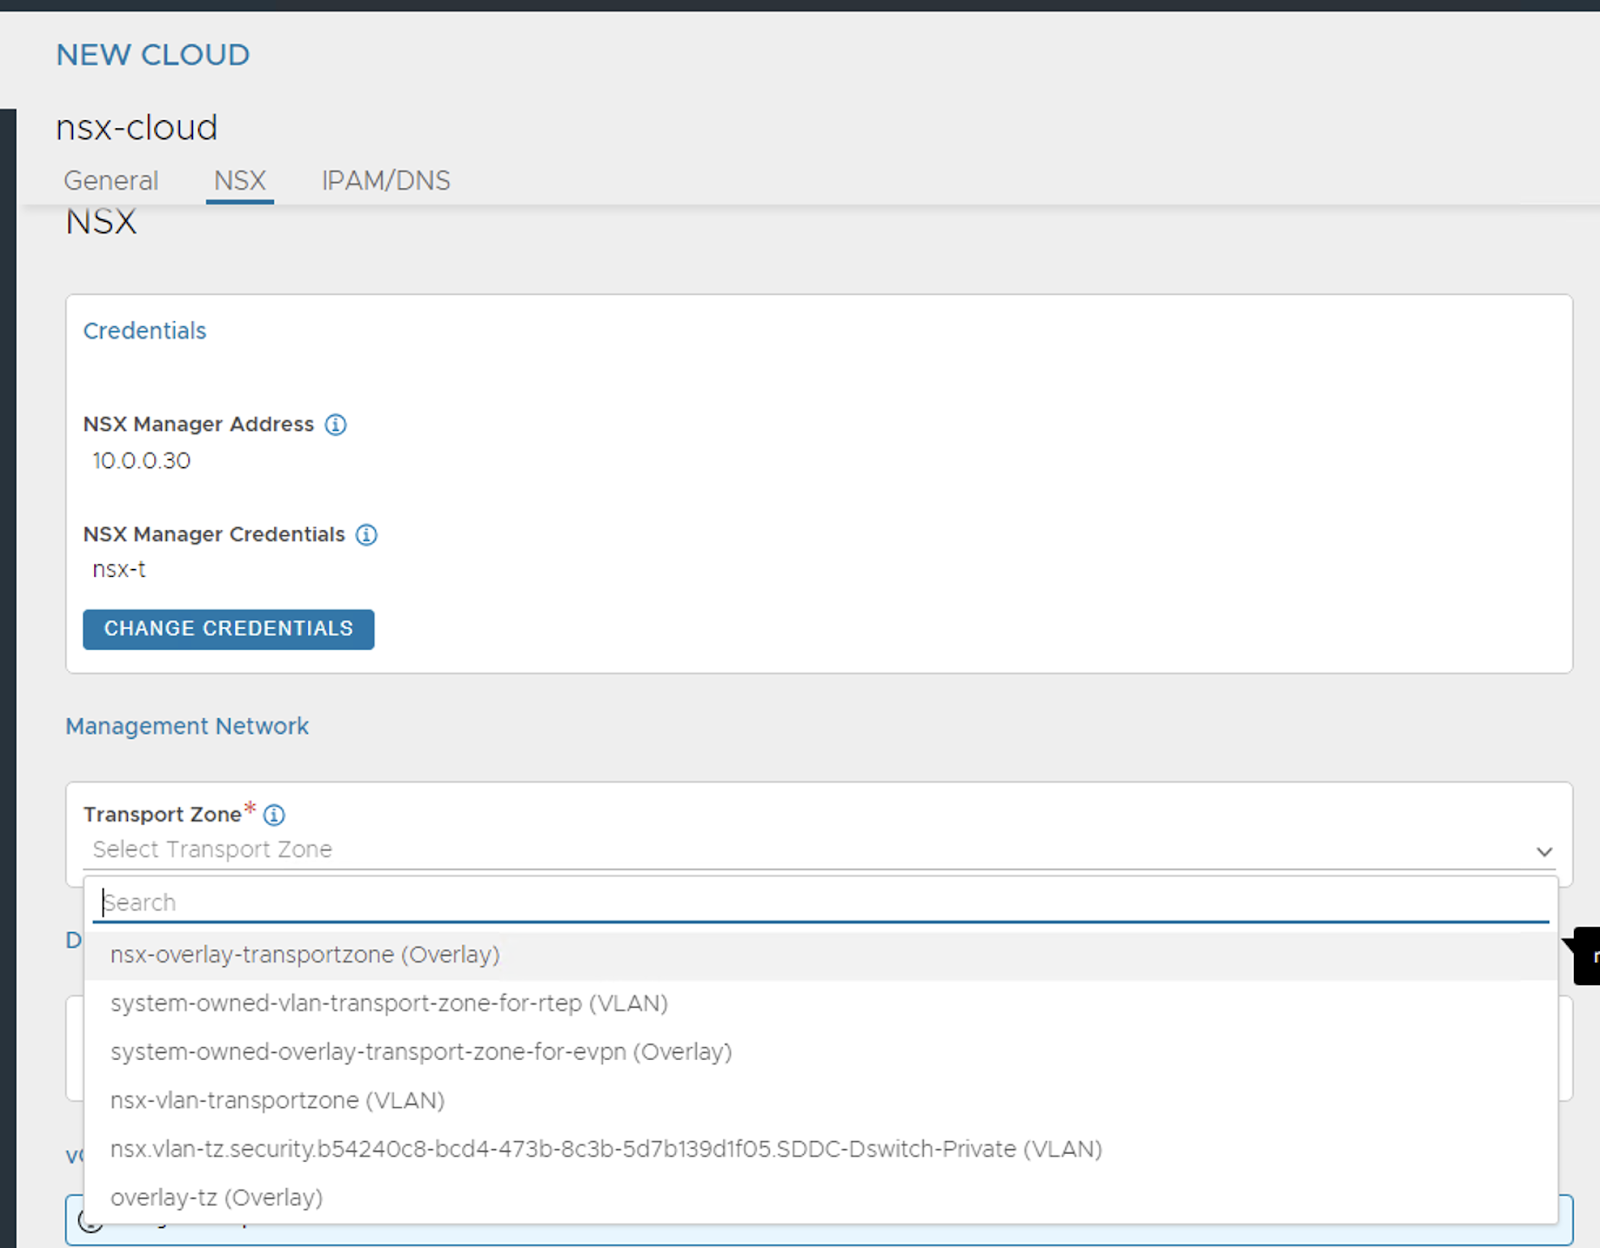
Select the relevant T1 and VIP and Management Segments.
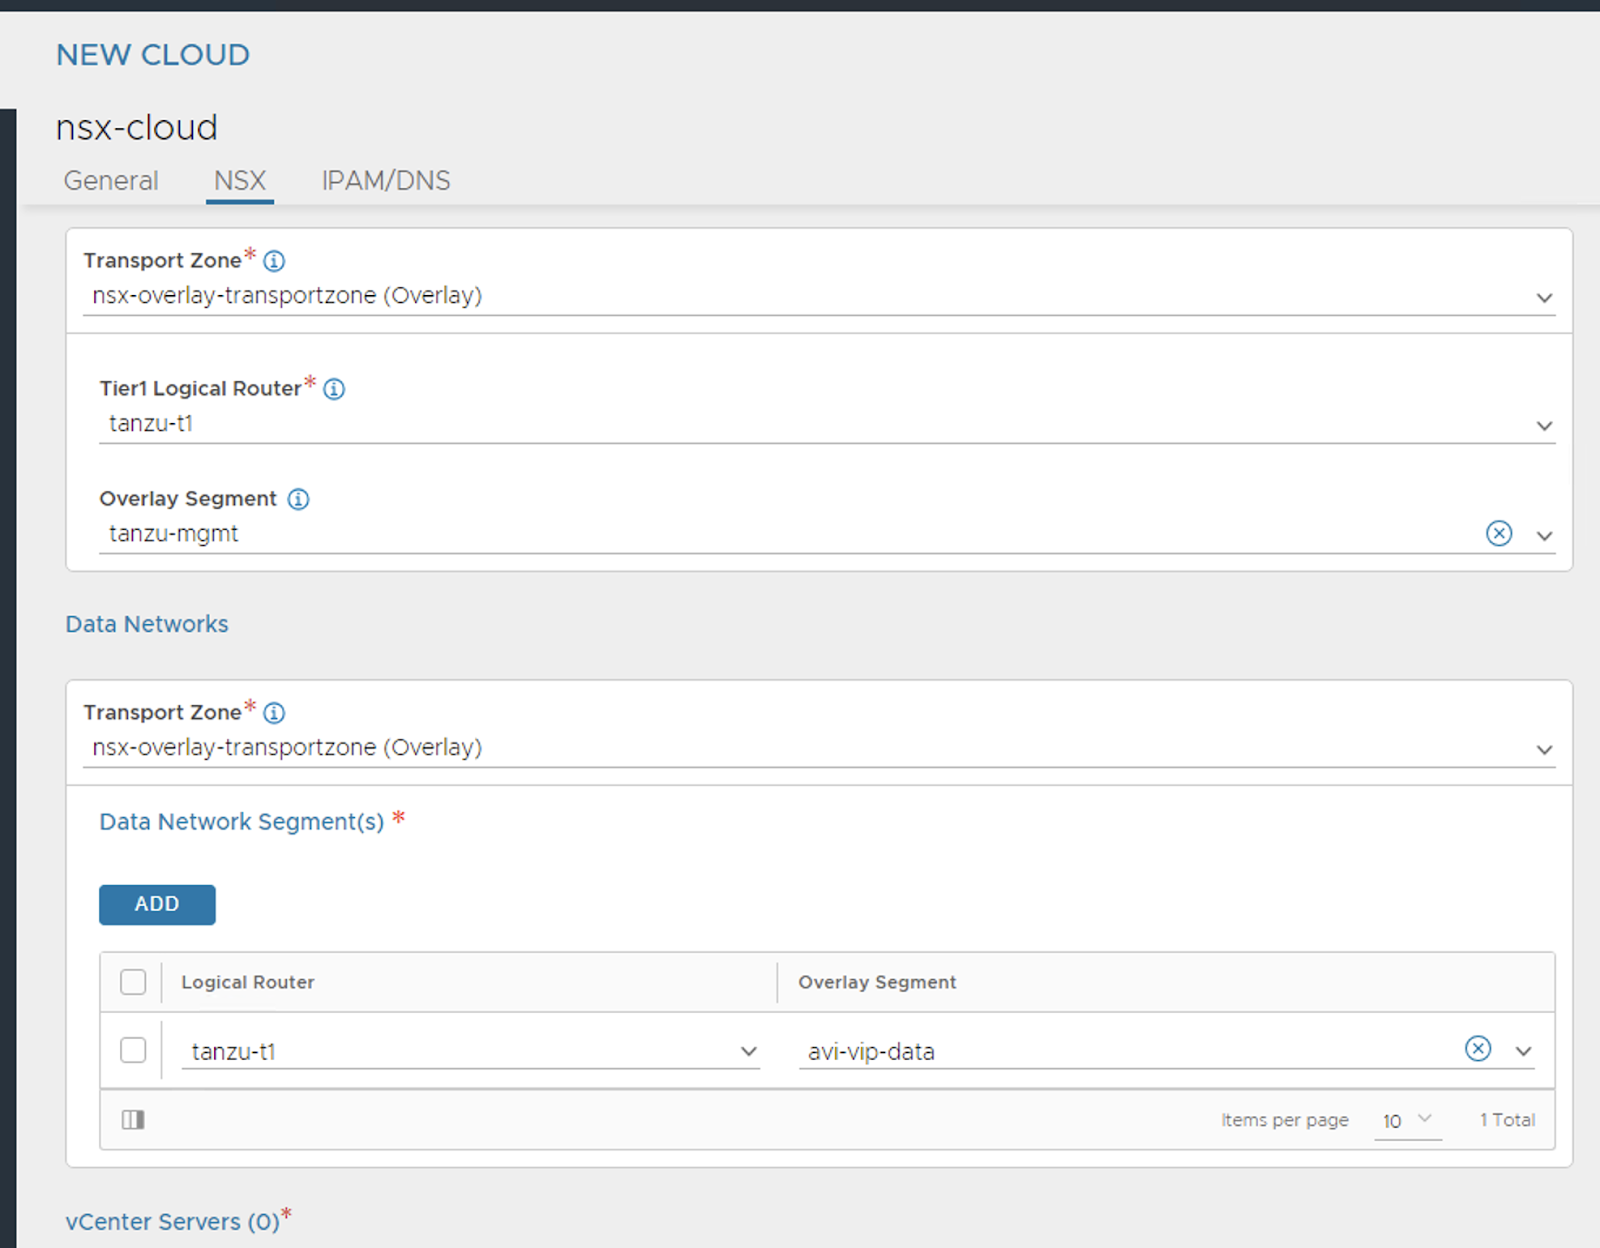
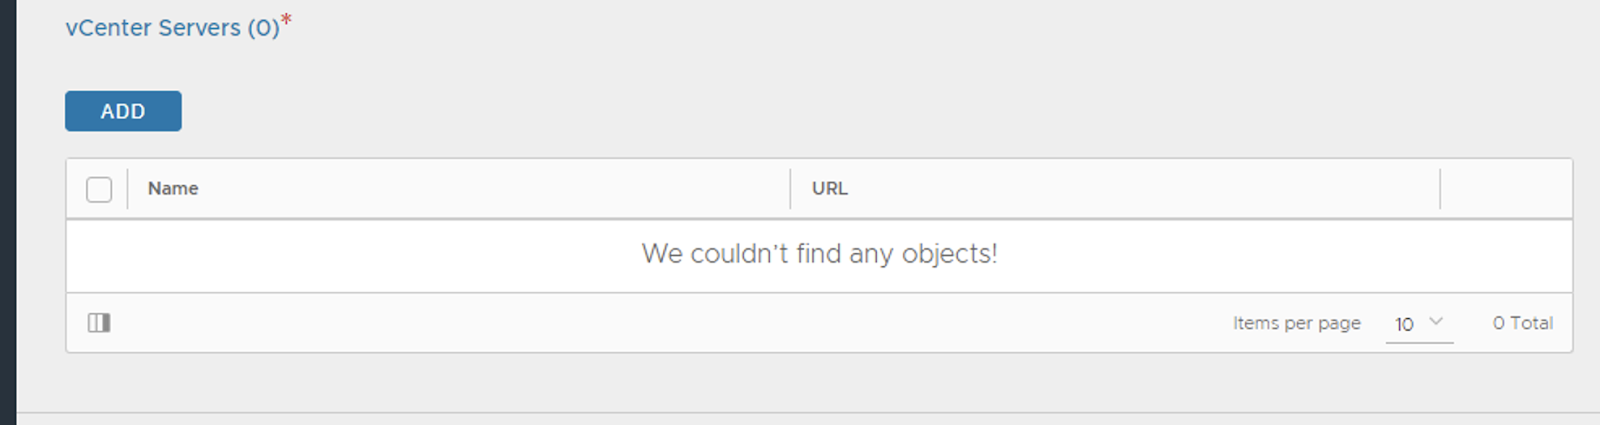
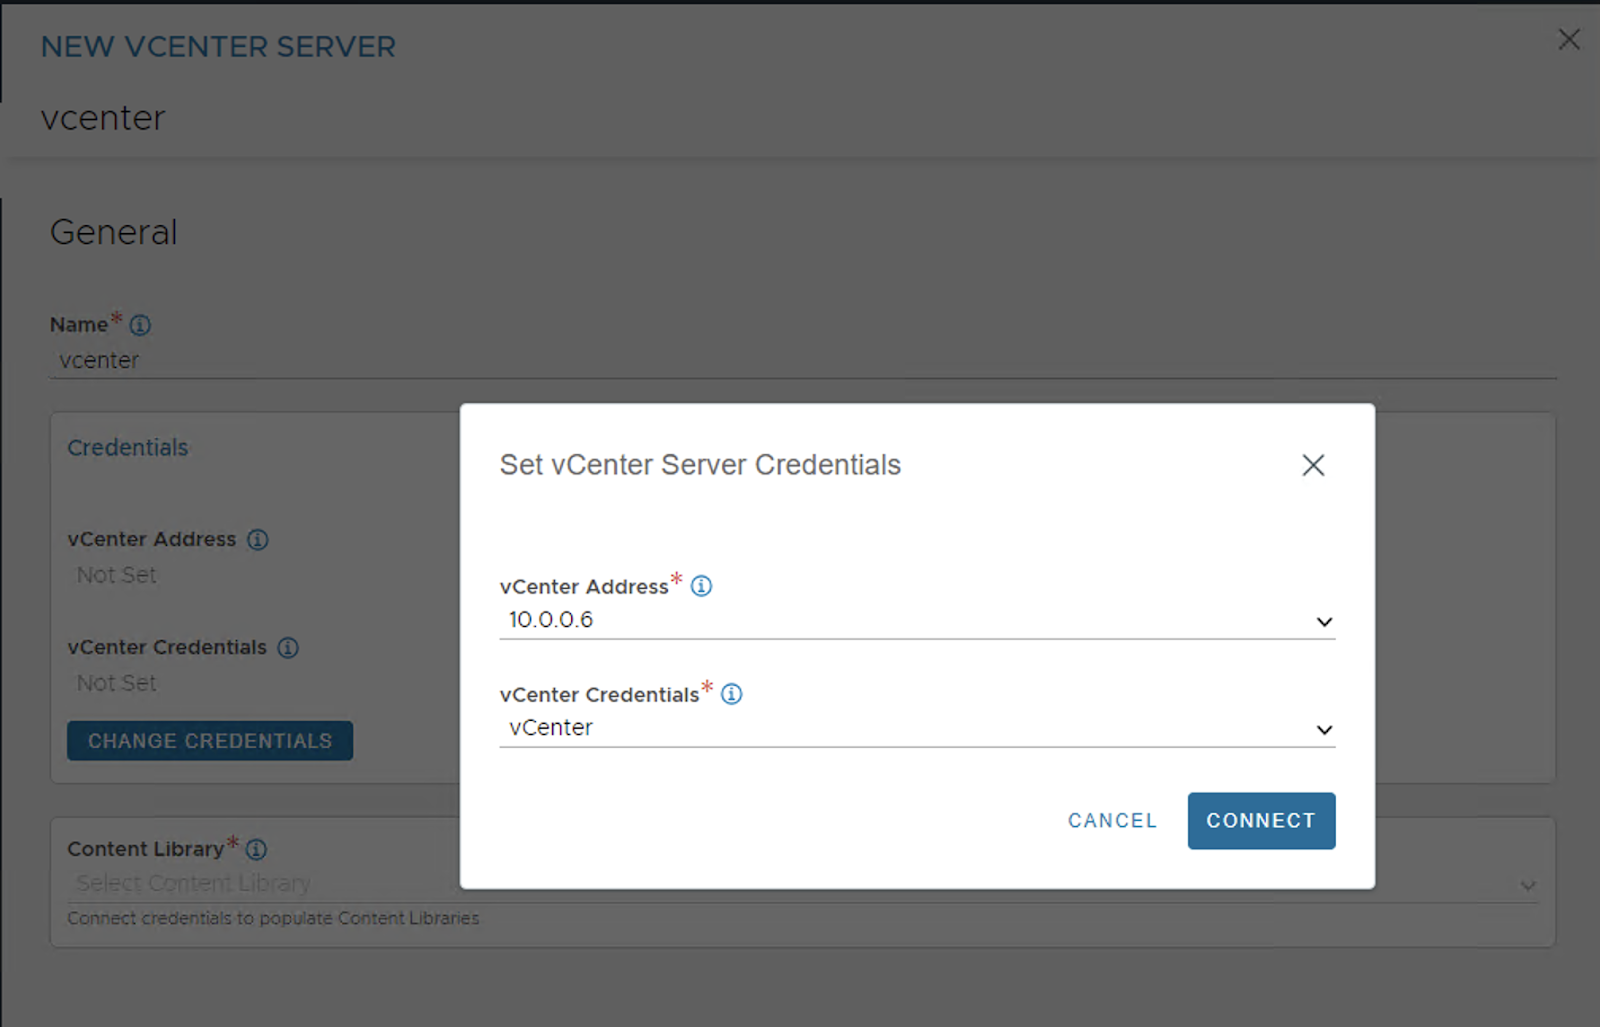
Setup the vCenter Server using the credentials you created earlier.
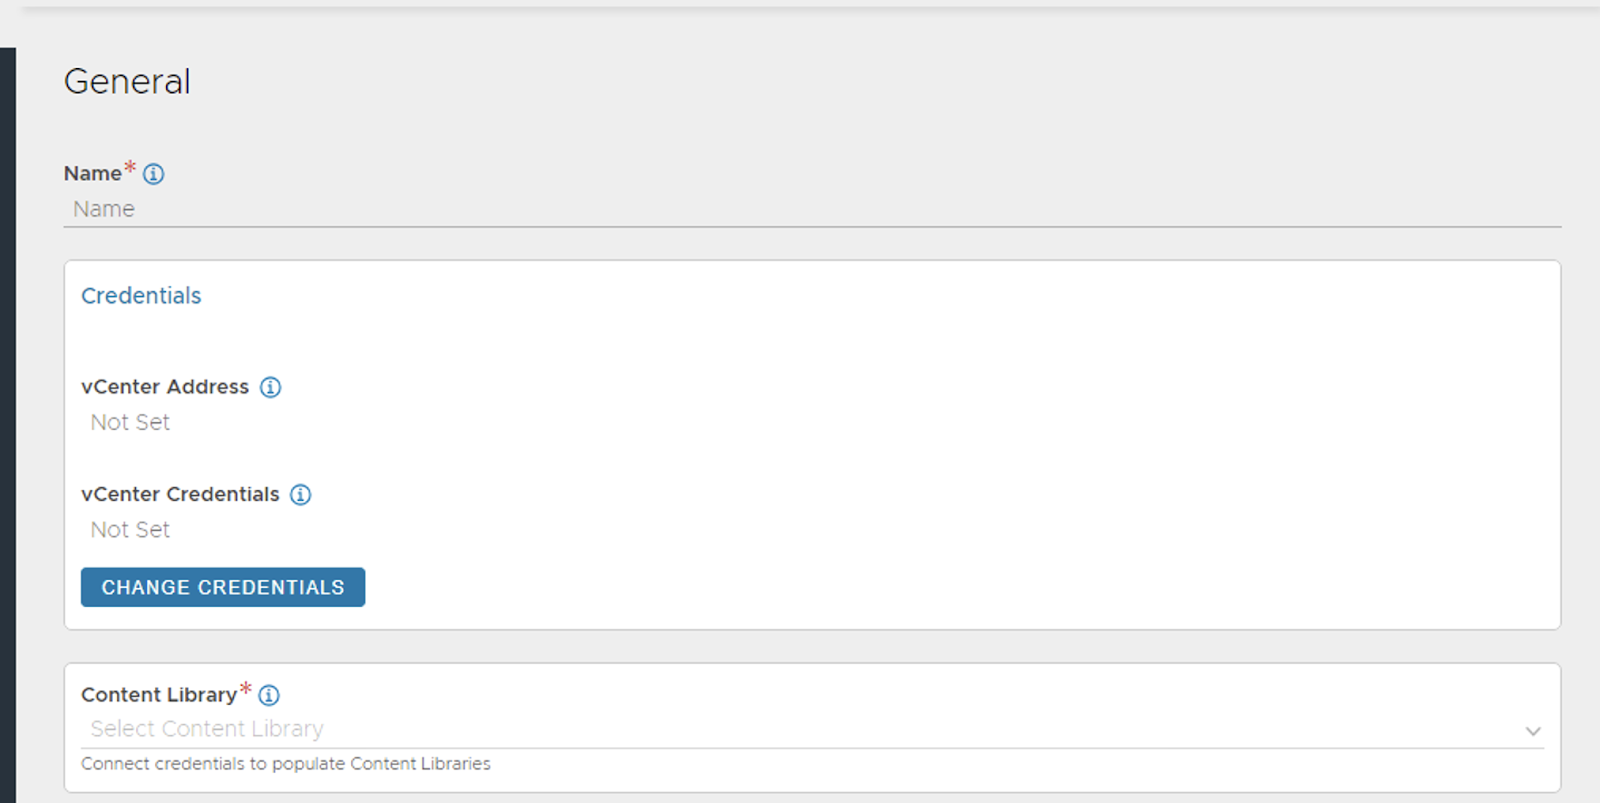
Your Content Library should be auto-populated.


AVI Network Setup
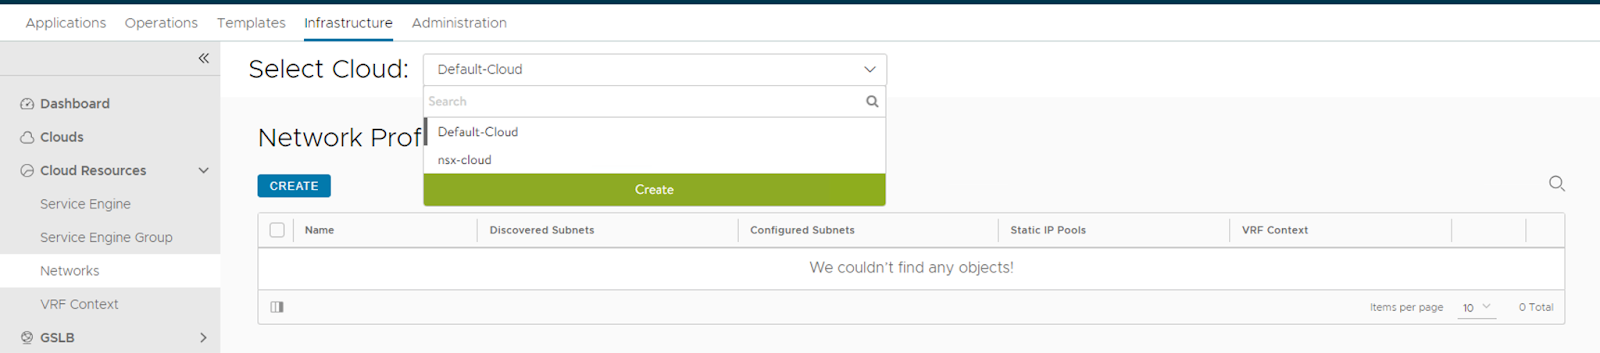
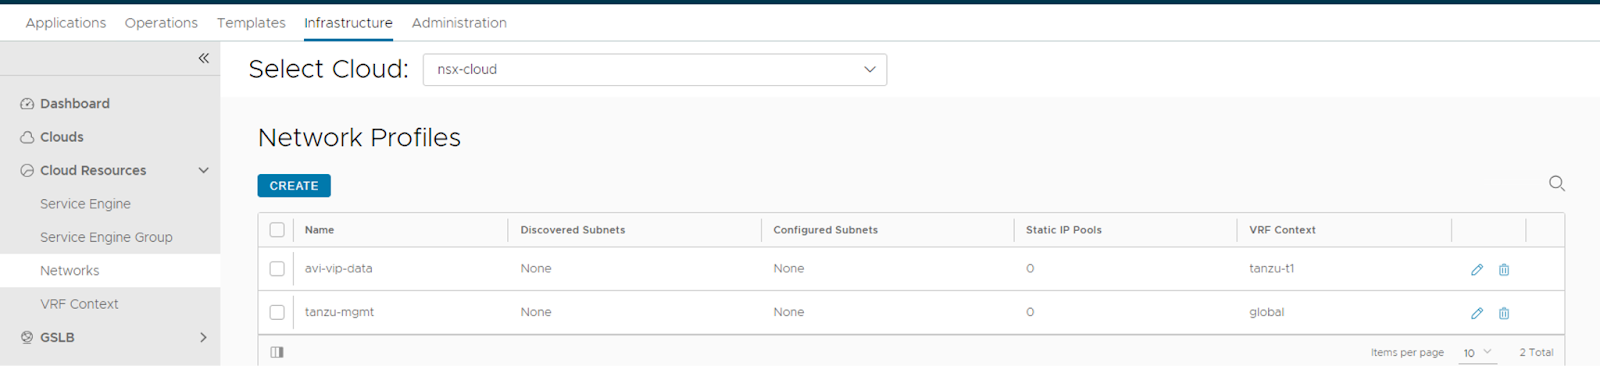
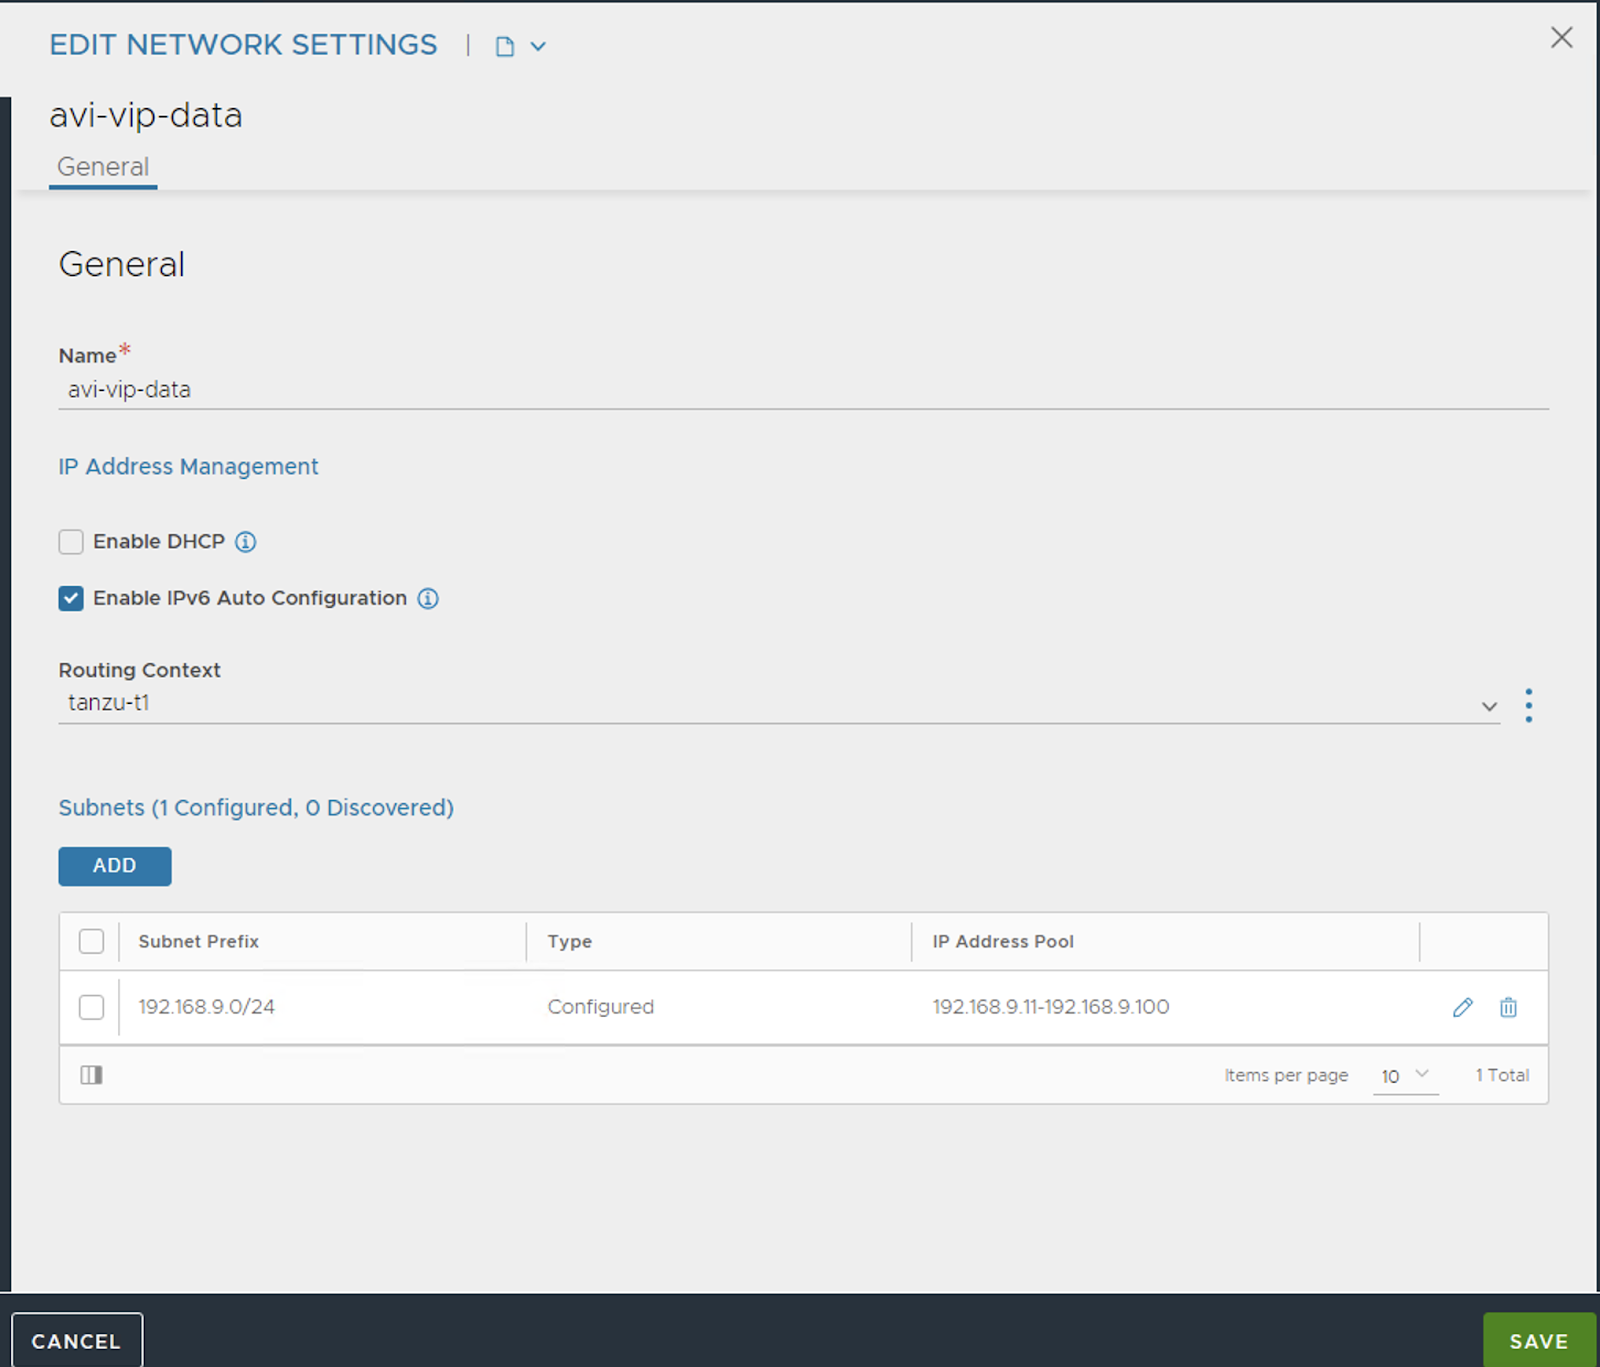
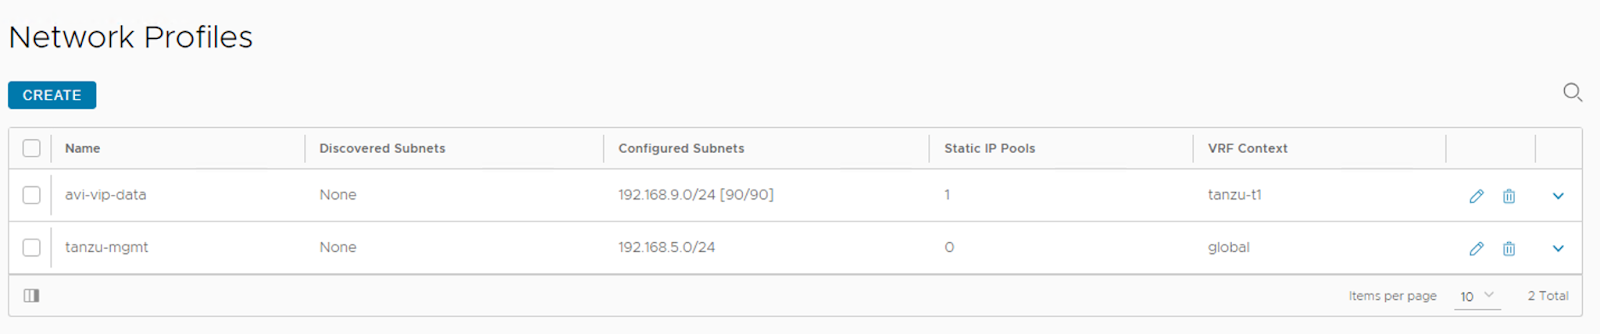
We will now configure a network profile to be used by Cloud. Navigate to “Infrastructure – Cloud Resources – Networks” and choose the cloud that you created from the “Select Cloud” dropdown.
You should now see both the networks that you created while setting up the cloud.
Note: Only SE Mgmt interface supports DHCP, Data interface needs IP and a static route pointing to the Data network’s gateway needs to be configured as well.
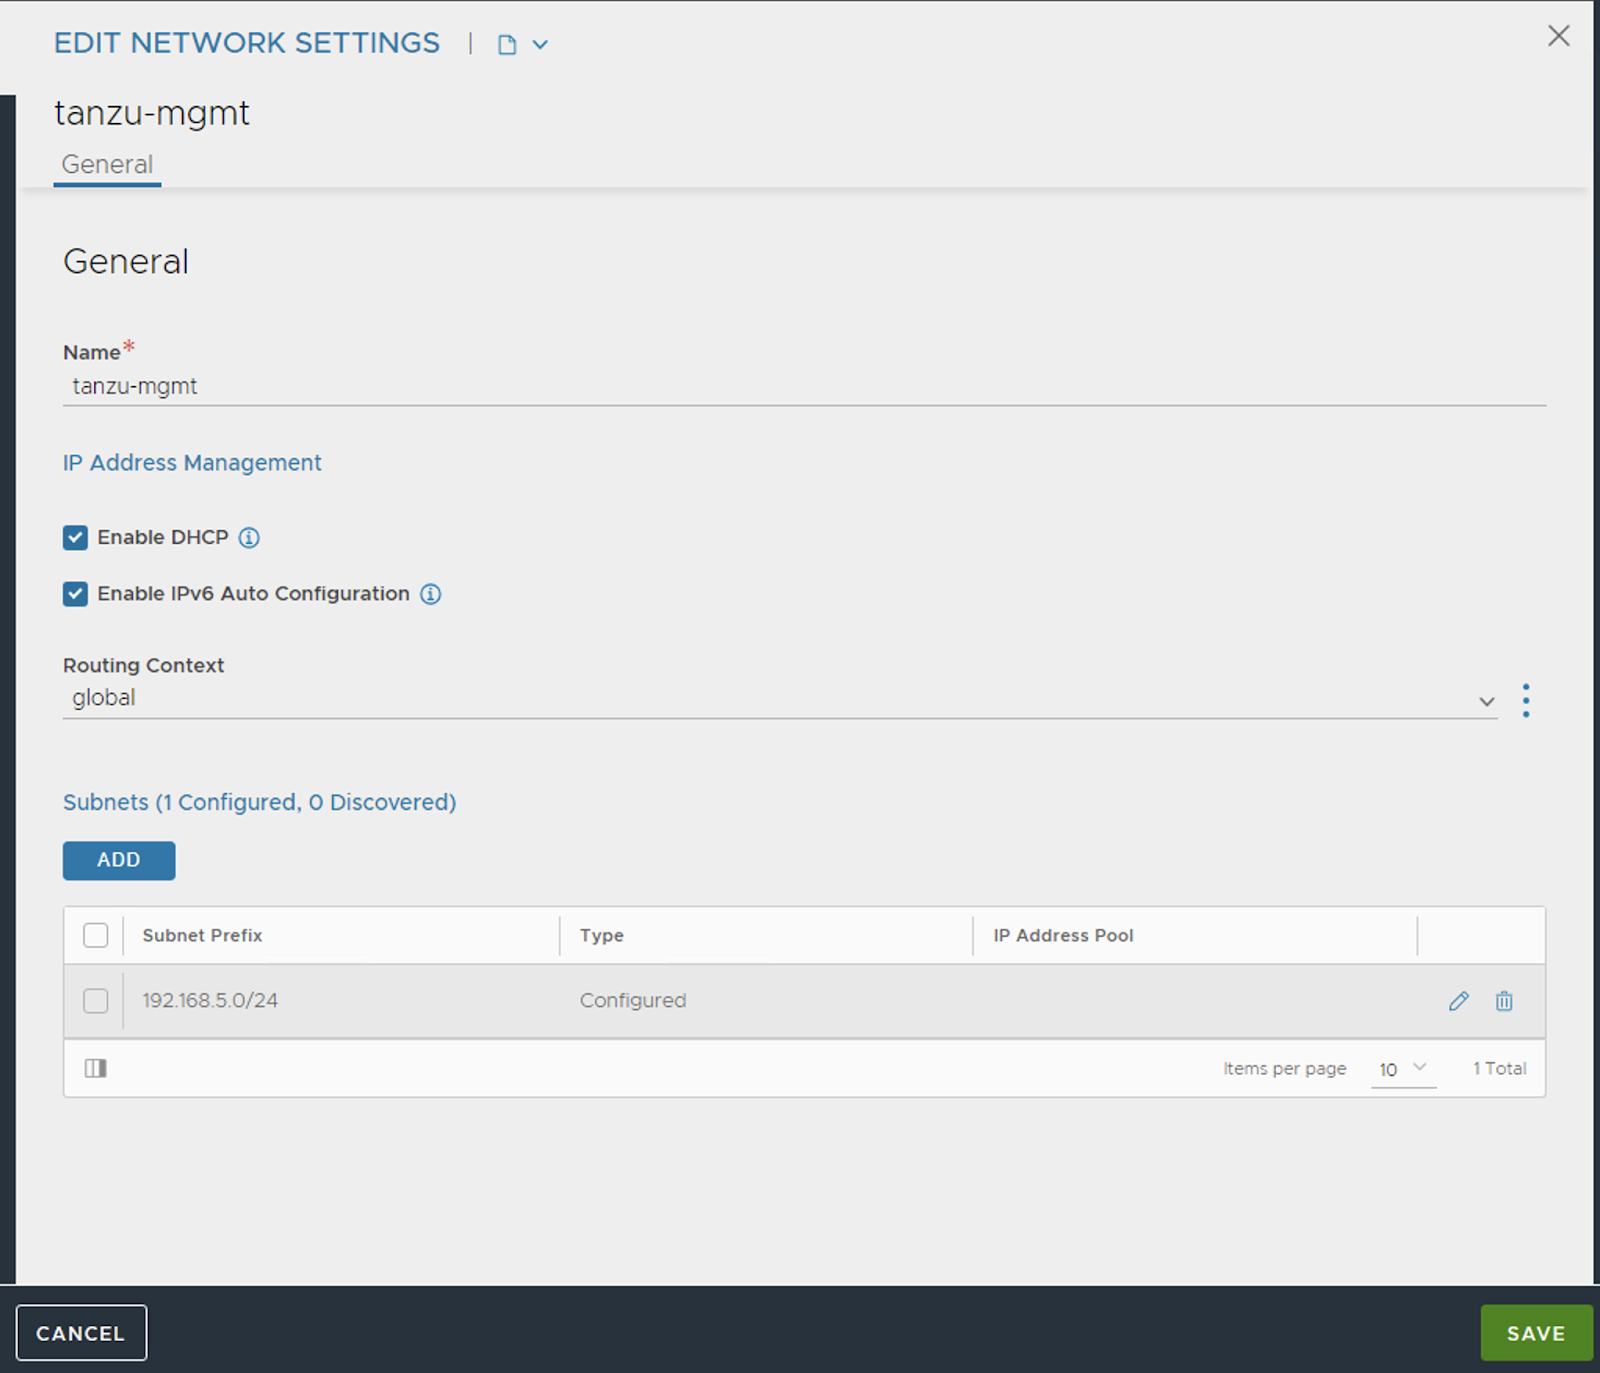
Select the management network and click the pencil icon to edit it.
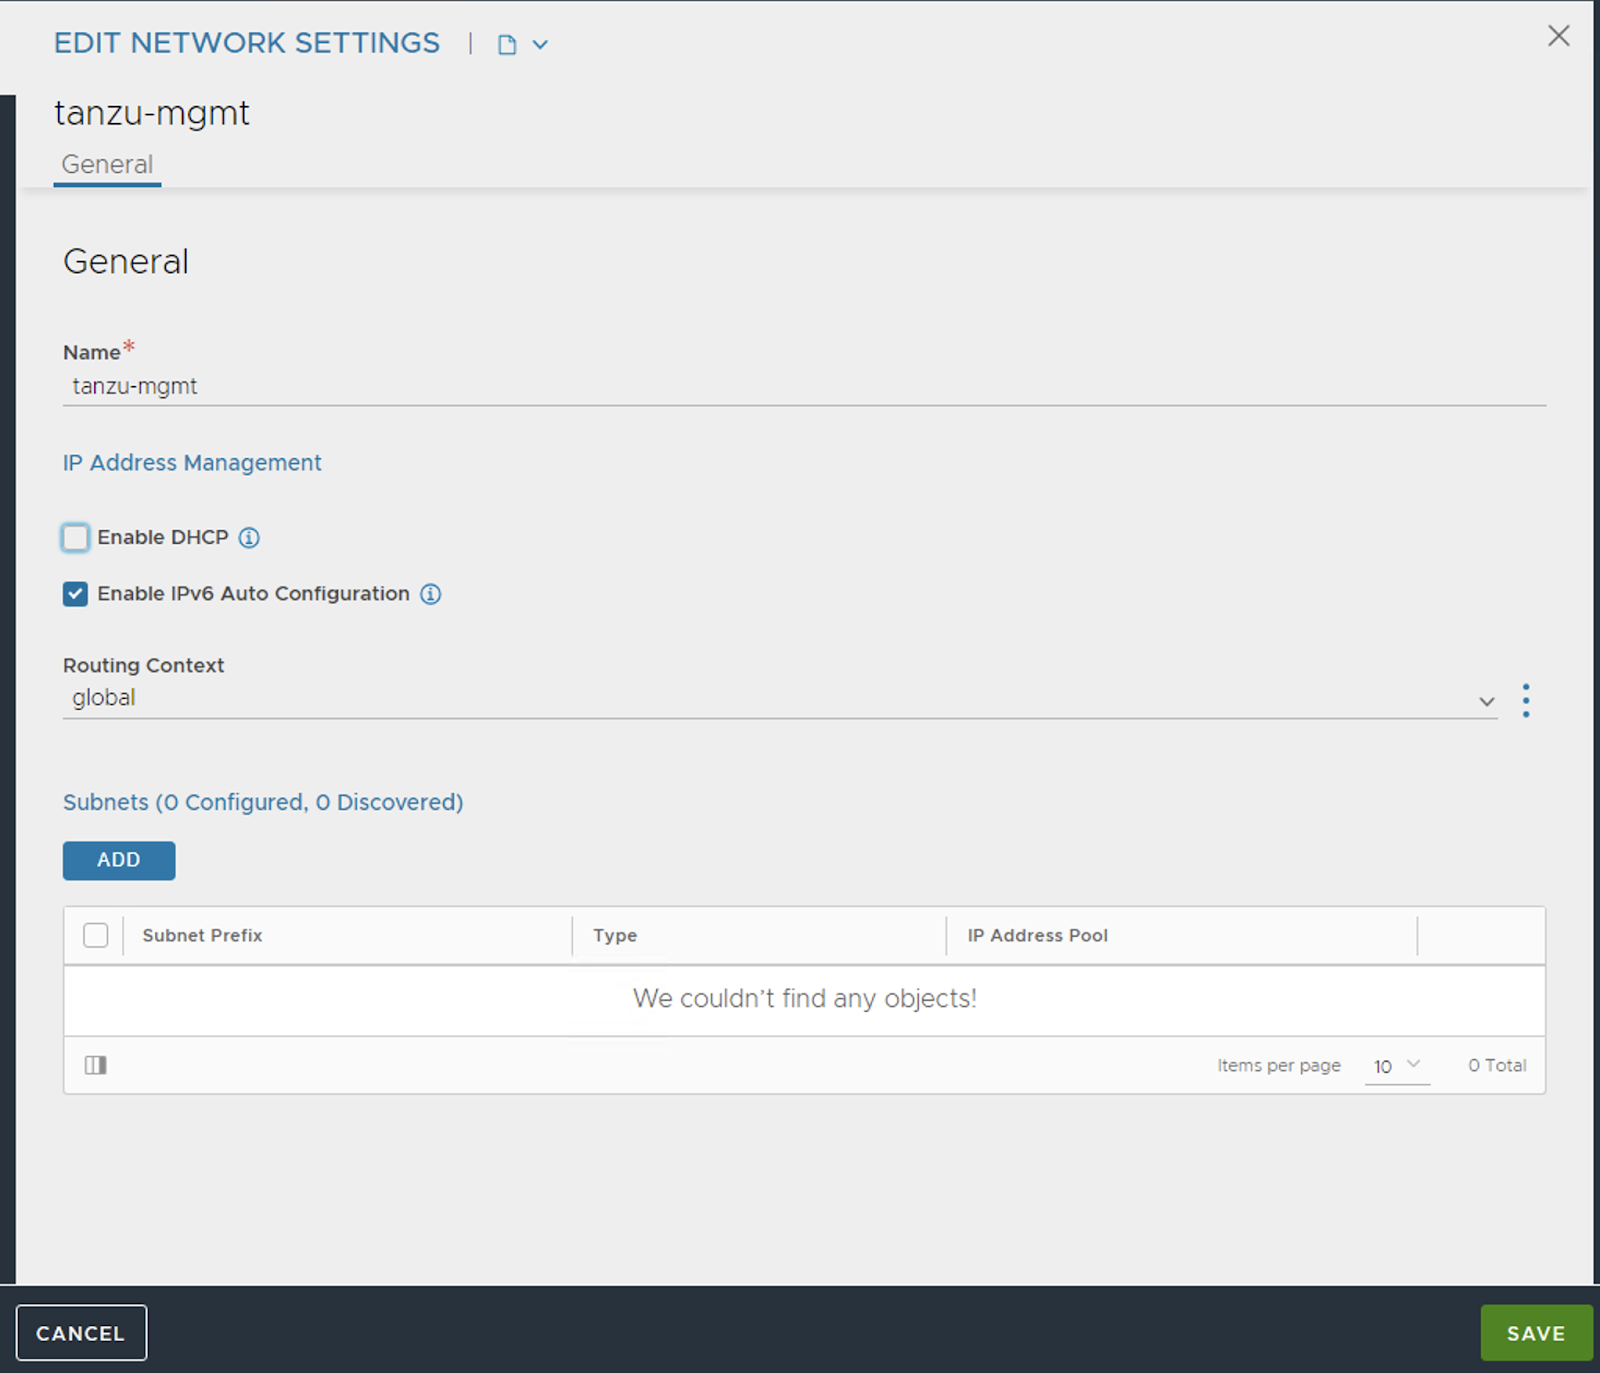
Enable DHCP and configure subnet by clicking add against the subnets.
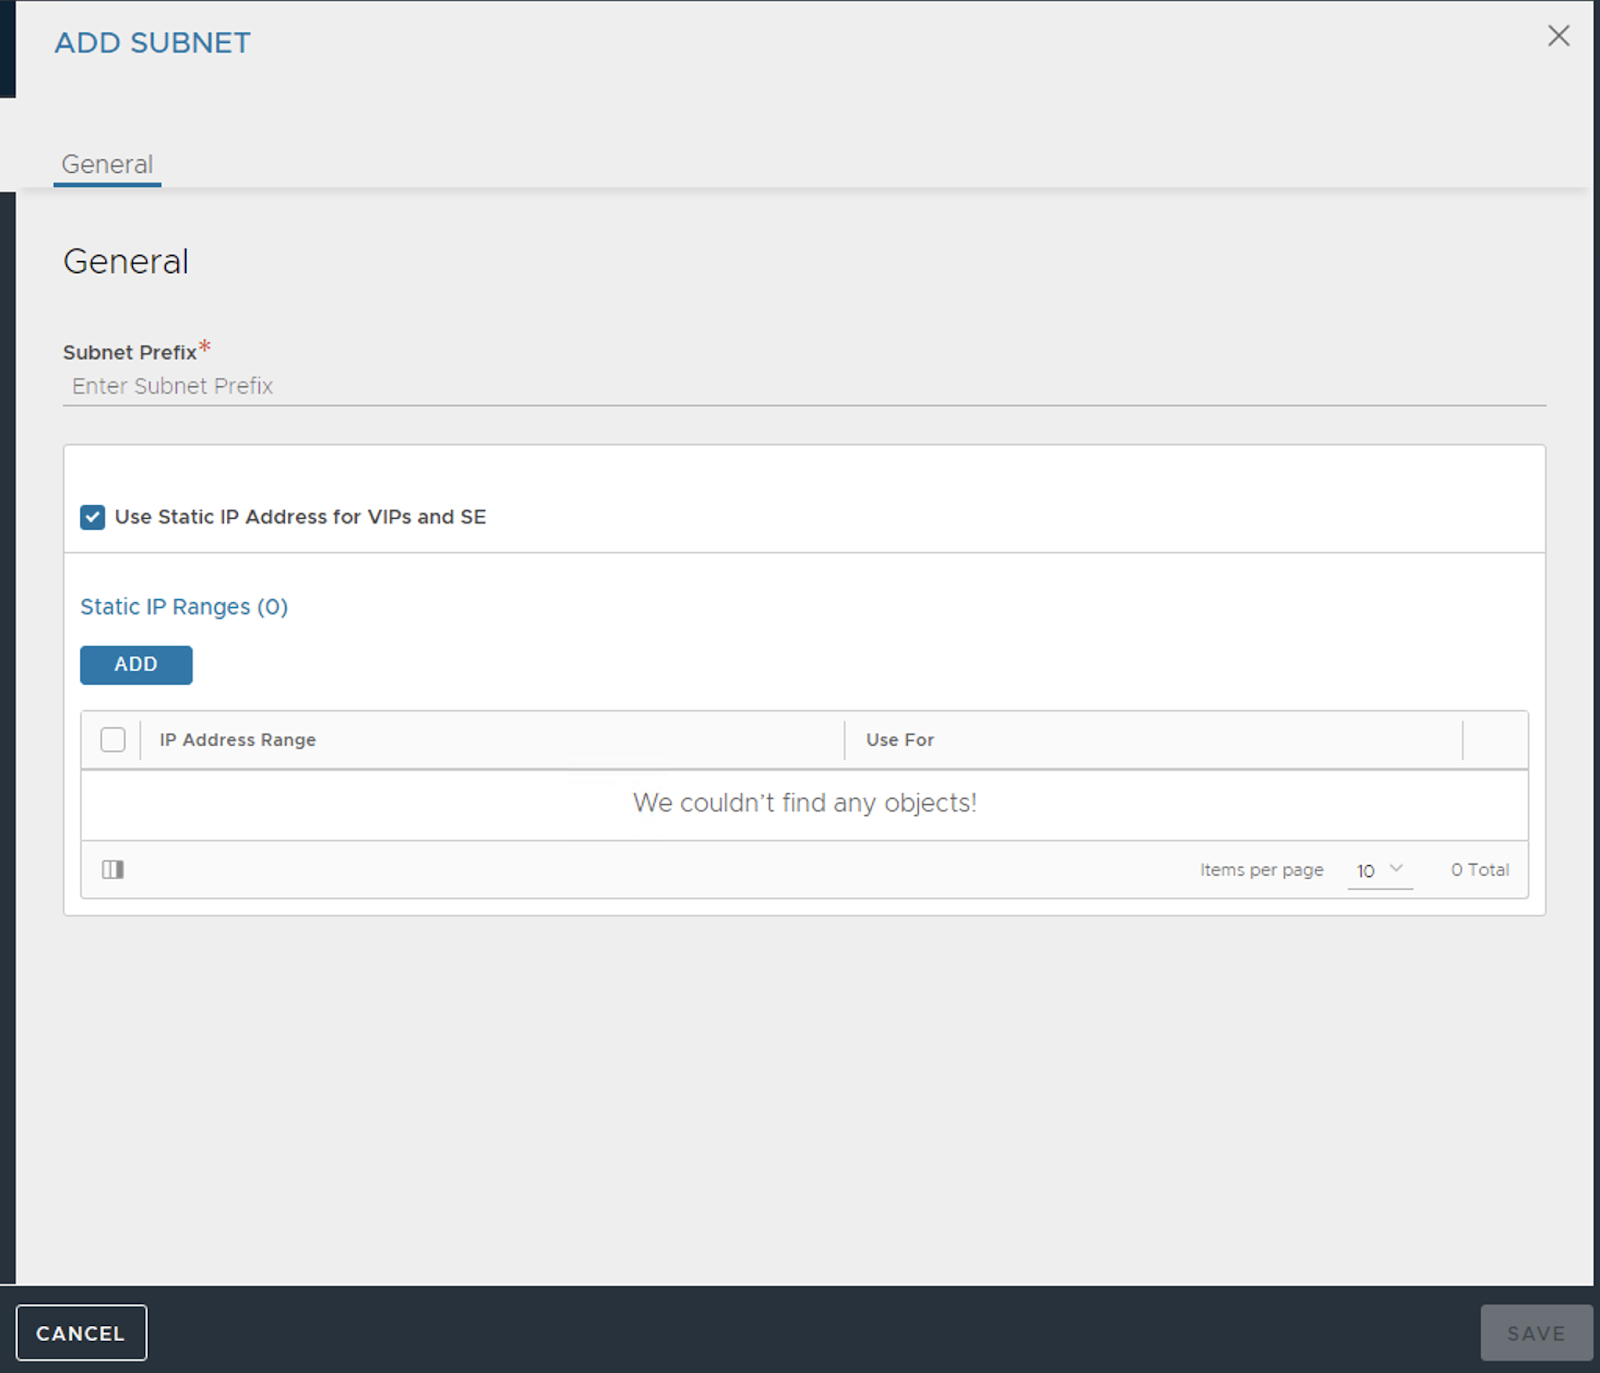
Enter the management subnet and *uncheck* the “Use Static IP Address for VIPs and SE”
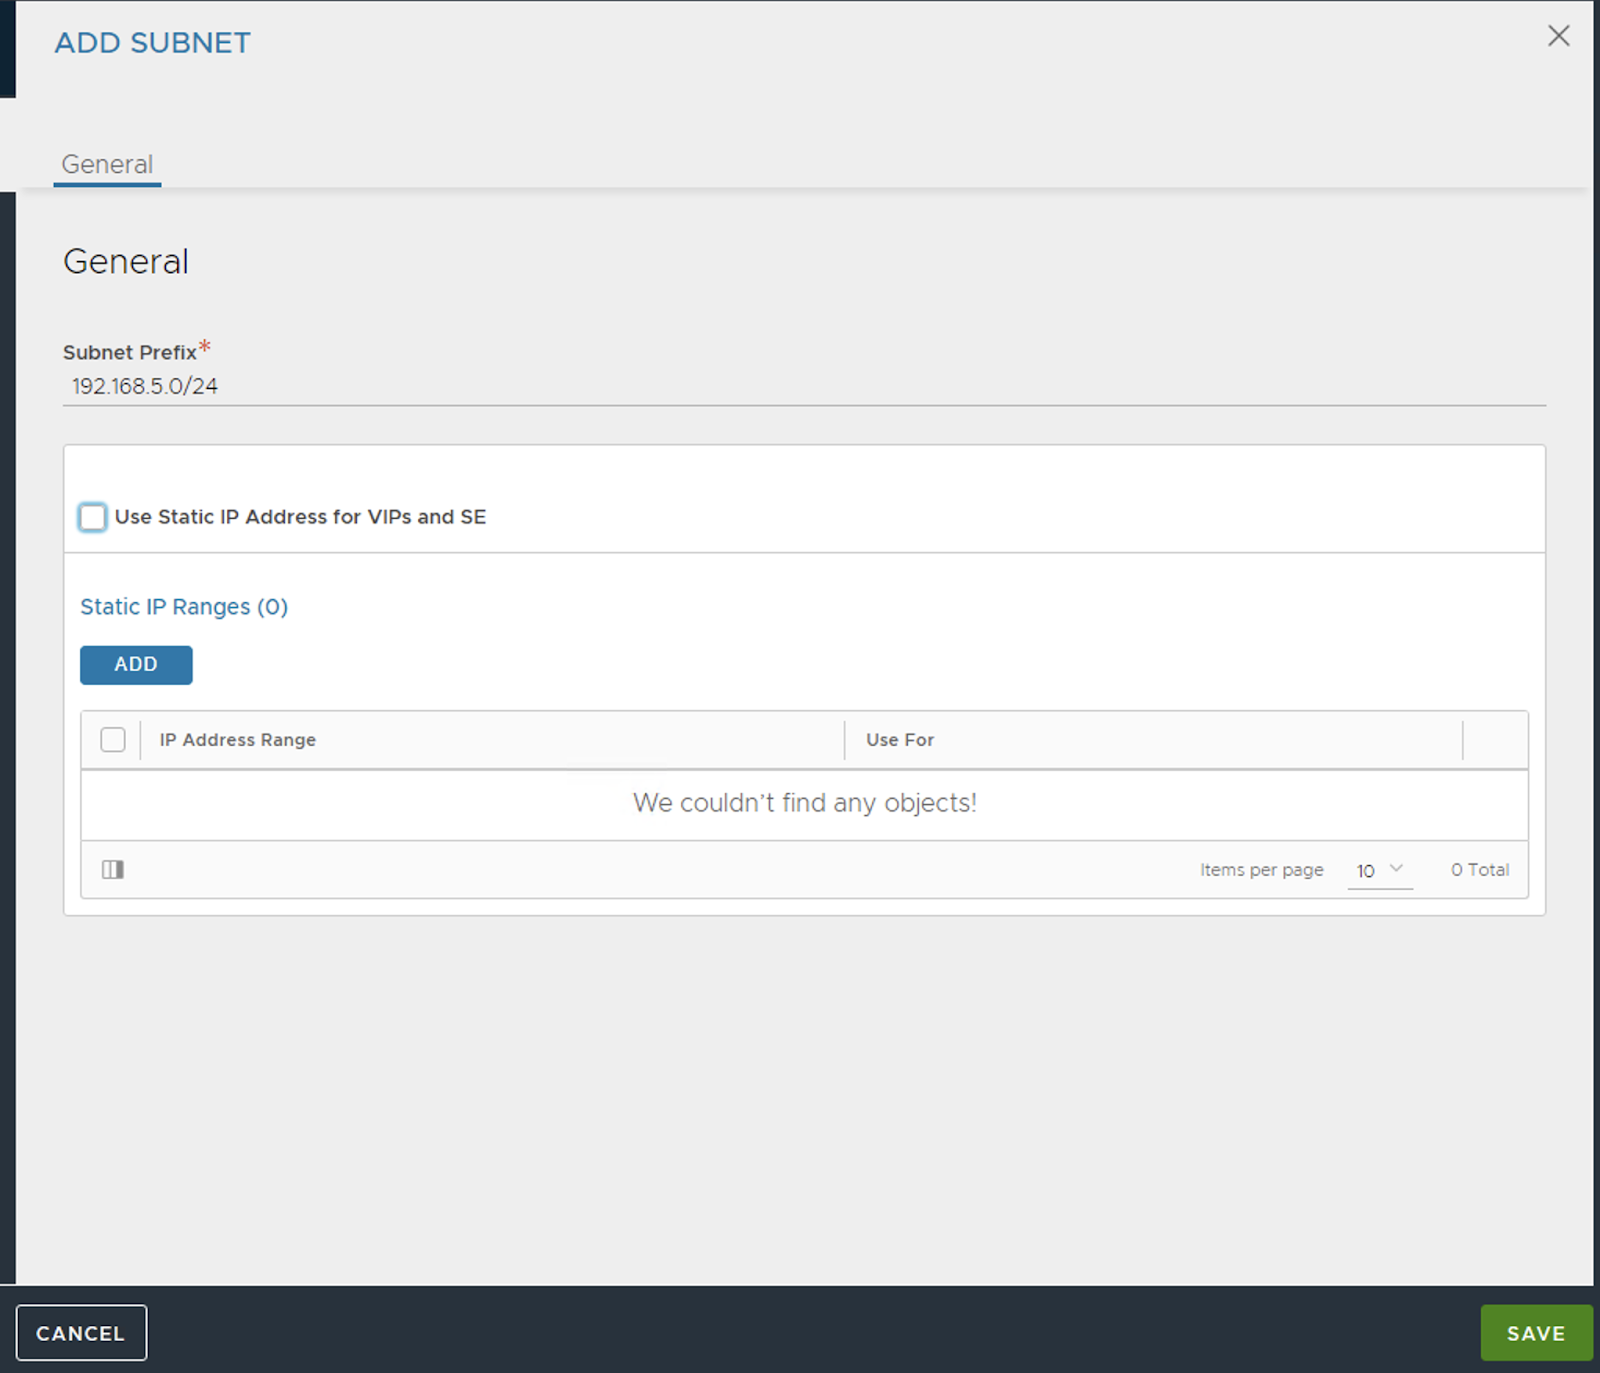

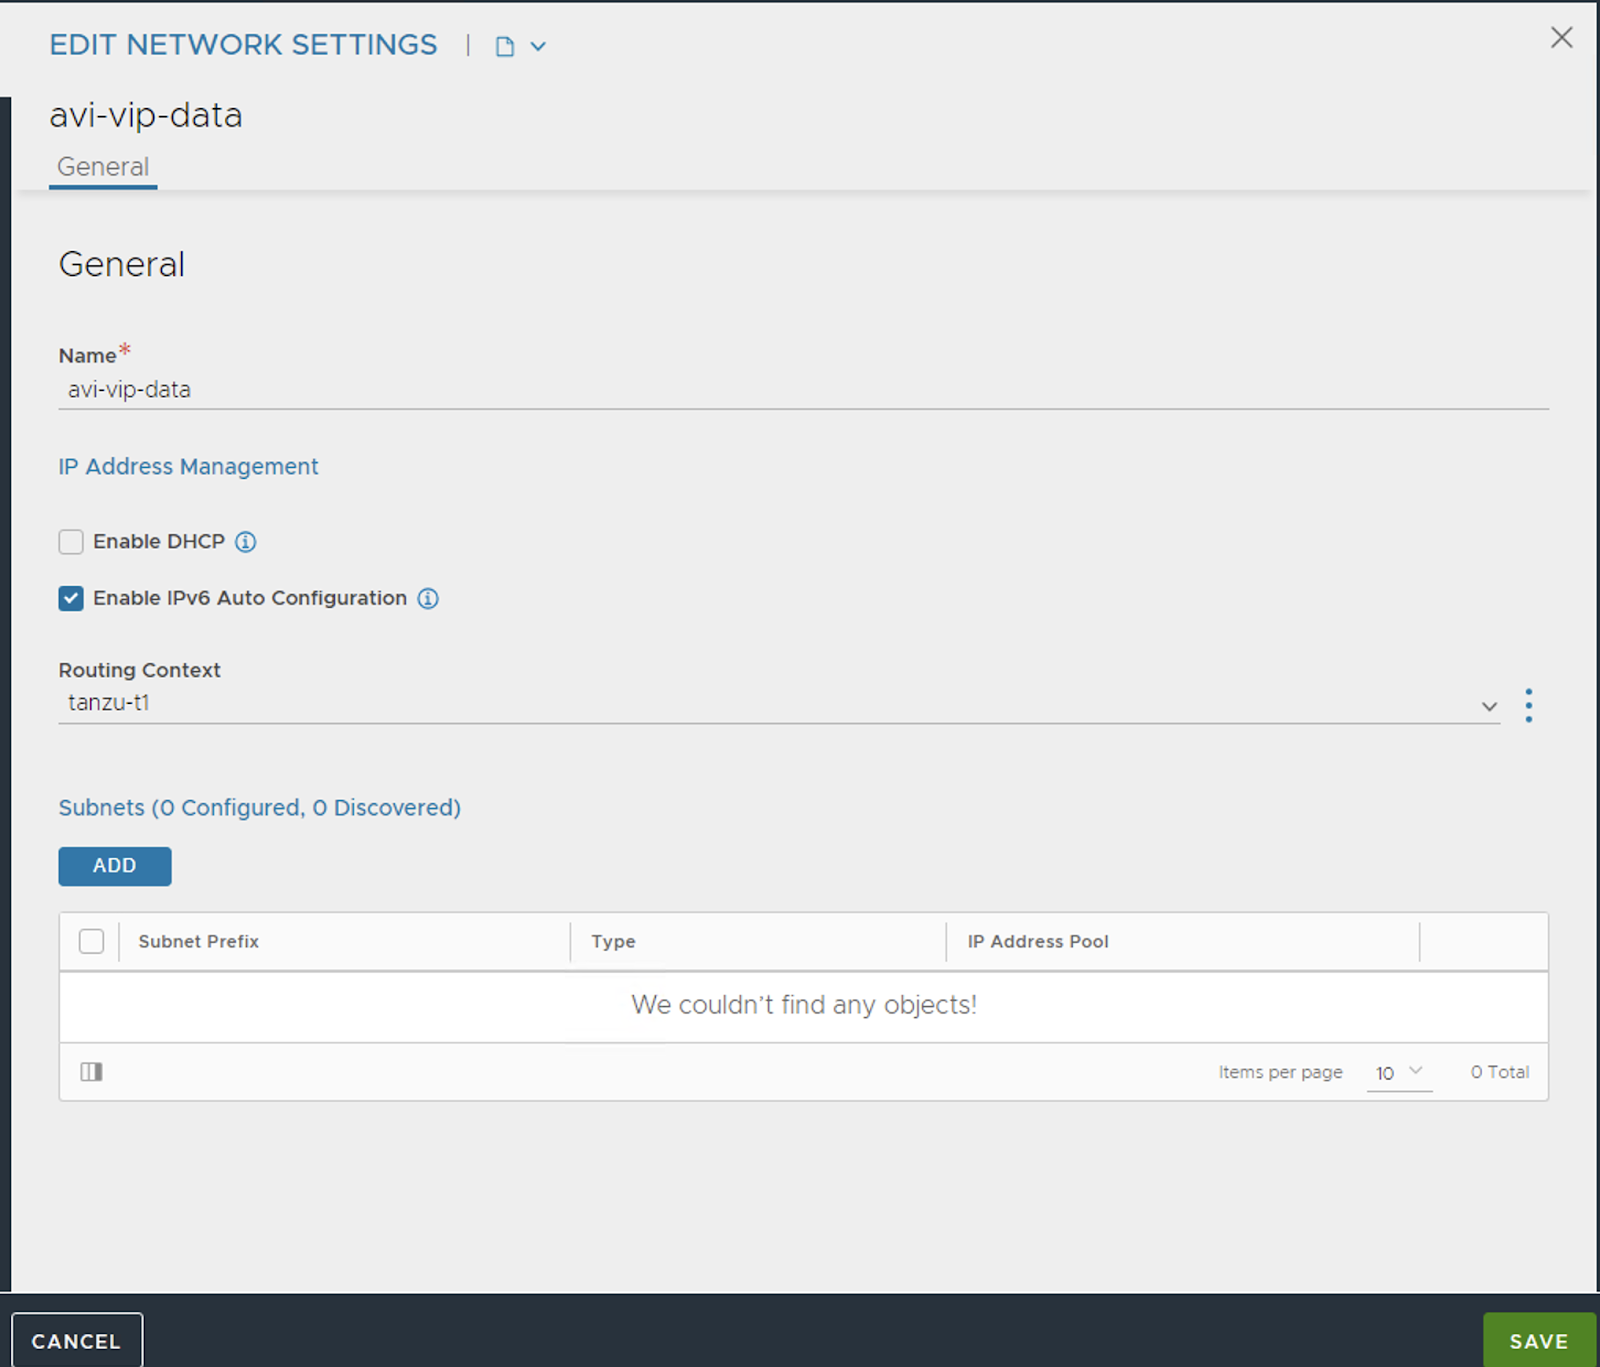
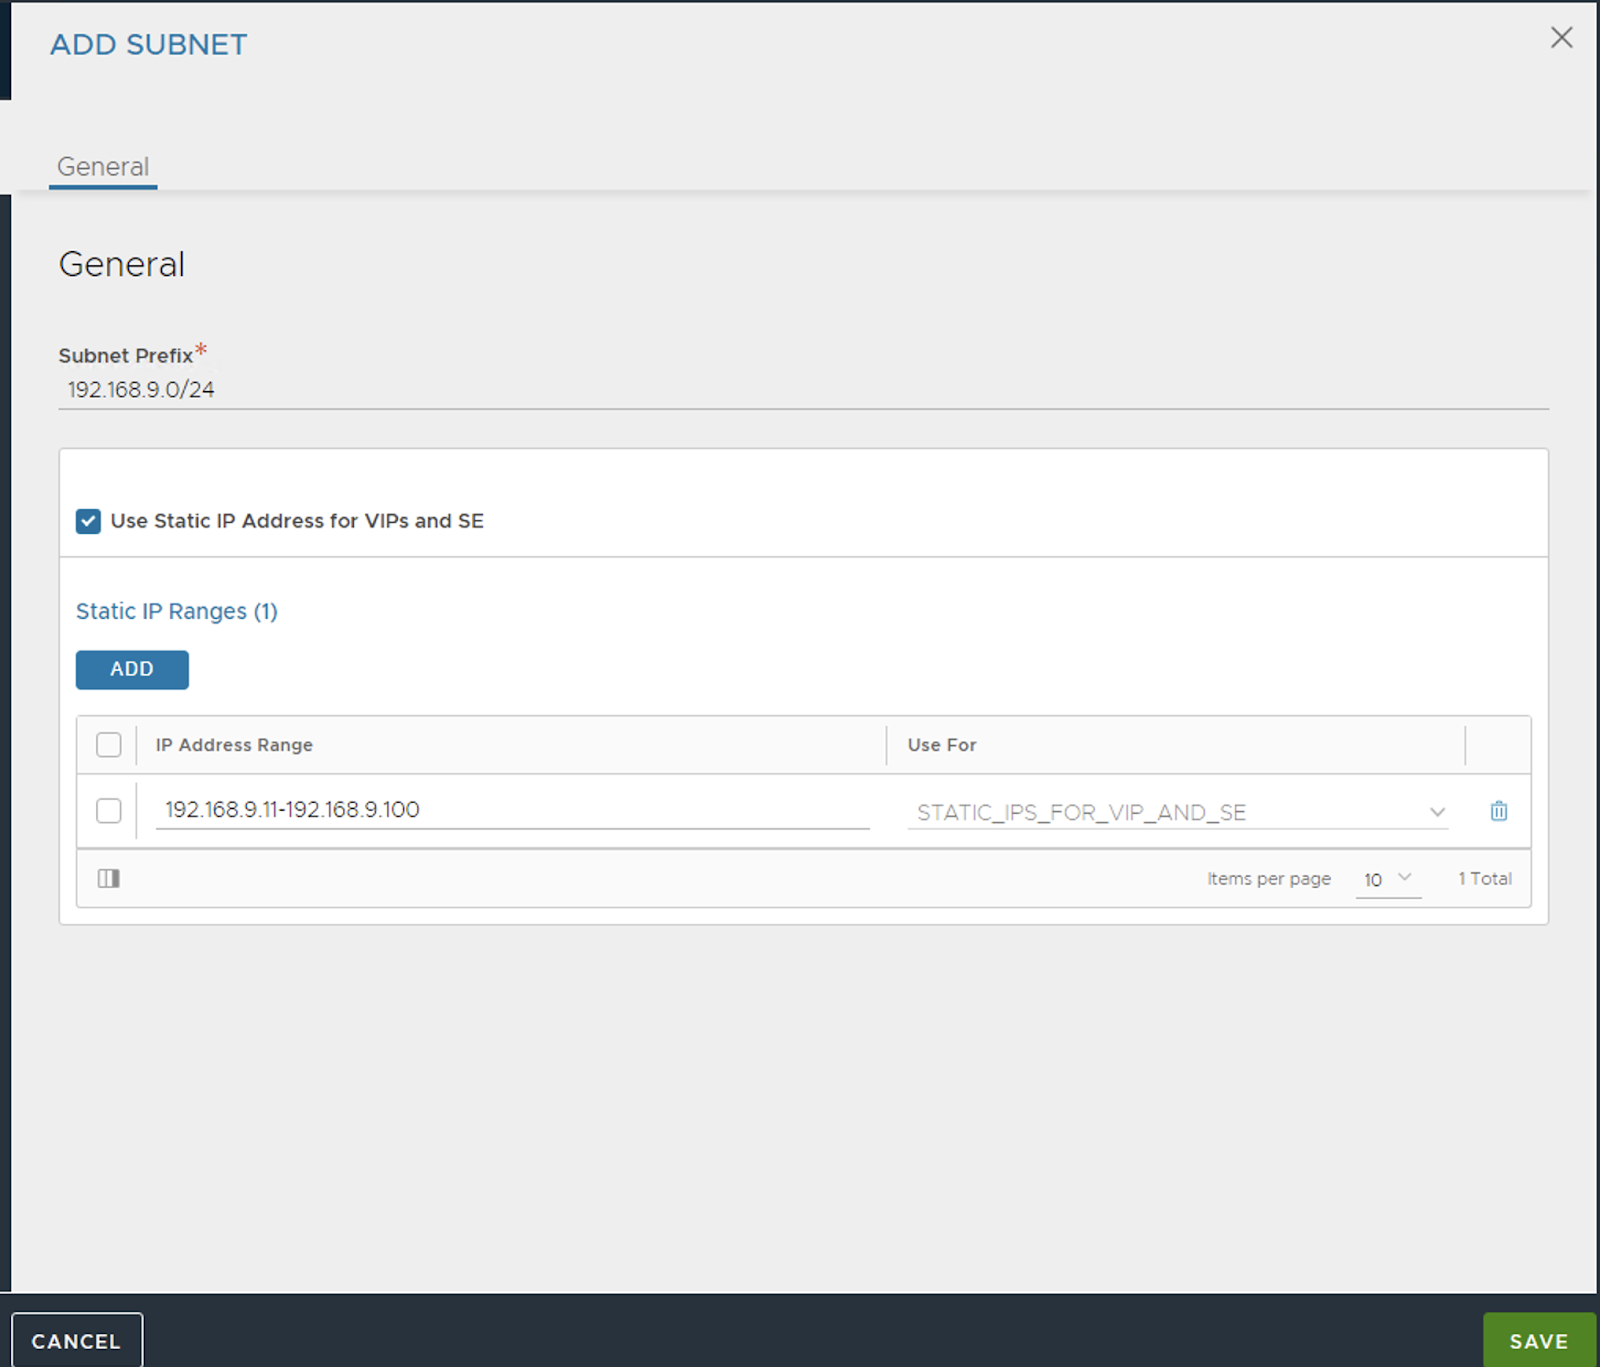
Similarly edit your data network and update the subnet. (DO NOT ENABLE DHCP and LEAVE THE CHECKBOX SELECTED FOR “USE STATIC IP ADDRESS FOR VIPs AND SE”)
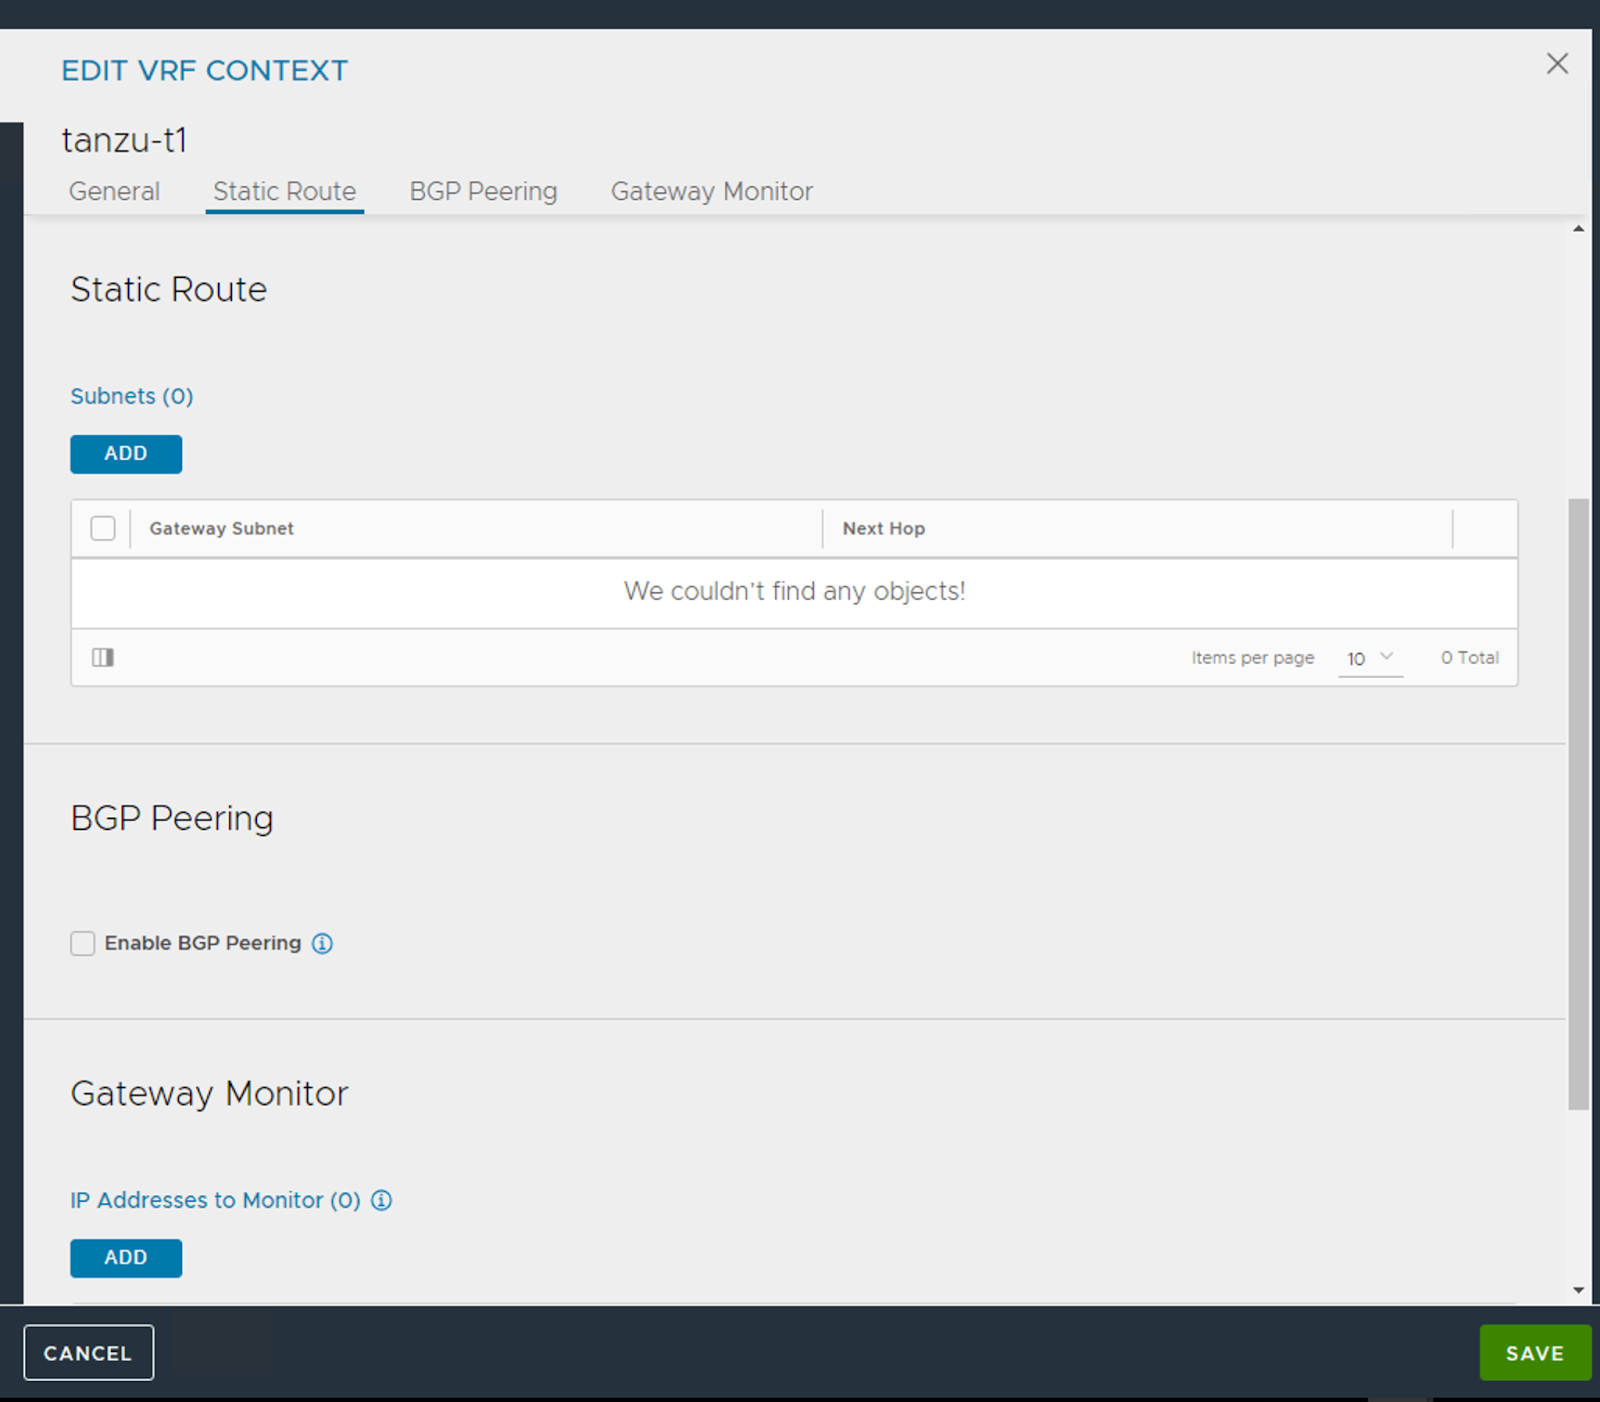
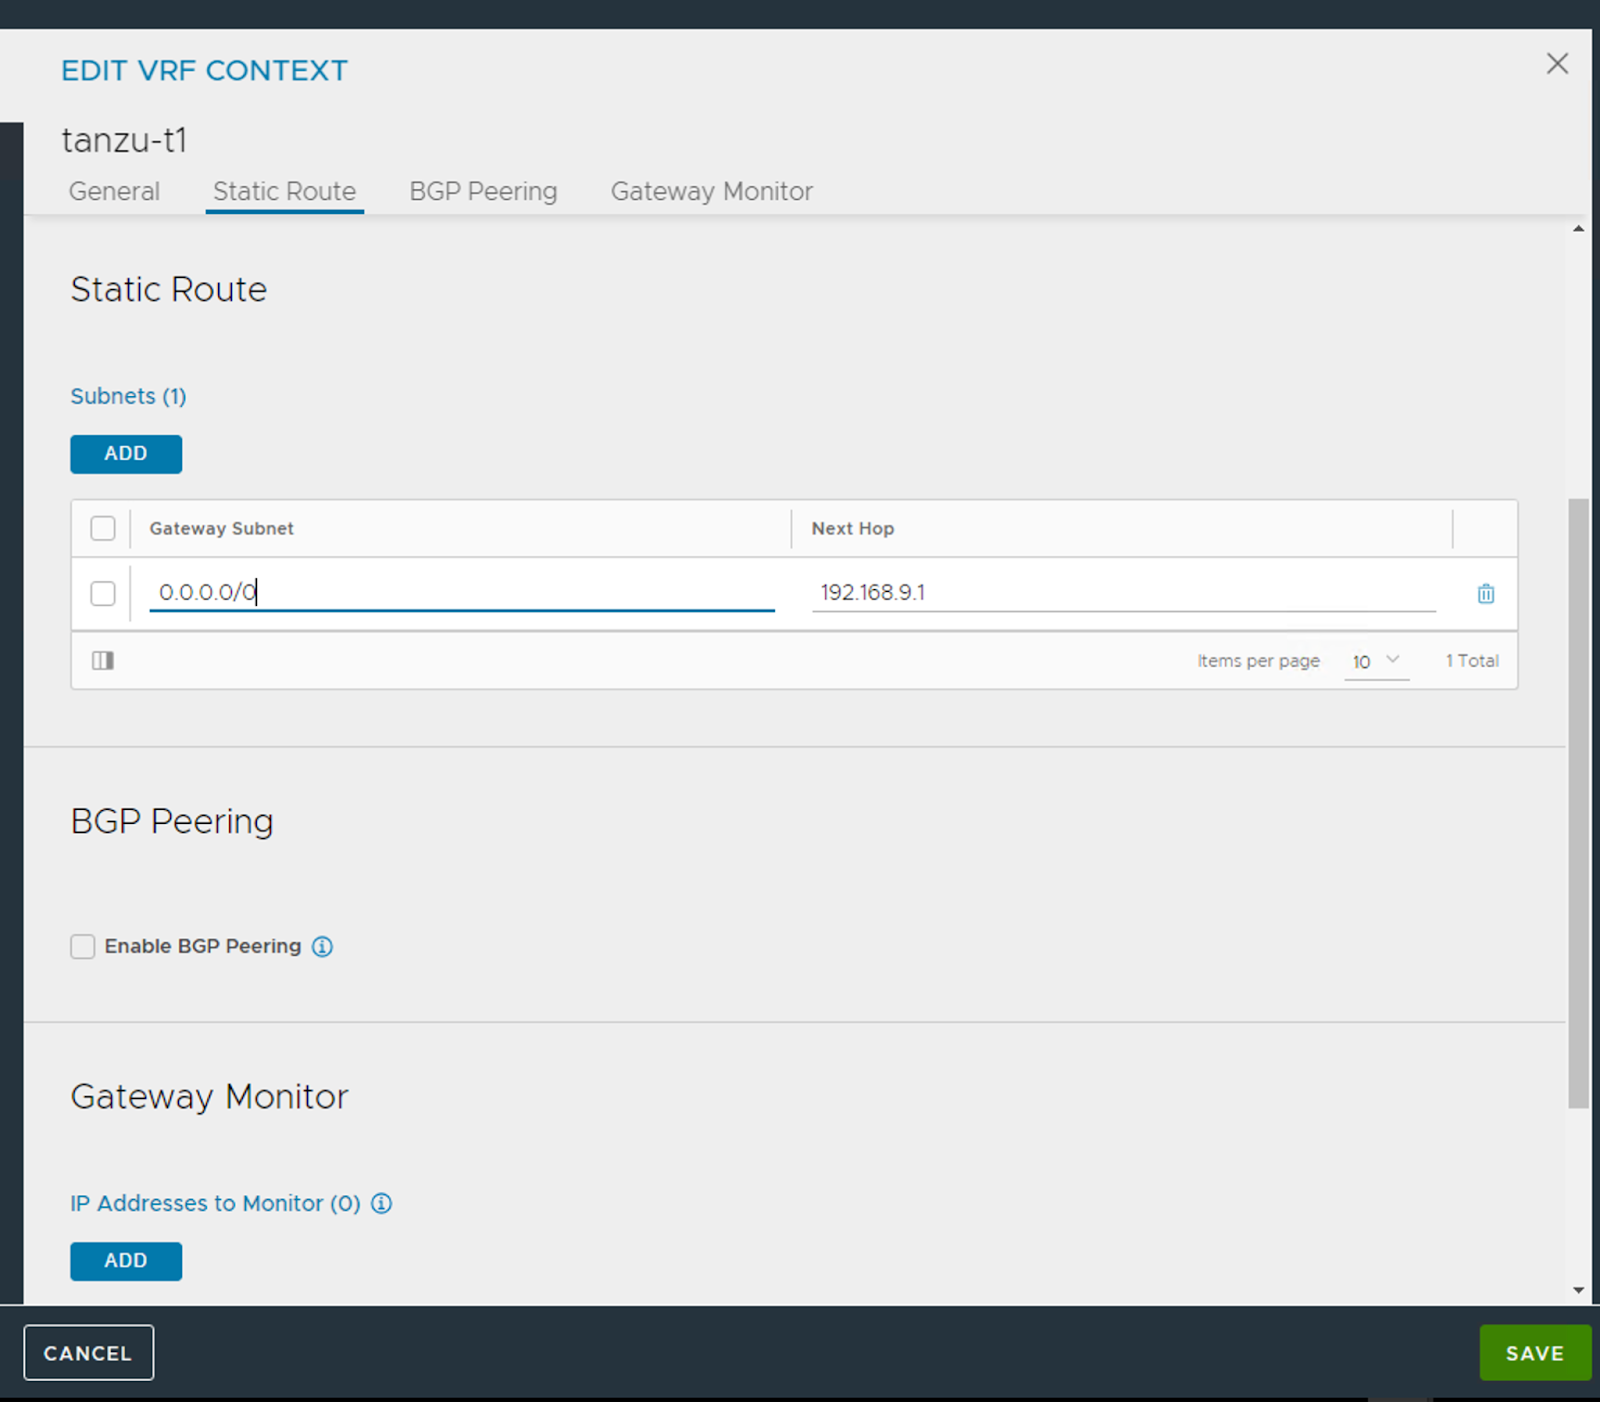
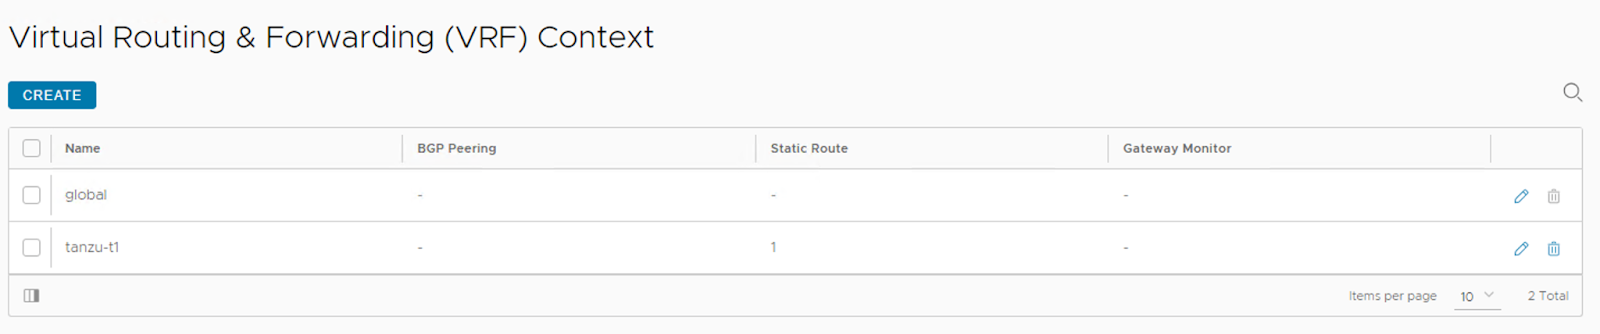
Static Route
Navigate to “Infrastructure – Cloud Resources – VRF Context” and select the cloud that you created.
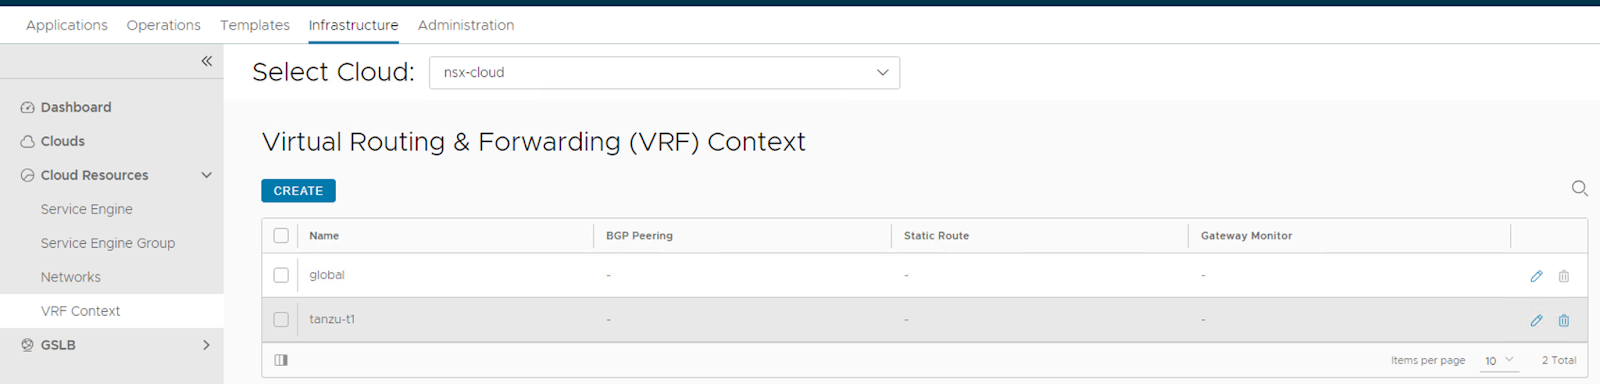
Edit the T1 context and add the static route (pointing to the gateway of the data/vip network – 192.168.9.1 in my case) by following the prompts as shown below.
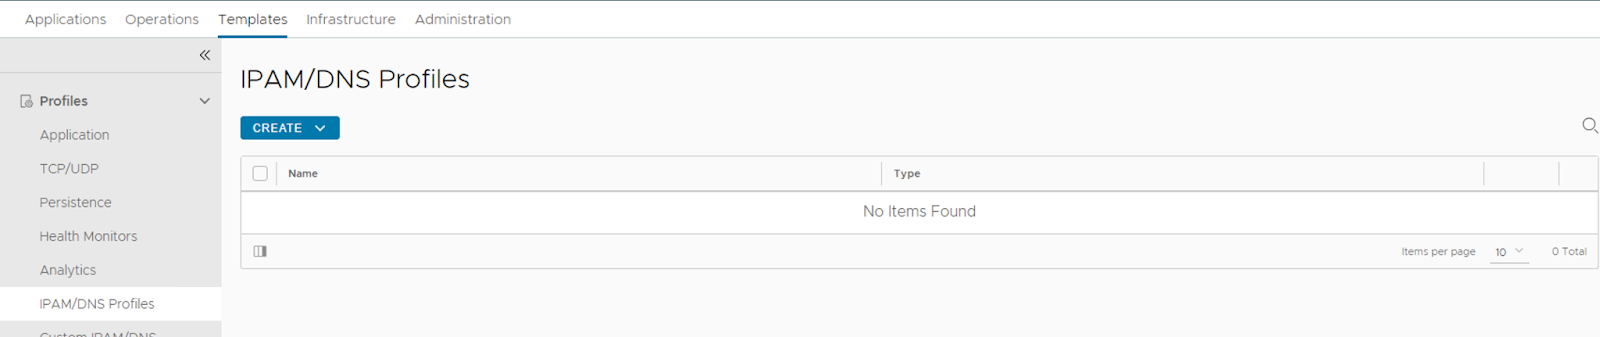
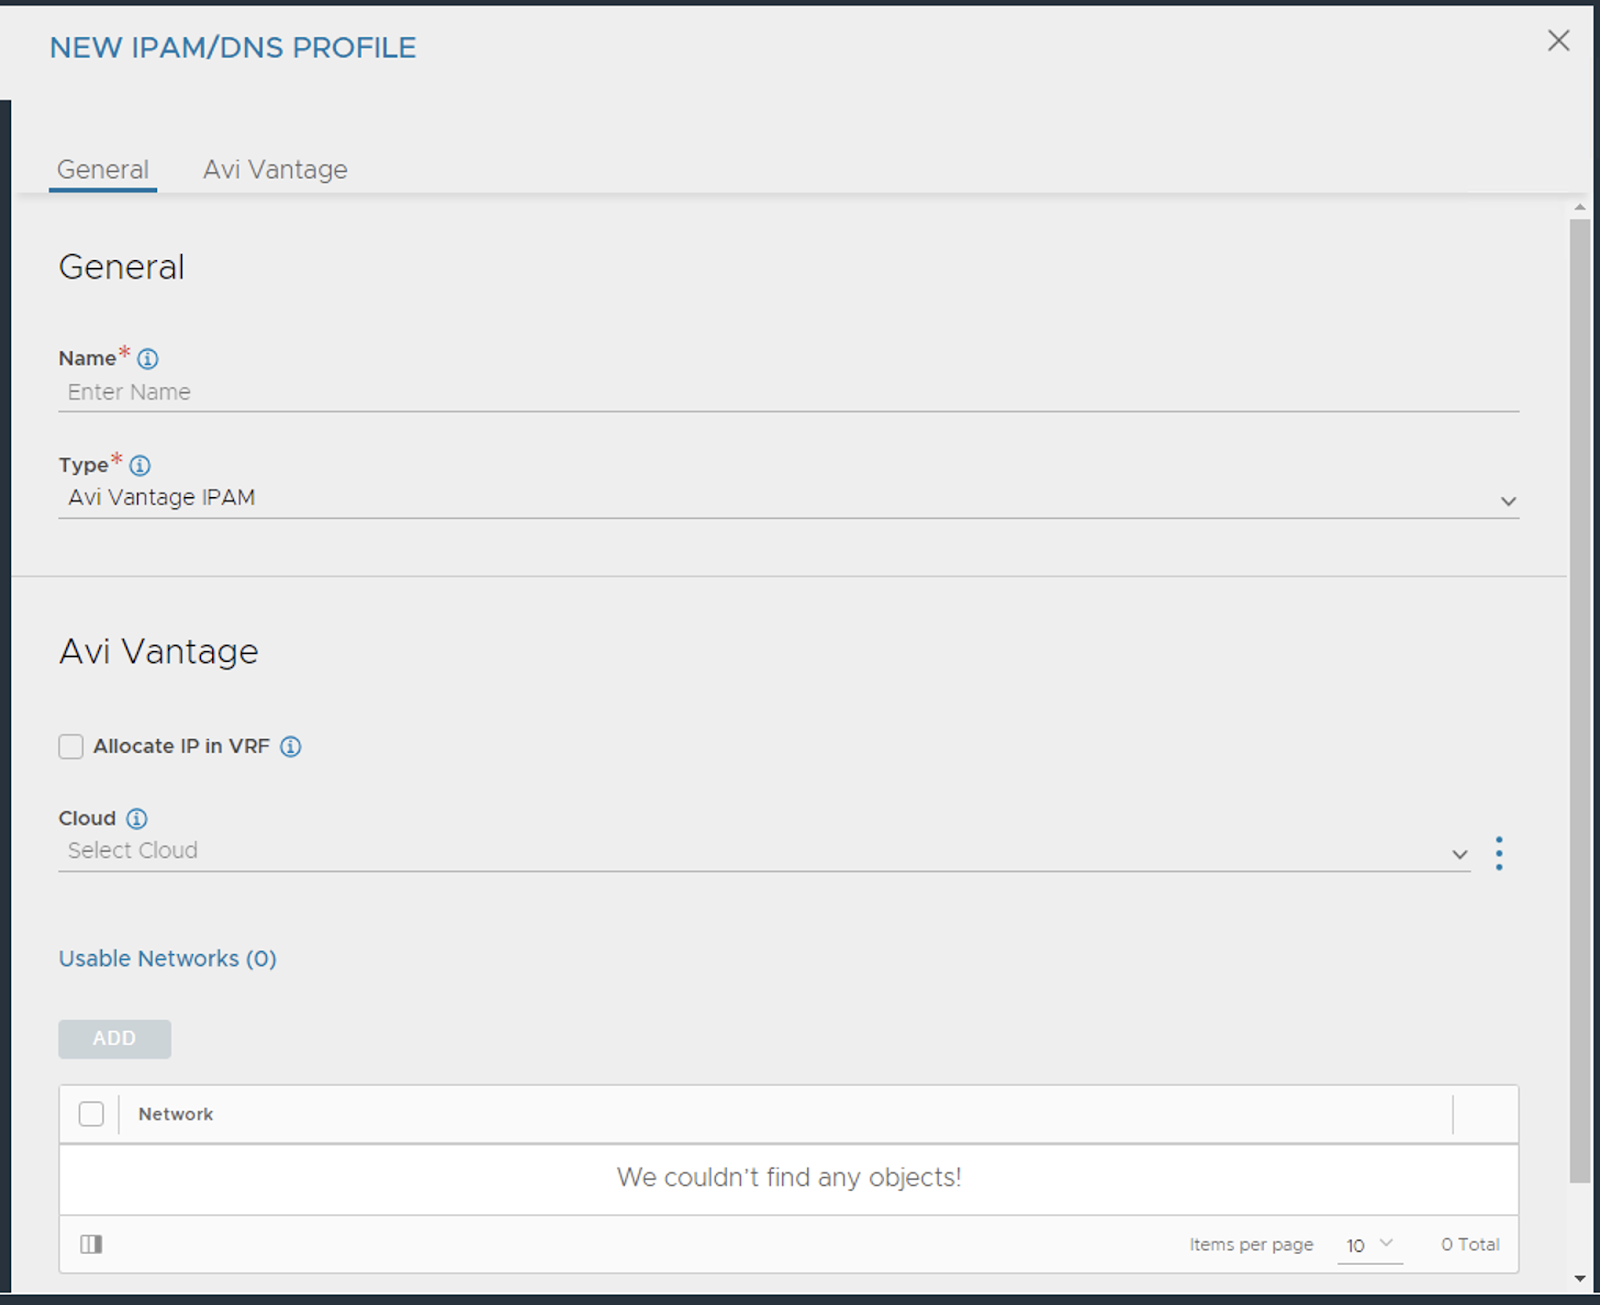
IPAM Profile
An IPAM profile is needed for VIPs to be auto-allocated when a VS is created. To create an IPAM profile, navigate to “Templates – IPAM/DNS Profiles – Create”.


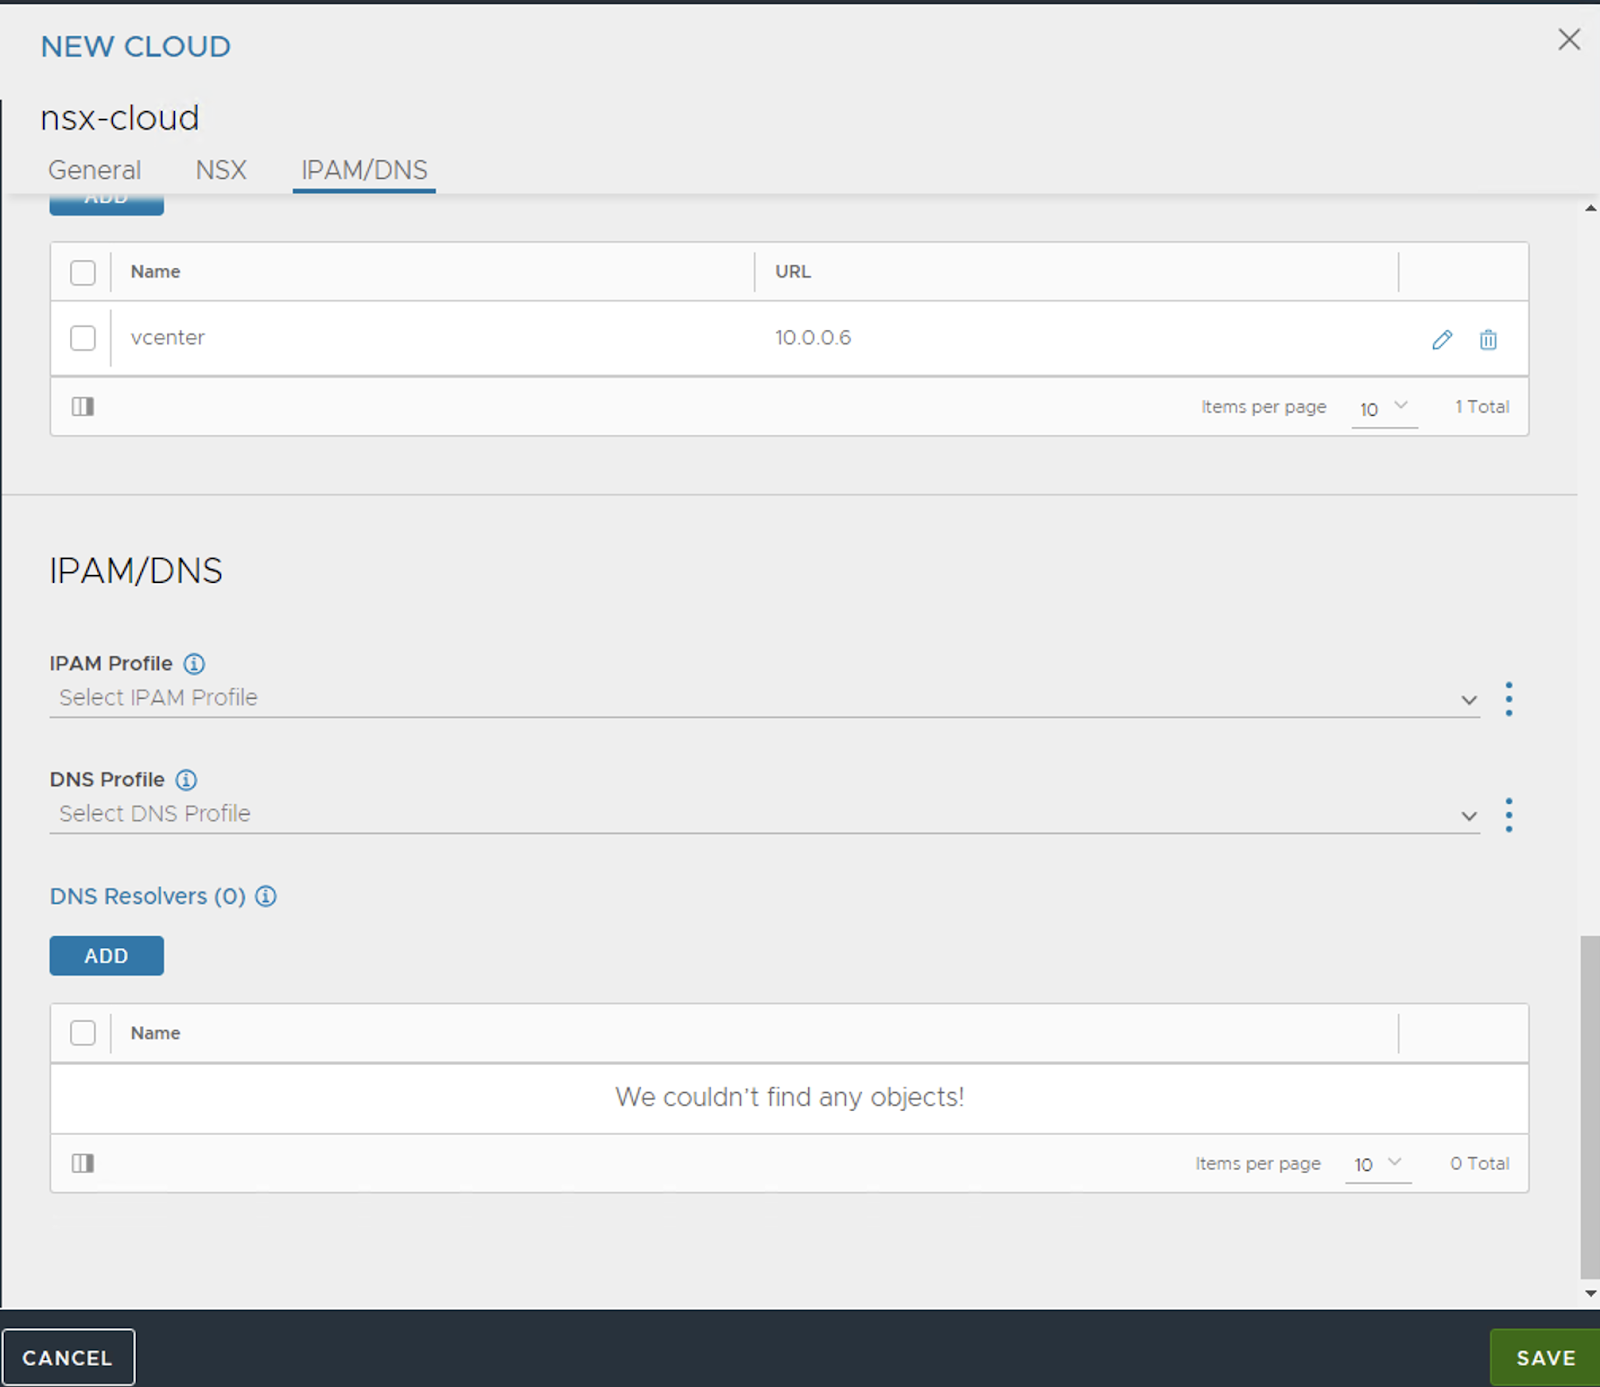
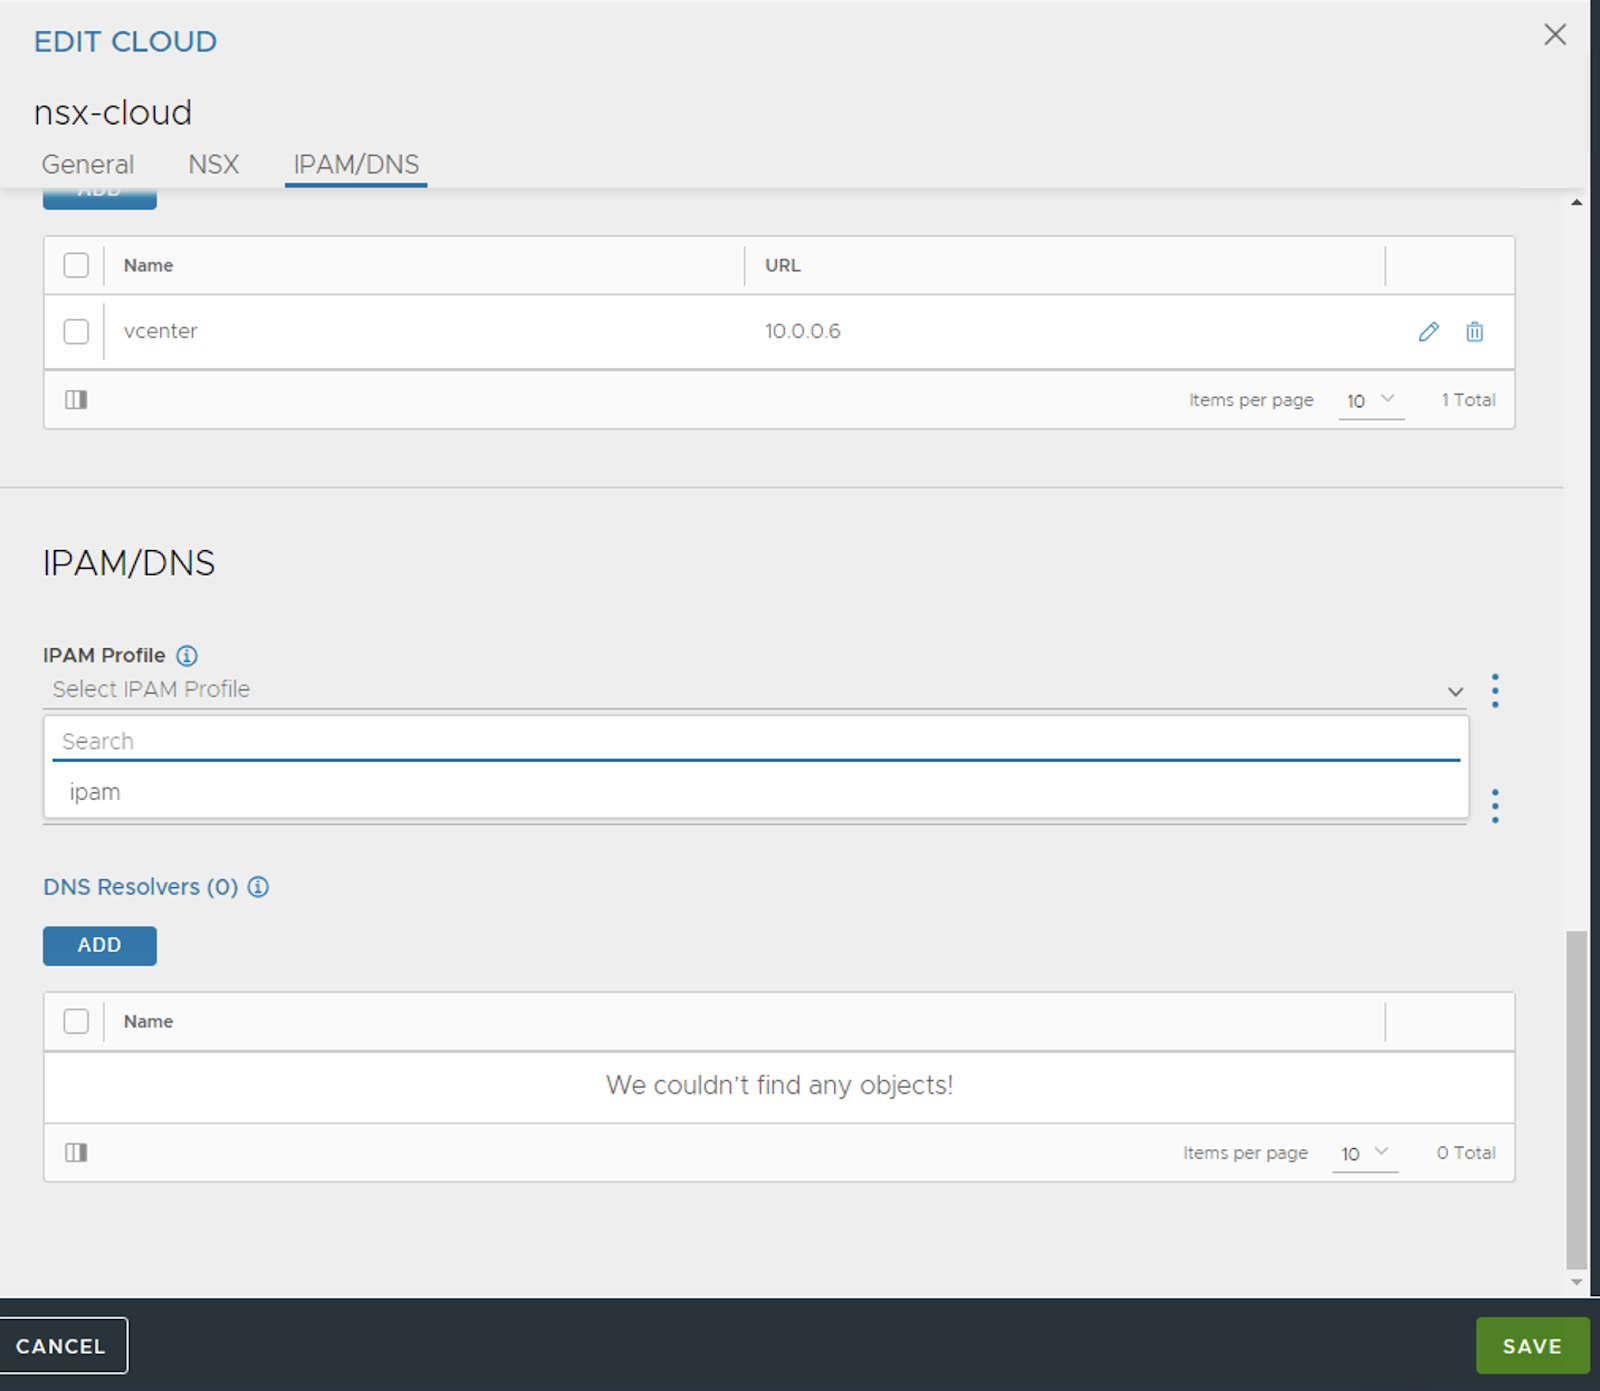
Finally edit the cloud and update the IPAM information.

Click on the pencil icon against the name of your cloud and navigate to the IPAM/DNS section and select the ipam profile that you just created above.
That’s it, you are all set to use your NSX ALB. Stay tuned for more in this series!
0 Comments