Recently, I came across a customer scenario where a storage refresh had to be performed in a TKGi environment, which meant migrating all existing infrastructure including the Persistent Volumes to new data stores. I intend to cover the steps involved in this migration on a very high level, while the focus being Persistent Volumes migration.
Starting vCenter 7.0U3o, this migration can be performed via vSphere UI. The procedure is documented here.
For the context of this blog, we will assume the vCenter version to be pre-7.0U3o and hence instead of the UI, we will be using the CNS Manager APIs to perform this migration.
More about CNS Manager here
CNS Manager is a diagnostic and self-service tool that helps detect and auto-remediate some of the known issues in storage control plane in vCenter. It also provides certain table stake features, such as svMotion and datastore decommission to complement the Cloud Native Storage solution offered in vCenter.
CNS Manager can be installed to any Kubernetes conformant cluster and I chose to install it on the same cluster where the PVs are provisioned.
Installation Pre-requisites
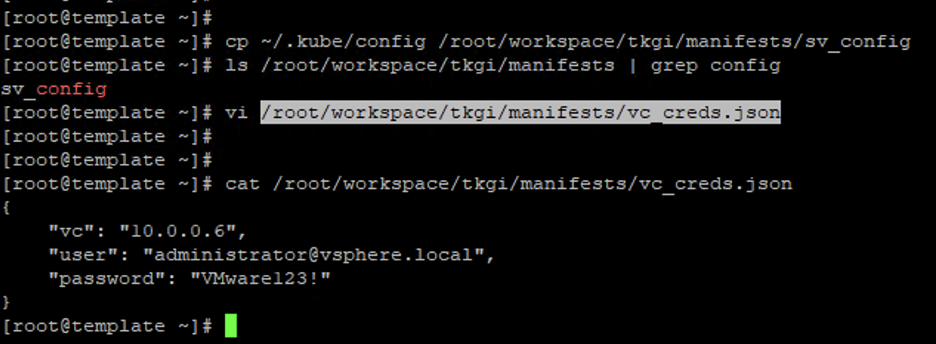
- Obtain the kube-config file of the cluster where you intend to install cns-manager and save it to a file named sv_config

- Create a vc_creds.json file with the vCenter credentials
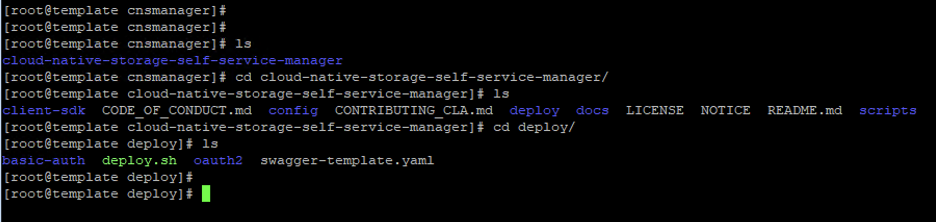
- Clone the cloud-native-storage-self-service-manager repo to your working directory
"git clone https://github.com/vmware-samples/cloud-native-storage-self-service-manager.git"
Installation
Run the deploy script with necessary arguments based on chosen type of the deployment – Following command uses basic authentication mode of the deployment:
"./deploy.sh cns-manager <PATH-TO-SV_CONFIG> <PATH-TO-VC_CREDS.JSON> <WORKER-NODE-IP>:30008 basicauth false 'Administrator' 'P@ssw0rd'"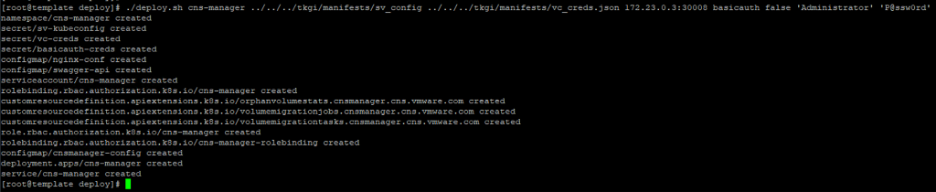

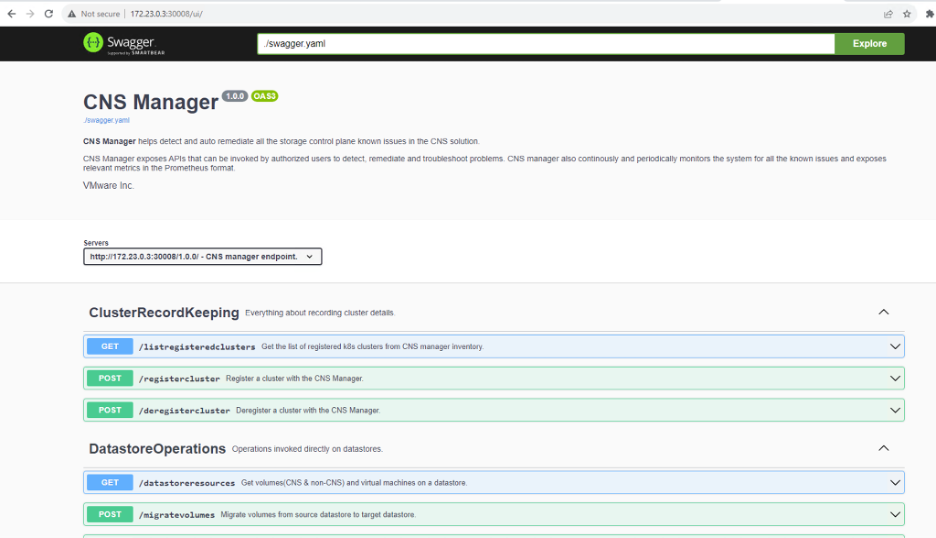
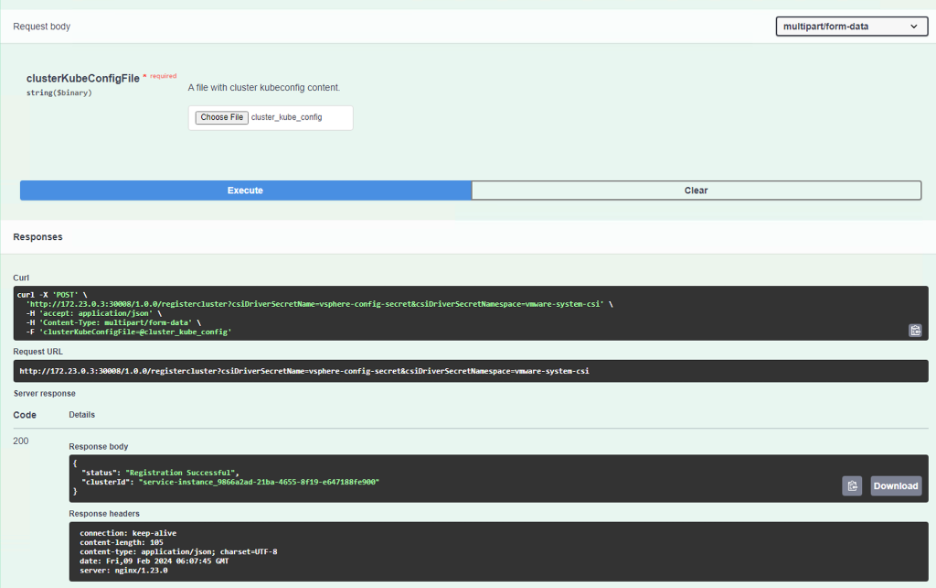
Once the pod is running, you can access the UI via http://<worker-node-ip>:30008/ui/. When prompted to login, use the credentials specified during the installation and you should be able to see a swagger UI like the one below.


Before we can proceed with the volume migration, we need to register the cluster with the /registercluster API. Though we will be using the same cluster and it is already registered, we will have to do this again, because the clusterID with which cns manager was deployed will be sv_config. We will have to register the cluster again with its service-instance_<id> for a TKGi cluster or with any user-defined name for the other clusters.
To register the cluster we will need a csiDriverSecretName, csiDriverSecretNamespace and a clusterKubeConfigFile. We will reuse the same sv_kubeconfig file as the clusterkubeconfigfile, since we are registering the same cluster. The csiDriverSecretNamespace will be the “vmware-system-csi” and the csiDriverSecretName will be “vsphere-config-secret“, which should exist already if you have the CSI driver for vSphere installed in the cluster. If not, you can create the secret with the following command:
kubectl create secret generic vsphere-config-secret --from-file=csi-vsphere.conf --namespace=vmware-system-csiContent of the csi-vsphere.conf should be as follows:
[Global]

cluster-id = "service-instance_9866a2ad-21ba-4655-8f19-e647188fe900"

[VirtualCenter "10.0.0.6"]

insecure-flag = "true"
user = "administrator@vsphere.local"

password = "Admin123@"

port = "443"

datacenters = "SDDC-Datacenter"


Troubleshooting
As it can be seen from the above screenshot, the cns-manager container wasn’t able to resolve the FQDN of the cluster (retrieved from kube-config file). To workaround the issue, you may have to create a local host entry on the container. Since the container had internet access, installing vim and editing it locally was a viable option. In a production scenario, this can be done by locally creating a container image with the necessary host entries pre-added and using the image to deploy the container.

and now the cluster registration succeeded, which can be confirmed by listing the clusters using the /listregisteredclusters API

Migration Procedure
The migration procedure involves updating the storage class within the TKGi clusters, followed by Persistent Volumes migration, followed by BOSH Director/OpsManager migration and then finally the TKGi clusters recreation.
While the Opsmanager VM can be storage migrated(svMotion) through vSphere UI, BOSH Director can be migrated using this procedure. And after the Persistent Volume migration is complete, you can follow KB 67277 to migrate the TKGi clusters to the new data store.
Now, coming back to the topic of Persistent Volume migration – Migrating all PVs at once is possible using the /migratevolumes API of the cns-manager, by specifying the source and destination data store names as shown below. This will initiate a disk relocation task in the vCenter for all the PVs in the source datastore.

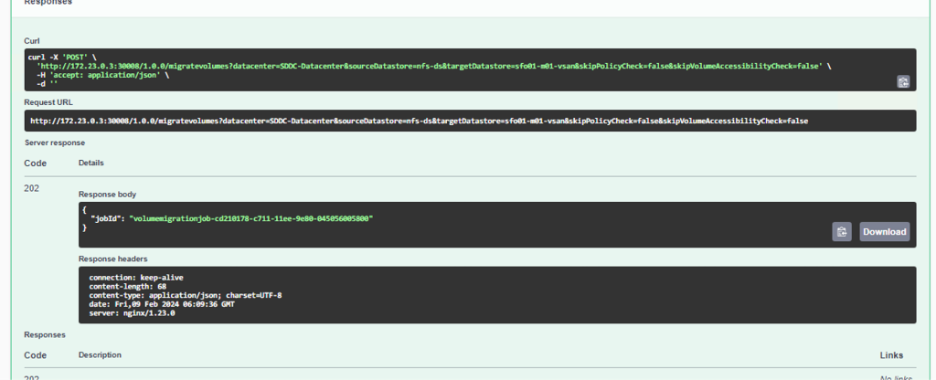
Progress of the task can be monitored with the jobId which was obtained from the output of /migratevolumes API call


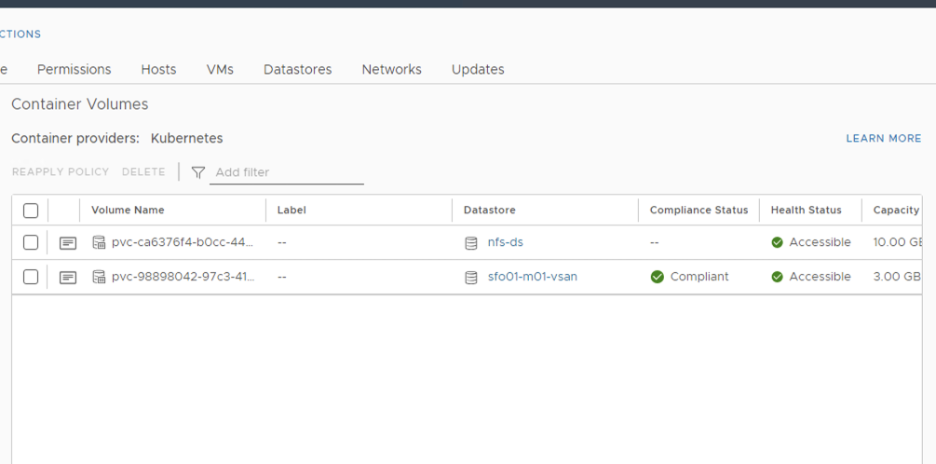
Validation
Upon completion of the job, you should be able to see all PVs on the new datastore
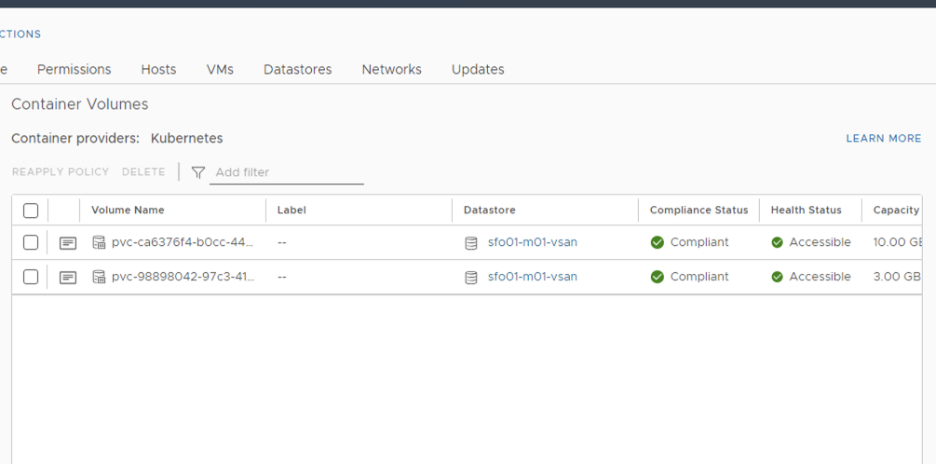

That’s it. Your PVs should all be on the new datastore now. Once you complete the other migrations based on the KBs shared above, you should be good to remove the old datastore’s and continue using the new one’s.
If you have any concerns around implementing this in your production environment, reach out to your Broadcom representative for help or better yet, if you have a TAM assisting you, then you already are in safe hands!
Happy learning!