
TAS/ALB Installation Series – Part 8
Now that we have successfully installed TAS, we are good to provision apps using it. To do so, we will be using the “CF CLI” which we installed earlier during the pre-requisites setup stage.
For the sake of simplicity, I will be using a simple static page (nginx) application.
Create a directory for TAS deployments and then create an empty file named “Staticfile”. It is important that you name the file exactly the same. To know why: read about Staticfile detection.
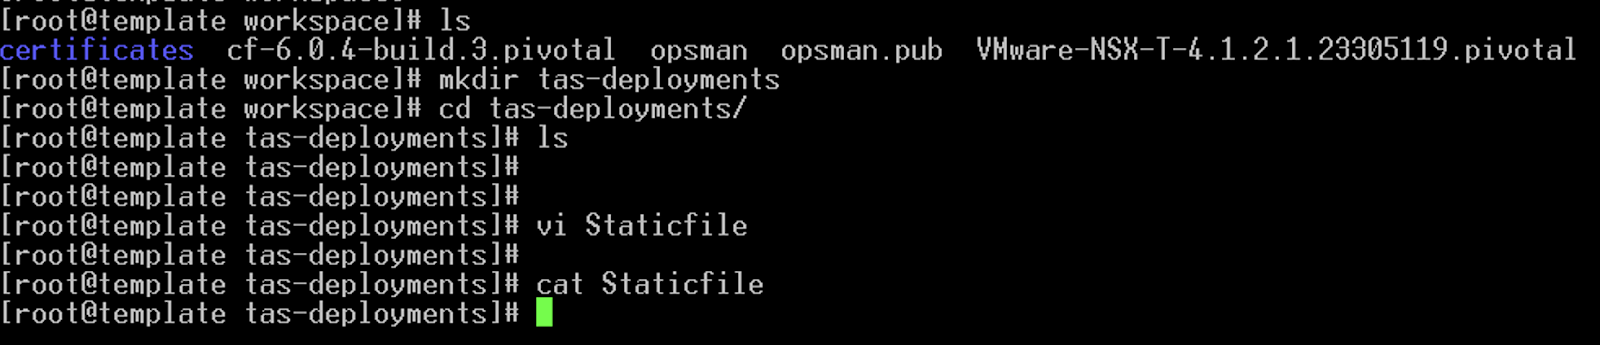
Create another file named “index.html”. Copy paste the following contents into the file and save it.
<!DOCTYPE html>
<html>
<head>
<title>Nginx via Tanzu Application Service!</title>
<style>
html { color-scheme: light dark; }
body { width: 35em; margin: 0 auto;
font-family: Tahoma, Verdana, Arial, sans-serif; }
</style>
</head>
<body>
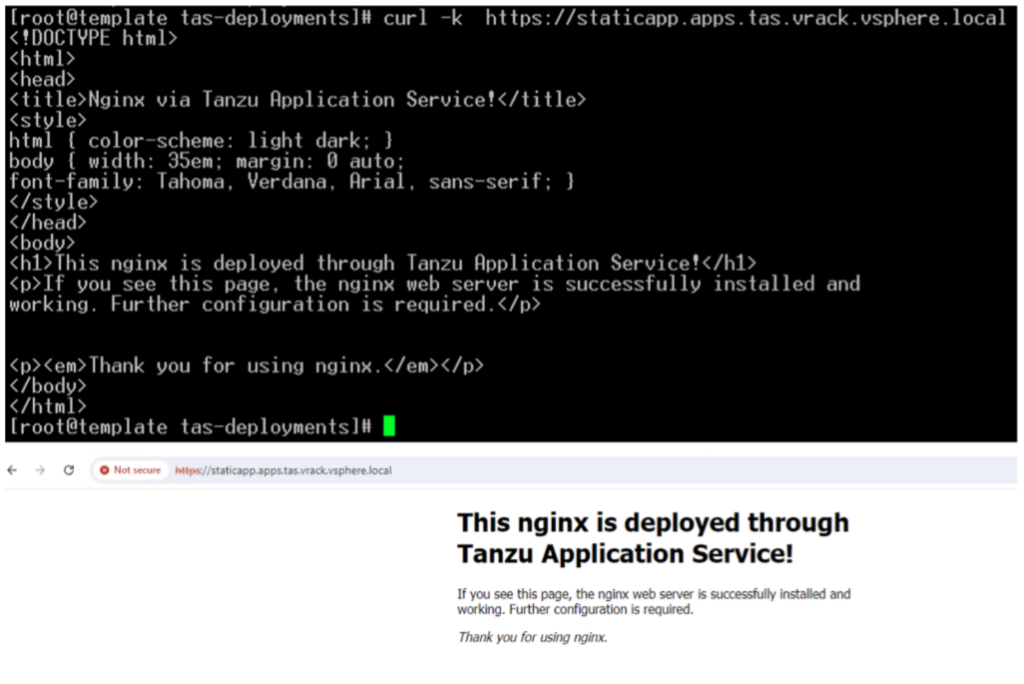
<h1>This nginx is deployed through Tanzu Application Service!</h1>
<p>If you see this page, the nginx web server is successfully installed and
working. Further configuration is required.</p>
<p><em>Thank you for using Tanzu Application Service.</em></p>
</body>
</html>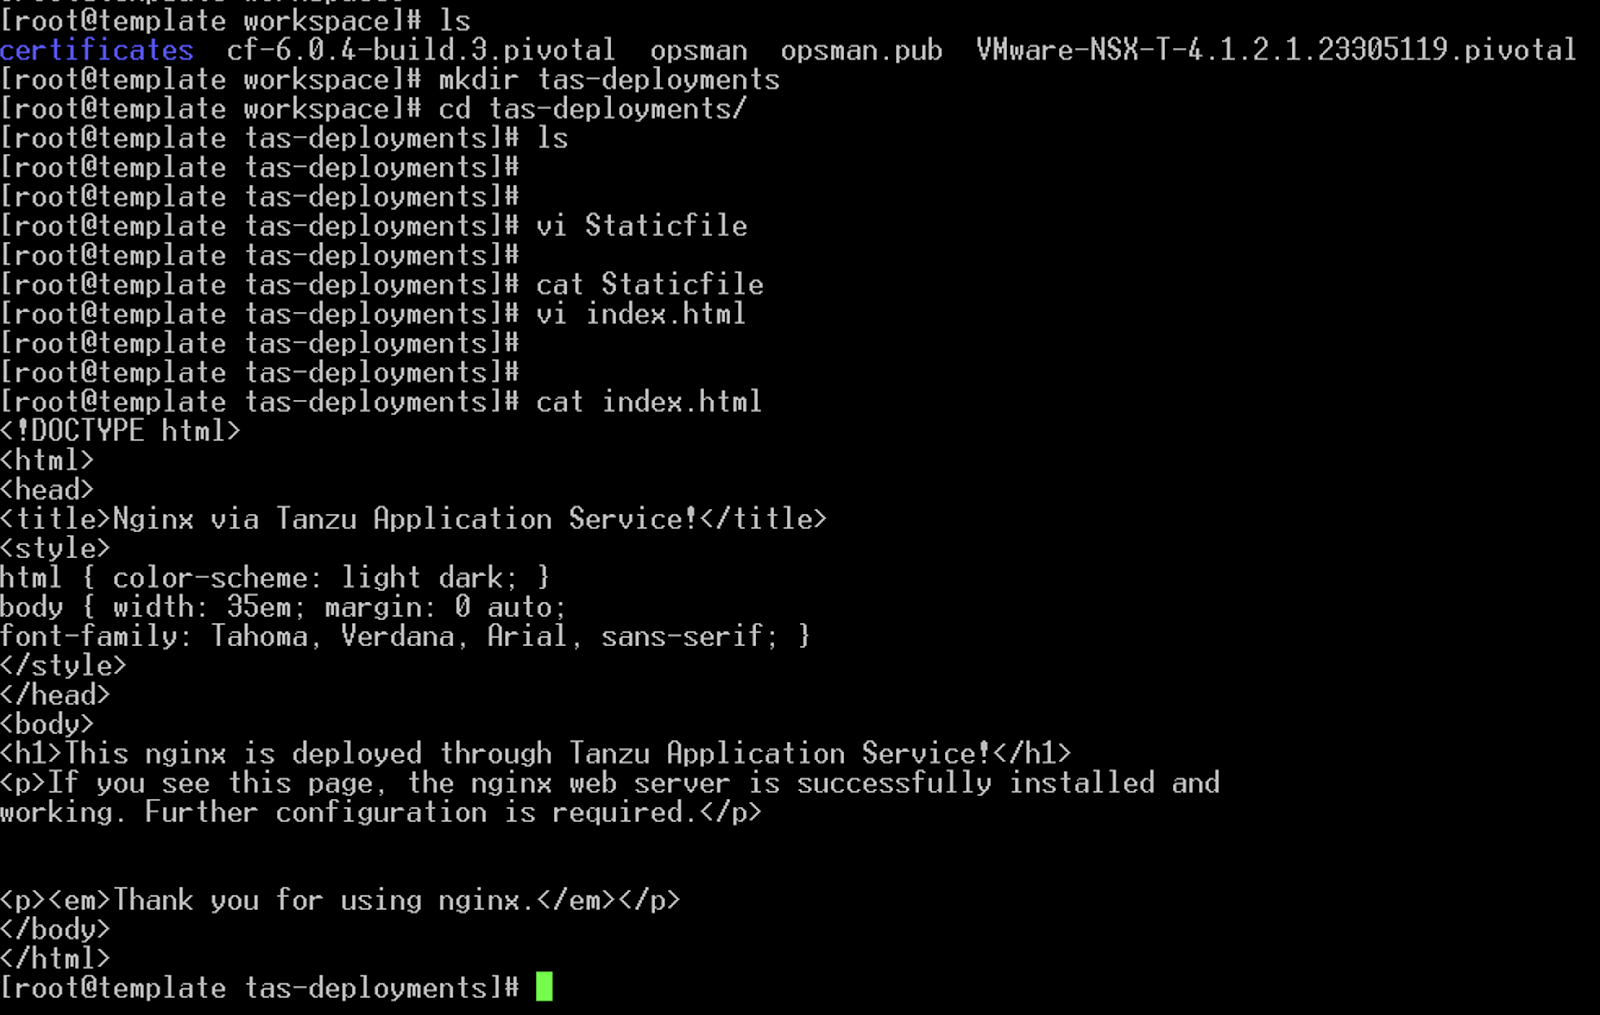
To deploy the application, we need to do a “cf login”. I will be using the admin account to deploy my app and hence will retrieve the password from the Operations Manager UI.
Navigate to “TAS Tile – Credentials – UAA – Admin Credentials” and retrieve the password.

Login to the foundation using “cf login –skip–ssl-validation”. When prompted for the API endpoint, enter “api.<yoursystemdomain>”. This is usually the API terminology used within TAS.
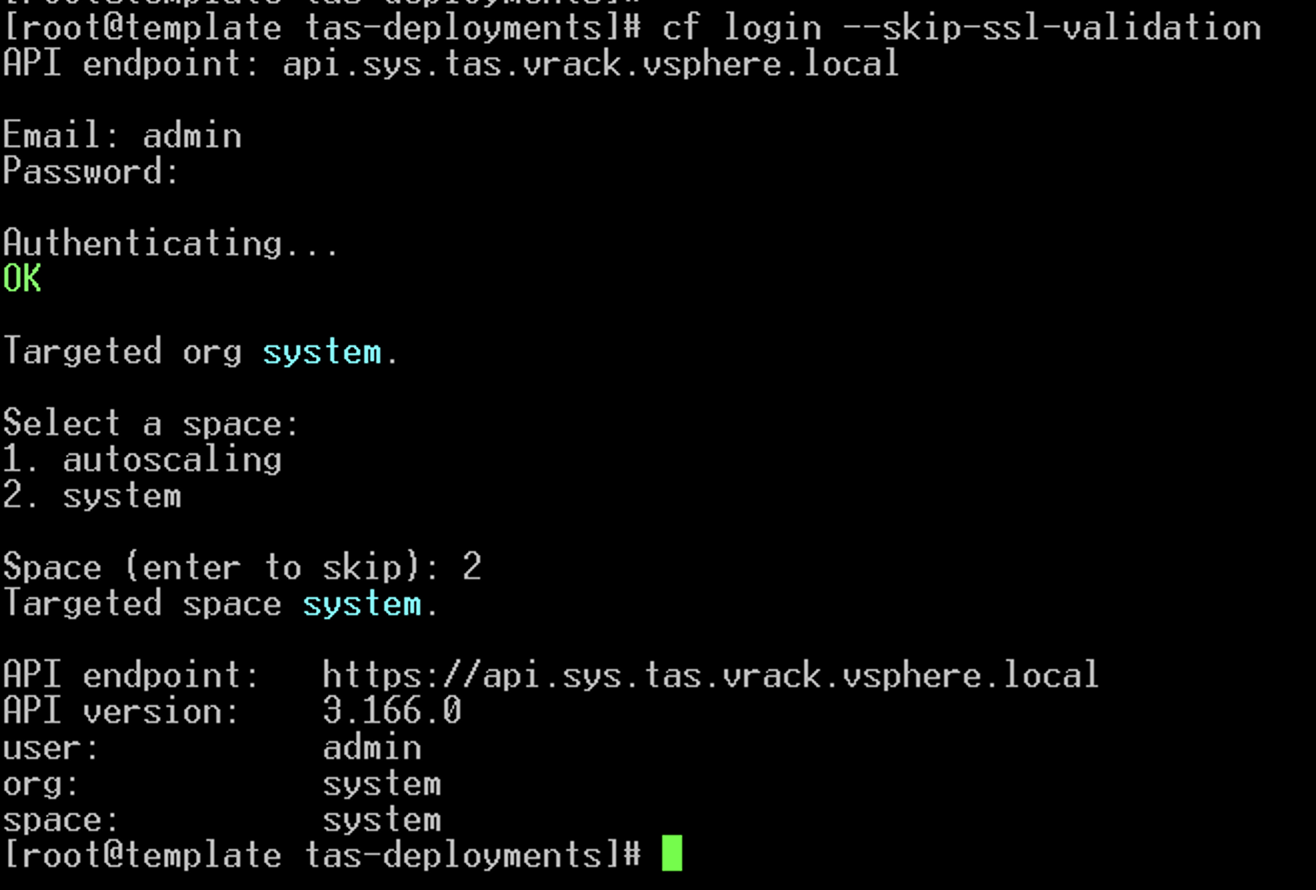
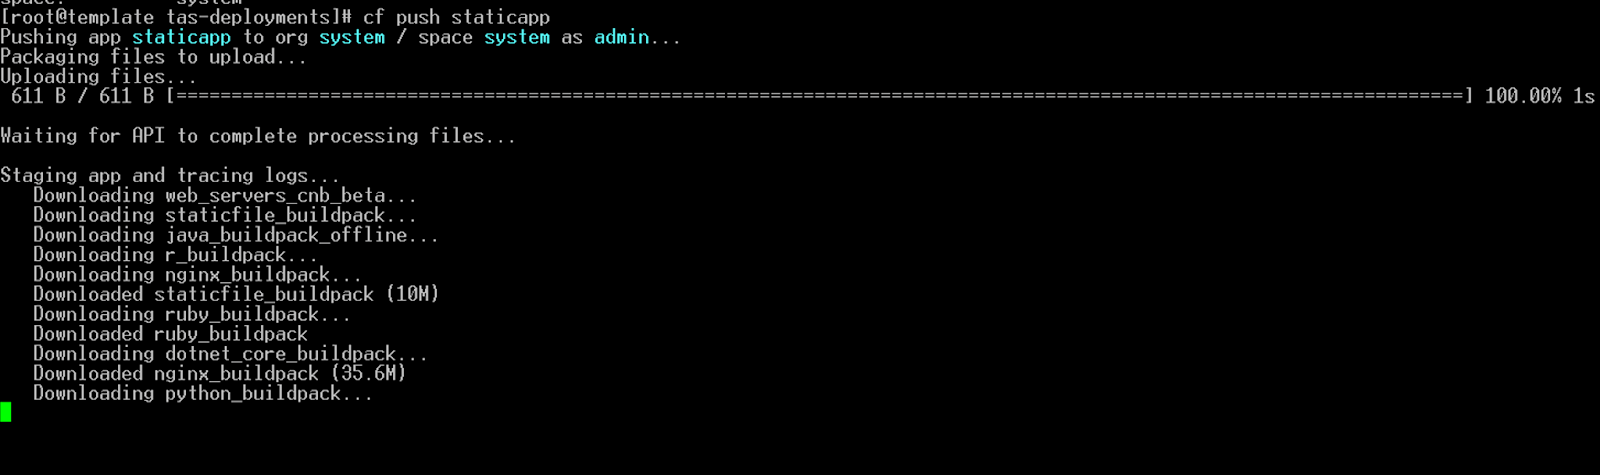
Now that you are logged in to the system org and system space, you can push any applications using “cf push <appname>”. Remember to do this from the same directory, where you created the Staticfile and index.html files.
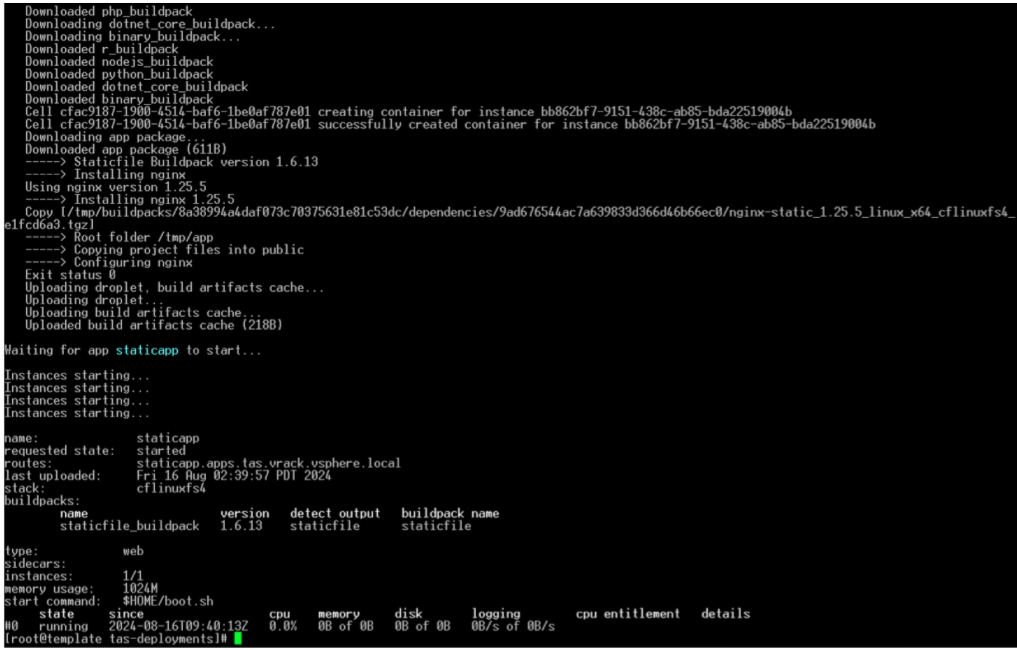
As you can see the app is up and running now. Now, how do we access this application/web page? You can retrieve that information by using either “cf apps” or “cf routes”
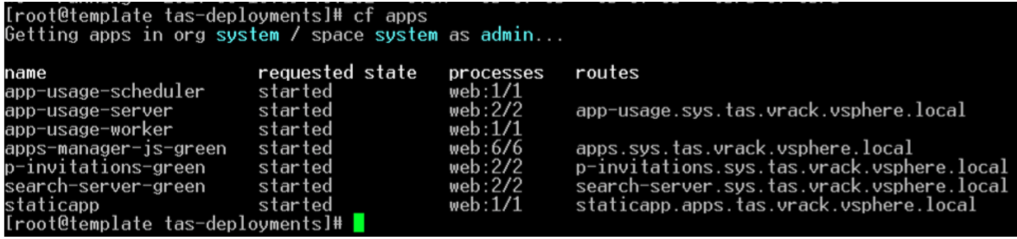
There are other system apps that are already running on this space, which you can ignore. The last line item is the app that we deployed – “staticapp”. If you see the routes column against our deployed app, it says “staticapp.apps.tas.vrack.vsphere.local”. This is the URL through which we can access the web page. And if you haven’t already noticed, yes this has our apps domain appeneded to the name of our deployment. That’s how cf routes are created.
And, that’s how, I learnt TAS, at least the basics 🙂
Feel free to comment about what you liked (or din’t) in this installation series below. If you have reached (read) thus far, a big thank you!
Until next time, Happy Learning!
0 Comments